
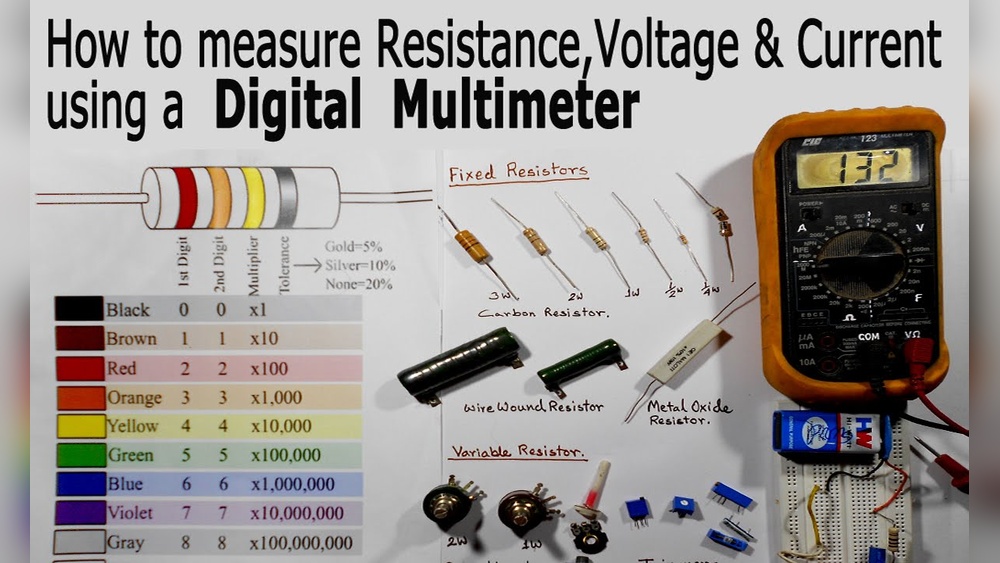
Using a multimeter can seem intimidating for beginners, but mastering this tool opens a world of possibilities for troubleshooting, repairing, and understanding electronic circuits. Whether you’re a homeowner, hobbyist, or aspiring technician, the multimeter is your gateway to diagnosing everything from faulty outlets to dead batteries.
But what if you’ve never even held one before? This comprehensive guide breaks down every essential aspect, no jargon, no confusion, so even complete novices can confidently wield a multimeter. Along the way, you’ll also find advanced tips and expert advice to take your skills to the next level.
From the first time I picked up a multimeter, I realized that understanding its functions is like learning the language of electricity. With practice, you’ll uncover hidden problems, prevent costly repairs, and gain a deeper appreciation for how everyday devices work.
Let’s walk through every step, setup, measurement, safety, and real-world applications, with crystal-clear explanations and pro-level insights.
Key Takeaways
- Multimeters measure voltage, current, and resistance, crucial for diagnosing electrical and electronic issues.
- Both analog and digital multimeters have unique advantages; beginners usually prefer digital models for ease of use.
- Proper safety precautions and correct settings are essential to avoid damage or injury.
- Real-world examples and comparison tables help clarify best practices and common mistakes.
- Advanced users can leverage multimeters for circuit analysis, continuity testing, and even component identification.
- Frequently asked questions and troubleshooting tips are included for deeper understanding.
Credit: www.youtube.com
Understanding The Multimeter: Types, Parts, And Functions
Before diving into usage, it’s vital to understand what a multimeter is and how it works. This section covers the types of multimeters, their key components, and the basic functions you’ll use.
Types Of Multimeters
There are two main types:
- Analog Multimeters: Use a needle and dial; preferred for monitoring trends or fluctuating signals.
- Digital Multimeters (DMM): Display readings on an LCD; widely favored for accuracy and simplicity.
| Feature | Analog Multimeter | Digital Multimeter (DMM) |
|---|---|---|
| Display Type | Needle & Scale | Digital LCD |
| Accuracy | Lower (prone to parallax error) | Higher (precise readings) |
| Ease of Use | Requires interpretation | User-friendly |
| Cost | Generally less expensive | Varies (basic to advanced models) |
| Best For | Visualizing changing signals | Quick, accurate measurements |
Pro Tip: For most beginners, a basic digital multimeter is the ideal starting point due to its intuitive interface.
Key Parts Of A Multimeter
Regardless of type, all multimeters share several essential components:
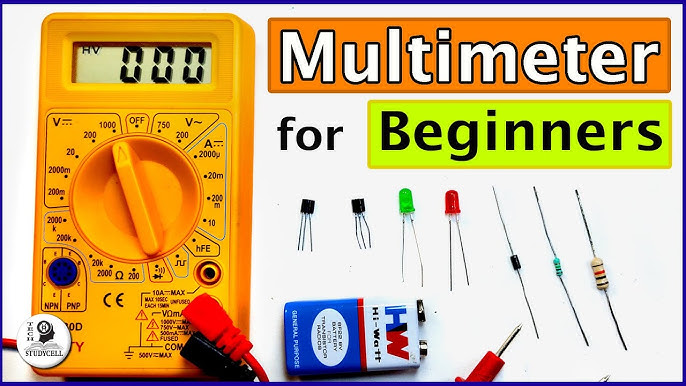
- Display: Shows your readings (LCD for digital, needle for analog).
- Selection Dial (Rotary Switch): Allows you to choose the measurement type, voltage (V), current (A), resistance (Ω), and sometimes more.
- Input Jacks: Usually three or four ports for the test leads; labeled as COM (common), VΩmA (voltage/resistance/current), and possibly 10A or high-current.
- Test Leads: Red (positive) and black (common/negative) probes for connecting to the circuit or component.
Multimeter Functions: What Can You Measure?
A standard multimeter can measure:
- Voltage (V): Both AC (alternating current) and DC (direct current).
- Current (A): AC or DC flow of electrons.
- Resistance (Ω): How much a component resists electrical flow.
- Continuity: Checks if a circuit is complete, using a beep or light.
- Diode Testing: Specialized function for checking diodes or LEDs.
- Capacitance and Frequency (Advanced Models): For advanced users, some models measure these as well.
Example: If your flashlight stops working, a multimeter can help you test the battery’s voltage, check the bulb’s continuity, and diagnose the switch, all with one tool.
Credit: www.youtube.com
Setting Up And Using A Multimeter: Step-by-step Guide
Getting started with a multimeter involves several key steps. Beginners should focus on mastering these basics before attempting advanced measurements.
Step 1: Safety First
Electrical safety is paramount. Here’s what to remember:
- Always start with the multimeter set to the highest range for the measurement you’re taking.
- Never measure resistance or continuity on a live (powered) circuit.
- Check that your test leads are undamaged and firmly connected.
- For household AC (mains) measurements, be extra cautious, incorrect settings can damage the meter or cause harm.
Warning: High-voltage circuits can be deadly. If unsure, consult a qualified electrician or refer to OSHA’s electrical safety guidelines.
Step 2: Understanding The Dial And Settings
Most multimeters have a rotary dial for selecting measurement type and range:
- DC Voltage (V, or VDC): For batteries, electronics.
- AC Voltage (V~ or VAC): For wall outlets, appliances.
- Resistance (Ω): For checking fuses, wires, resistors.
- Current (A): Usually requires moving the red lead to a dedicated amp jack.
- Other Functions: Continuity (often a diode symbol), diode check, etc.
Pro Tip: If unsure of the voltage or current, always start at the highest range and work downward for more precise readings.
Step 3: Connecting The Test Leads
- Insert the black lead into the COM (common) port.
- Insert the red lead into the VΩmA port for most measurements; use the 10A or high-current port only for large current readings.
- Hold the probes by their insulated handles, keeping fingers behind the guards.
Step 4: Measuring Voltage
- Set the dial to the correct voltage type and range (DC or AC).
- Touch the black probe to the negative or ground point.
- Touch the red probe to the positive point.
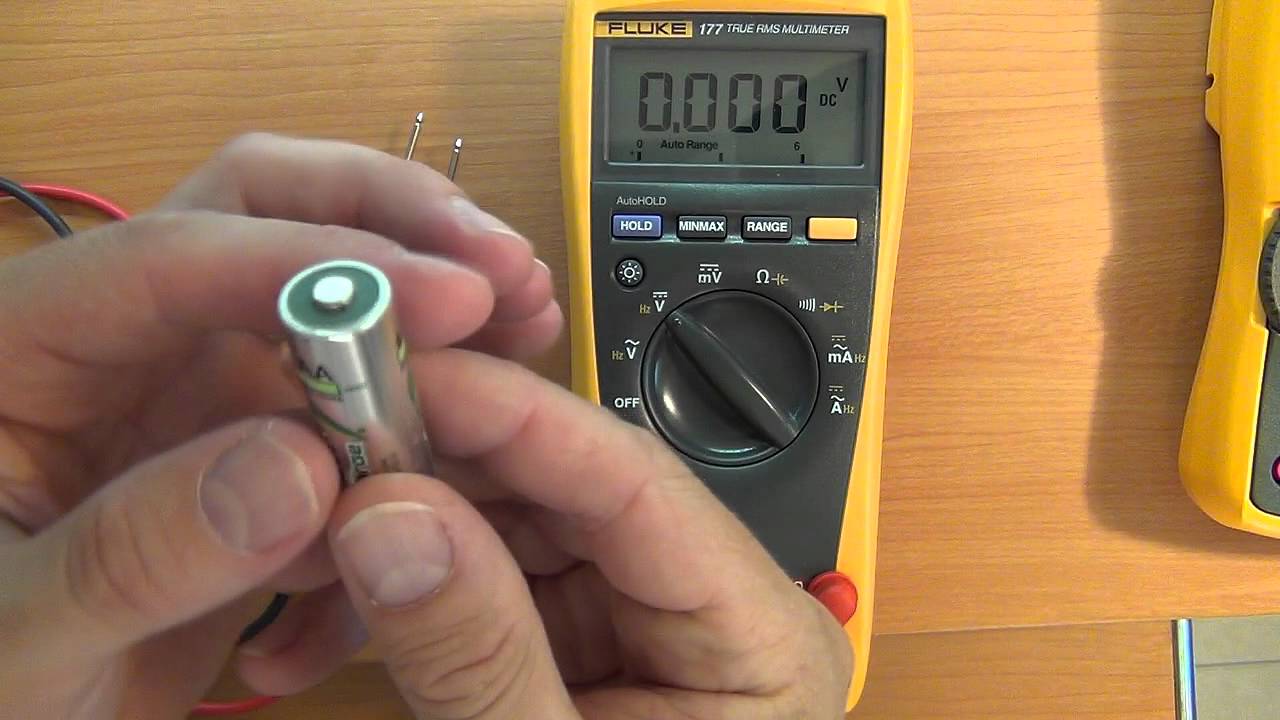
- Read the display, for example, a AA battery should show around 1.5V.
Step 5: Measuring Resistance
- Turn off power to the circuit.
- Set the dial to the resistance (Ω) setting.
- Touch probes to both ends of the component.
- Read the display, a very high reading indicates an open circuit.
Step 6: Measuring Current
- Move the red lead to the correct current port.
- Set the dial to the appropriate current (A) setting.
- Break the circuit and insert the probes in series (current must flow through the meter).
- Read the value, never exceed the meter’s maximum current rating.
Step 7: Testing Continuity
- Switch to continuity mode (look for a diode or sound wave symbol).
- Touch probes across the circuit; a beep indicates continuity.
Example: When repairing a lamp, use continuity mode to check if the cord or switch is broken.
Real-world Applications: Practical Multimeter Projects
Understanding theory is essential, but practical experience cements your knowledge. Here are three real-world scenarios where a multimeter is invaluable.
Testing Household Batteries
- Objective: Identify dead or weak batteries.
- How: Set the dial to DC voltage, place probes on battery terminals.
- Results: AA/AAA batteries should read near 1.5V; 9V batteries should be close to 9V.
Example: If your remote control stops working, quickly test each battery to avoid unnecessary replacements.
Troubleshooting Car Electrical Issues
- Objective: Diagnose problems with fuses, bulbs, or the battery.
- How: Use voltage mode for battery checks, continuity for fuses, resistance for bulbs.
- Results: Car battery below 12V may indicate it needs charging or replacement.
Pro Tip: Always use the DC voltage setting for automotive circuits.
Checking Wall Outlets
- Objective: Ensure outlets deliver correct voltage.
- How: Set to AC voltage, insert probes into outlet slots.
- Results: US outlets should read about 120V AC.
Warning: Mains voltage is hazardous, if uncomfortable, ask a licensed electrician.

Credit: www.mobilecellphonerepairing.com
Advanced Multimeter Skills: Going Beyond The Basics
Once you’re comfortable with standard measurements, expand your skill set with advanced techniques. These methods are useful for electronics enthusiasts, hobbyists, and professionals.
Using The Diode Test Function
- Purpose: Checks if a diode or LED is functioning.
- How: Set to diode mode, connect probes to the diode; a typical forward voltage drop (0.6, 0.7V for silicon diodes) means it’s working.
Example: In my experience, using diode mode quickly reveals if an LED is faulty without needing to power up the whole circuit.
Measuring Capacitance And Frequency
Some advanced digital multimeters include:
- Capacitance Measurement: Connect probes across the capacitor; compare the reading to the rated value.
- Frequency Measurement: Useful in audio, radio, and motor circuits; connect probes as directed in the manual.
Pro Tip: Always discharge capacitors before testing to avoid meter damage or shock.
Identifying Faulty Components
- Resistors: Out-of-spec readings indicate failure.
- Transistors: Use diode mode to test junctions.
- Fuses: Continuity mode reveals if a fuse is blown.
Recording And Comparing Multiple Readings
Advanced multimeters may offer:
- Data Hold: Freezes the display for easier recording.
- Min/Max Functions: Captures fluctuating values for analysis.
| Function | Basic Multimeter | Advanced Multimeter |
|---|---|---|
| Voltage, Current, Resistance | ✔️ | ✔️ |
| Continuity, Diode Test | ✔️ | ✔️ |
| Capacitance, Frequency | ❌ | ✔️ |
| Temperature Probe | ❌ | ✔️ |
| Data Hold, Min/Max | ❌ | ✔️ |
Example: When building audio amplifiers, I use data hold to compare voltage drops across multiple transistors, making troubleshooting much more efficient.
Multimeter Comparison: Features, Price, And Best Use Cases
With hundreds of models on the market, choosing the right multimeter can be overwhelming. This section compares popular types and features for beginners and advanced users.
Essential Features For Beginners
- Auto-Ranging: Automatically selects the correct range for measurements, reducing user error.
- Large Display: Easy-to-read numbers, especially helpful in dim workspaces.
- Rubberized Case: Protects against accidental drops.
- Basic Functions Only: Voltage, current, resistance, and continuity.
Features For Advanced Users
- True RMS Measurement: Accurate readings for non-sinusoidal AC signals.
- Backlit Display: For working in low-light environments.
- Temperature Measurement: Useful for HVAC and electronics.
- PC Connectivity: Logs readings for analysis.
Price Comparison Table
| Model Type | Typical Price Range (USD) | Key Features | Best For |
|---|---|---|---|
| Basic Digital Multimeter | $15, $40 | Auto-ranging, continuity | Homeowners, students |
| Advanced Digital Multimeter | $50, $200 | True RMS, capacitance, temp probe | Hobbyists, technicians |
| Professional Bench Multimeter | $300+ | Lab-grade accuracy, data logging | Engineers, laboratories |
| Analog Multimeter | $10, $30 | Visual needle, basic functions | Legacy users, education |
Example: If you’re just starting, a $20 digital multimeter will cover all basic needs. If you’re diagnosing HVAC systems, investing in a $100+ model with temperature and true RMS is worthwhile.
Troubleshooting Common Multimeter Problems
Even seasoned users encounter issues with their multimeters. Here’s how to tackle the most common problems.
Multimeter Won’t Power On
- Check the battery: Replace if necessary.
- Inspect the fuse: Many meters have a replaceable fuse to protect against overload.
- Examine test leads: Broken or frayed leads cause false readings.
Inaccurate Or Fluctuating Readings
- Verify settings: Double-check the dial and probe placement.
- Check for interference: Strong electromagnetic fields can disrupt sensitive measurements.
- Ensure good contact: Dirty or oxidized probe tips give inconsistent results.
Meter Reads ‘ol’ Or ‘1’
- Overload or out-of-range: Switch to a higher range or check if the component is open circuit.
- Probes not connected: Ensure both leads are firmly in place.
Blown Fuse Or Damaged Meter
- Cause: Measuring current in the wrong port or setting; exceeding maximum ratings.
- Solution: Replace the fuse and review the manual for correct usage.
Pro Tip: Always consult the multimeter’s user manual for troubleshooting steps specific to your model.
Multimeter Safety: Crucial Dos And Don’ts
Safety cannot be overstated when working with electricity. Following these guidelines will help you avoid injury and keep your multimeter functioning correctly.
Dos
- Wear insulated gloves when working with high voltages.
- Check the meter’s CAT rating (Category I-IV) to ensure it’s suitable for the measurement environment.
- Disconnect power before measuring resistance or continuity.
- Store the meter in a dry, dust-free place.
Don’ts
- Never measure current with the leads in the voltage port.
- Don’t test live circuits with the resistance or continuity settings.
- Avoid using damaged test leads, replace them immediately.
- Don’t exceed the meter’s rated voltage/current, check the manual.
Warning: Using a low-rated meter on high-energy circuits can cause catastrophic failure. Choose a meter certified to safety standards such as IEC61010 and UL.
Safety Ratings Explained
Multimeters are rated for different environments. For example:
- CAT I: Electronic devices.
- CAT II: Appliances, portable tools.
- CAT III: Distribution panels, fixed installations.
- CAT IV: Utility lines, outdoor wiring.
Refer to Wikipedia’s multimeter safety section for more details.
Frequently Asked Questions
What Is The Difference Between Measuring Ac And Dc Voltage With A Multimeter?
Multimeters can measure both AC (alternating current) and DC (direct current) voltages, but you must select the appropriate mode on the dial. AC voltage (V~) is used for household outlets and appliances, while DC voltage (V, ) is used for batteries and electronic devices. Using the wrong setting can lead to incorrect readings or even damage the meter.
Can I Use A Multimeter To Test Rechargeable Batteries?
Yes, a multimeter is ideal for checking the voltage of rechargeable batteries such as AA NiMH, Li-ion cells, or lead-acid batteries. Set the dial to DC voltage, and compare the reading to the battery’s rated voltage. Rechargeable batteries may read slightly lower than their nominal voltage when discharged.
Why Does My Multimeter Beep When Testing Continuity, And What Does It Mean?
The continuity mode checks if there is a complete electrical path between two points. A beep indicates low resistance (typically less than 50Ω), confirming a good connection. No beep suggests an open circuit or broken wire.
Is It Safe To Measure Current In Household Outlets With A Multimeter?
Measuring current in household outlets is extremely dangerous and should only be performed by professionals with the correct equipment. Most multimeters are not designed for high current directly from outlets; improper use can damage the meter and cause injury. Instead, use a clamp meter for AC current in mains circuits.
How Do I Maintain My Multimeter For Long-term Reliability?
To ensure long-term reliability, store the multimeter in a cool, dry place, replace batteries regularly, and inspect test leads for wear. Clean the probes with isopropyl alcohol, and never exceed the meter’s voltage or current ratings. Calibrate your meter annually if using it for professional or precision work.
Mastering a multimeter transforms how you approach electrical and electronic problems, empowering you to diagnose, repair, and experiment with confidence. Start simple, practice regularly, and soon you’ll find that even advanced measurements become second nature. Whether you’re fixing a toy, building a robot, or troubleshooting your car, the multimeter is the tool that brings invisible electrical mysteries into clear, measurable reality.