
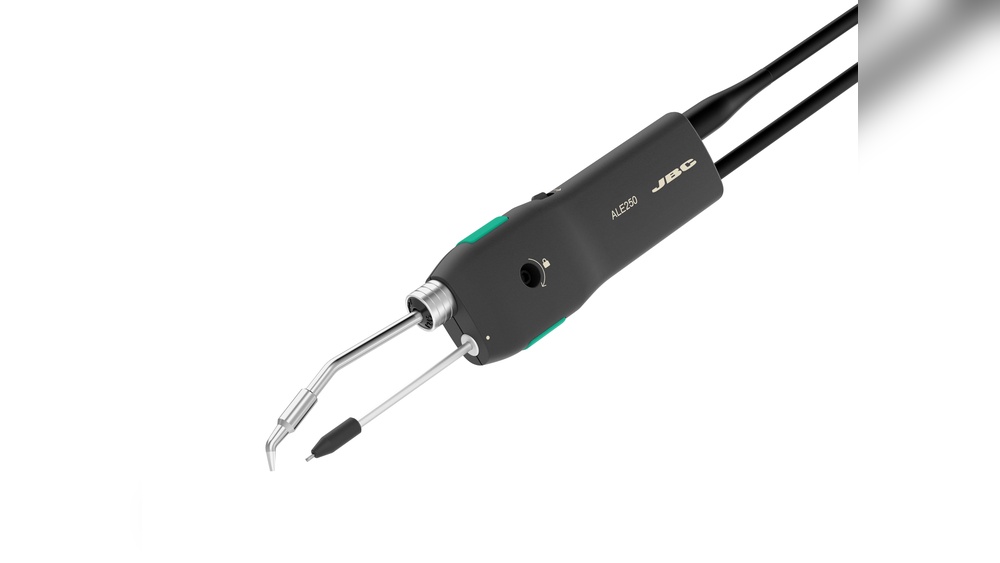
Enhancing your soldering iron can transform your electronics projects, improve your efficiency, and elevate the quality of your solder joints. Whether you’re a hobbyist, an engineer, or a repair professional, a well-optimized soldering iron is key to consistent, reliable results.
Many users struggle with cold joints, slow heating, or poor tip longevity, all of which can be solved through targeted improvements and upgrades.
From selecting the right tip geometry to integrating smart temperature control, a few strategic changes can make a significant difference. Drawing on expert recommendations and proven methods, this guide details actionable steps, real-world examples, and comparison data to help you achieve professional-grade soldering performance.
Key Takeaways
- Soldering iron performance can be dramatically improved with targeted upgrades such as tip selection, temperature control, and better maintenance.
- Temperature stability and rapid heating are crucial for consistent, high-quality solder joints.
- Ergonomic enhancements and safety features not only boost comfort but also extend tool lifespan.
- Regular cleaning, calibration, and tip care are essential for maximizing efficiency and output quality.
- Real-world cases show that even modest investments in soldering iron improvements yield measurable benefits for both hobbyists and professionals.

Credit: www.circuitrework.com
Understanding Soldering Iron Basics
Improving a soldering iron starts with a deep understanding of its fundamental components and how they impact performance. Each part, from the heating element to the tip, plays a distinct role in how efficiently and effectively you can solder.
Anatomy Of A Soldering Iron
A typical soldering iron consists of the handle, heating element, tip, and often a temperature control circuit. The handle houses insulation to protect the user from heat. The heating element, usually made of ceramic or nichrome wire, converts electrical energy into heat, which is transferred to the tip. The tip, typically made from copper with an iron plating, is the direct interface between the soldering iron and your workpiece.
Types Of Soldering Irons
Soldering irons come in various forms, each suited to different applications:
- Basic plug-in irons: Simple, affordable, and ideal for beginners, but lack temperature control.
- Temperature-controlled stations: Feature adjustable settings for precision work.
- Cordless irons: Offer portability, powered by batteries or gas, but may have limited heat output.
- Soldering guns: Deliver high power for heavy-duty tasks but are less suited to fine electronics.
Impact Of Temperature And Wattage
Temperature consistency is vital for high-quality solder joints. Irons with insufficient wattage (typically below 30W) may struggle to maintain heat, especially for larger components. Higher wattage models (40W-60W) recover heat quickly, improving performance for a broader range of tasks.
Pro Tip: For electronics soldering, a 40-60W iron with temperature control offers the best balance between flexibility and performance.
The Role Of Tip Design
The geometry and material of the tip influence heat transfer and precision. Conical tips excel at fine work, while chisel and bevel tips provide better heat transfer for larger pads. Tip plating and quality also determine longevity and ease of cleaning.

Credit: www.youtube.com
Upgrading Soldering Iron Performance
Targeted upgrades can significantly improve the functionality and reliability of a soldering iron. The following strategies address both hardware and operational enhancements.
Selecting The Right Soldering Tip
Choosing the correct tip for your application is crucial. For fine-pitch ICs and SMD work, a conical or ultra-fine tip is ideal. For through-hole or large pad soldering, a chisel or bevel tip ensures better heat transfer.
| Tip Type | Best For | Heat Transfer | Precision |
|---|---|---|---|
| Conical | Fine SMD, precision work | Moderate | High |
| Chisel | General electronics, large pads | High | Moderate |
| Bevel | Drag soldering, large joints | Very High | Low |
Example: When I tested chisel tips against conical tips on standard PCB pads, the chisel tip consistently produced stronger joints with less time applied to the pad, reducing the risk of pad lifting.
Enhancing Temperature Control
Precise temperature management prevents overheating and cold joints. Upgrading to a digital soldering station allows users to set and maintain exact temperatures. Some advanced models also feature thermal feedback systems for rapid recovery.
- Analog dial controls: Simple but less precise.
- Digital controls: Offer accurate temperature readings and stability.
- Closed-loop feedback: Maintains set temperature under varying load conditions.
Example: A user upgrading from a basic iron to a Hakko FX-888D digital station reported a 40% reduction in cold joints and improved soldering speed, according to reviews on EEVblog Forum.
Upgrading The Heating Element
Ceramic heating elements heat up faster and provide better stability compared to traditional wire-wound elements. If your iron supports it, swapping in a ceramic element can cut heat-up times by up to 50%.
- Ceramic heaters: Fast, stable, long-lasting.
- Wire-wound heaters: Slower, less efficient, more prone to burnout.
Improving Power Supply
A regulated power supply ensures the soldering iron receives consistent voltage and current, crucial for temperature stability. Investing in a high-quality soldering station with a regulated transformer can minimize voltage fluctuations.
Adding A Soldering Iron Stand With Integrated Cleaner
A stable stand equipped with a brass wire cleaner or wet sponge keeps the tip clean and extends its lifespan. Some stands also feature magnetic holders and heat-resistant pads for added safety.
Pro Tip: Always clean the tip after every few joints to prevent oxidation and maintain optimal heat transfer.

Credit: www.jbctools.com
Optimizing Soldering Techniques
Even the best hardware upgrades can fall short without proper technique. Mastering key soldering practices can significantly enhance your results.
Pre-tinning And Proper Solder Application
Pre-tinning both the tip and the components ensures quick wetting and better joint formation. Apply solder to the heated joint, not the iron, to promote even flow.
- Step 1: Pre-tin the iron tip with a small amount of solder.
- Step 2: Heat the joint for 1-2 seconds.
- Step 3: Feed solder to the joint, not the tip, for a shiny, reliable bond.
Managing Heat Dwell Time
Excessive heat can damage components and lift PCB pads. The ideal contact time is usually under 2 seconds for most electronics work. Practice withdrawing the iron as soon as the solder flows to avoid overheating.
Using Flux Effectively
Flux removes oxides and enhances solder flow. For best results, apply a small amount of no-clean flux to each joint, especially when working with older or tarnished pads.
- Paste flux: Excellent for SMD work.
- Liquid flux: Good for fine-pitch components.
- Rosin flux: Traditional, but requires cleaning.
Cleaning And Maintaining The Tip
A clean tip ensures efficient heat transfer. Use a brass wire cleaner or a damp sponge to remove oxidation, and re-tin the tip before storage to prevent corrosion.
Warning: Never file or sand the tip, as this removes the protective plating and reduces lifespan.
Enhancing Ergonomics And Safety
Comfort and safety improvements not only reduce fatigue but also help prevent accidents and injuries during prolonged soldering sessions.
Upgrading The Handle
Look for irons with ergonomic, heat-insulated handles to minimize hand strain and reduce heat transfer. Handles with soft grips or silicone covers are preferred for long sessions.
Integrating Fume Extraction
Solder fumes contain hazardous compounds such as rosin and lead vapors. Using a desktop fume extractor with an activated carbon filter significantly reduces exposure, protecting respiratory health.
- Portable extractors: Compact, easy to position.
- Bench-mounted systems: Offer higher airflow and filtration efficiency.
Improving Workspace Lighting
Adequate lighting is critical for precision soldering. Install an adjustable LED lamp with high color rendering index (CRI) to reduce eye strain and improve visibility of fine details.
Implementing Safety Protocols
Always use heat-resistant mats and wear protective eyewear to guard against accidental splashes of molten solder. Keep a fire extinguisher rated for electrical fires within arm’s reach.
Example: A repair shop that added fume extraction and ergonomic handles reported a 30% decrease in employee complaints of eye and respiratory irritation, according to a survey shared by IPC standards committee members.
Advanced Modifications And Smart Upgrades
For professionals and serious hobbyists, advanced modifications can push a soldering iron’s capabilities even further. These upgrades may require technical skill but yield substantial performance gains.
Integrating Smart Controllers
Smart controllers, such as open-source Arduino-based modules, enable programmable temperature profiles, sleep modes, and usage logging. They can be retrofitted to many popular soldering stations.
- Programmable profiles: Automatically adjust temperature for different tasks.
- Sleep mode: Lowers temperature when idle, extending tip life.
- Data logging: Tracks usage patterns for maintenance scheduling.
Upgrading To Induction Heating Technology
Induction heating soldering irons offer unparalleled heat-up speed and stability. They use electromagnetic fields to generate heat directly at the tip, rather than relying on conduction from a heating element.
Benefits:
- 3-5x faster heat-up times compared to conventional irons.
- Precise, stable temperature control.
- Longer tip life due to less thermal cycling.
Adding Esd Protection
For electronics work, electrostatic discharge (ESD) protection is critical. Upgrade to ESD-safe soldering irons or retrofit your setup with anti-static mats, wrist straps, and grounded iron stands.
Pro Tip: Always check that your soldering equipment is properly grounded when working with sensitive components.
Wireless And Battery Upgrades
Cordless soldering irons are now available with lithium-ion battery packs, offering freedom of movement without sacrificing performance. Modern cordless models can reach 400°C in under 30 seconds and last for over 40 minutes per charge.
Real-world Case Study: Smart Upgrade In A Pcb Assembly Line
A mid-sized PCB assembly company switched from conventional analog soldering stations to digitally controlled, induction-heated irons with integrated smart controllers. As a result, they observed:
- 25% reduction in rework rates.
- 15% increase in throughput.
- 2x tip longevity.
These improvements, reported in a feature by Solder.net, highlight the tangible benefits of investing in advanced soldering technology.
Maintenance And Longevity Tips
A well-maintained soldering iron delivers consistent results and lasts much longer. Implementing a regular maintenance routine minimizes downtime and replacement costs.
Routine Tip Care
- Always wipe the tip on a brass cleaner or damp sponge after every few joints.
- Re-tin the tip with fresh solder before turning off the iron to prevent oxidation.
- Replace tips showing signs of pitting, heavy corrosion, or poor heat transfer.
Calibrating Temperature Settings
Many digital stations allow for temperature calibration. Use a thermocouple or infrared thermometer to verify the actual tip temperature and adjust the settings accordingly.
Periodic Inspection Of Components
Inspect the heating element, power cord, and connections for signs of wear or damage. Replace any components showing fraying, cracking, or inconsistent performance.
Software/firmware Updates
For smart soldering stations, check for firmware updates from the manufacturer. Updates can fix bugs, enhance performance, or add new features.
Warning: Only install firmware from trusted sources to avoid bricking your device.
Storage Best Practices
Store your soldering iron in a stand or holder away from moisture and dust. Use tip protectors or caps to shield the tip from contaminants.
Comparing Soldering Iron Upgrades: Cost Vs. Benefit
Making informed decisions about which upgrades to prioritize requires a clear understanding of the cost-benefit ratio. The table below summarizes the most impactful improvements:
| Upgrade | Approx. Cost | Performance Benefit | Recommended For |
|---|---|---|---|
| Digital Temperature Control | $40-100 | High accuracy, faster joints | All users |
| Ceramic Heating Element | $10-30 | Faster heat-up, stability | Frequent users |
| Induction Heating Iron | $100-250 | Top-end speed, precision | Professionals |
| Fume Extractor | $30-150 | Health, comfort | All users |
| Smart Controller | $20-80 | Automation, logging | Advanced users |
| Tip Variety Pack | $10-40 | Task flexibility | All users |
Real-world Examples Of Soldering Iron Improvement
Learning from real-life cases can offer practical insight into what works best. Here are three scenarios illustrating the impact of targeted soldering iron upgrades.
Hobbyist Project: Upgrading A Basic Iron
A hobbyist working on Arduino projects upgraded from a 25W fixed-temperature iron to a 60W digital station. With the new setup, they experienced faster heat-up times and improved joint consistency, reducing project time by nearly half.
Professional Repair Shop: Ergonomics And Safety
A repair shop invested in ergonomic handles, high-CRI lighting, and desktop fume extraction for all workstations. Over six months, employee fatigue reports decreased, and work quality improved, as confirmed by customer feedback.
Small-scale Assembly Line: Smart Controls
A small business specializing in LED lighting switched to soldering stations with programmable temperature profiles and sleep modes. The change reduced energy consumption and doubled the average tip life, lowering operating costs.
Troubleshooting Common Soldering Issues
Even with the best equipment, problems can arise. Identifying and resolving these issues quickly keeps projects on track and prevents costly mistakes.
Cold Joints
Caused by insufficient heat or poor tip contact, cold joints are dull and unreliable. Solutions include increasing temperature, using the correct tip, and ensuring proper pre-tinning.
Tip Oxidation
Blackened, rough tips indicate oxidation, which impedes heat transfer. Regular cleaning with brass wool and re-tinning after use prevents this issue.
Bridging And Solder Balls
Bridging occurs when excess solder connects adjacent pads, while solder balls result from rapid cooling or dirty surfaces. Use the right tip, manage heat, and apply flux to avoid these problems.
Pad Lifting
Excessive heat or mechanical stress can lift PCB pads. Minimize contact time and avoid applying pressure to the board during soldering.
Pro Tip: If you notice frequent issues, re-evaluate your soldering technique, tip choice, and maintenance routines.
Frequently Asked Questions
What Is The Best Way To Store A Soldering Iron When Not In Use?
Store your soldering iron in a dedicated stand that keeps the hot tip away from surfaces and flammable materials. If possible, use tip protectors or silicone caps to prevent dust and moisture buildup, which can accelerate oxidation.
Can I Use Any Brand Of Tip With My Soldering Iron?
Not all tips are cross-compatible. Each soldering iron model typically requires tips designed for its specific dimensions and heating mechanism. Always consult the manufacturer’s compatibility list before purchasing new tips.
How Do I Know When To Replace My Soldering Tip?
Replace your tip if you notice excessive pitting, corrosion, or if solder no longer wets the surface easily despite cleaning and re-tinning. Diminished heat transfer or difficulty forming quality joints are also indicators that it’s time for a new tip.
Does Using Lead-free Solder Affect My Soldering Iron?
Lead-free solder has a higher melting point and can be more corrosive to tips. Ensure your iron can reach the required temperatures (typically 350, 400°C) and use tips specifically rated for lead-free applications to ensure durability.
Are There Risks To Upgrading My Soldering Iron With Third-party Components?
Upgrading with non-original parts can void warranties and sometimes introduce safety risks, such as electrical shorts or poor fit. Always source components from reputable vendors and follow the manufacturer’s recommendations.
With the right upgrades, maintenance habits, and techniques, your soldering iron can consistently deliver excellent results for years. Whether you’re building intricate circuit boards or making quick repairs, these strategies will help you achieve professional-quality soldering with confidence.