
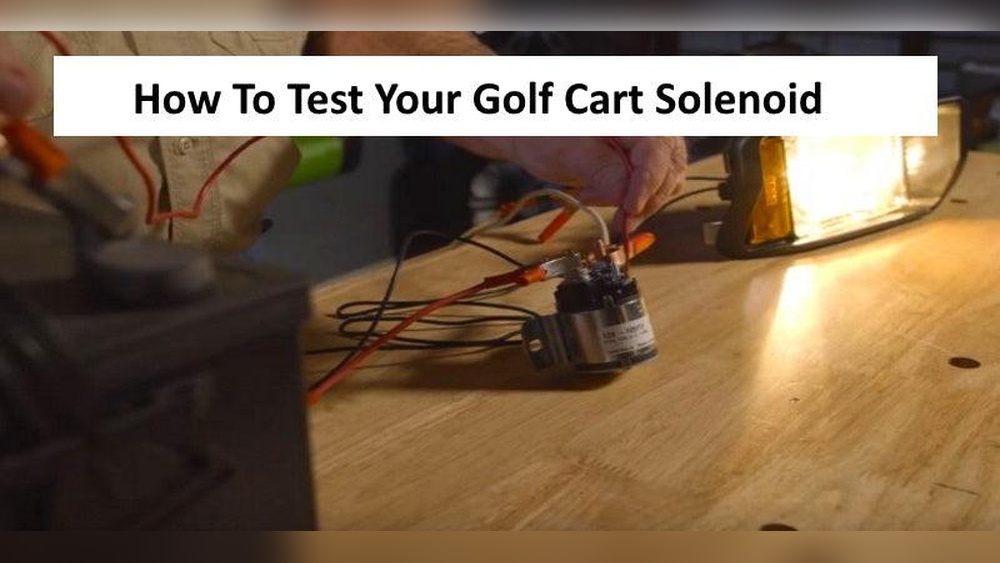
Testing a golf cart solenoid is a crucial skill for anyone maintaining or troubleshooting electric golf carts. Whether you’re a new owner, a DIY enthusiast, or a golf course technician, understanding how to diagnose solenoid issues can save significant time and money.
Many common golf cart problems, like failure to start, erratic movement, or battery drain, can be traced back to a faulty solenoid. With the right knowledge and tools, notably a multimeter, you can perform accurate solenoid tests and make informed repair decisions.
This guide is designed to be accessible for beginners, yet detailed enough for advanced users. By breaking down the process into clear, actionable steps and providing both foundational explanations and expert tips, you’ll build not only technical proficiency but also confidence in handling electrical diagnostics.
Additionally, real-world examples and data-backed advice ensure you’re learning practical, up-to-date methods. Let’s dive into the essential skills for testing a golf cart solenoid with a multimeter.
Key Takeaways
- Golf cart solenoids are critical for electrical power transfer; diagnosing them prevents larger issues.
- A multimeter is the most precise tool for solenoid testing, offering voltage, resistance, and continuity readings.
- Step-by-step testing procedures are provided for both beginners and advanced users.
- Data tables compare symptoms, test results, and solenoid types for quick troubleshooting.
- Advanced diagnostics, real-world examples, and maintenance tips are included for comprehensive understanding.
Credit: www.golfcarttiresupply.com
Understanding Golf Cart Solenoids
Golf cart solenoids are electromagnetic switches that control the flow of electricity from the battery to the motor. Their performance directly influences the cart’s ability to start, stop, and accelerate. Understanding their function and common failure modes is the first step toward effective troubleshooting.
What Is A Golf Cart Solenoid?
A solenoid is essentially an electromagnetically operated switch. When you press the accelerator, a small current energizes the solenoid coil, creating a magnetic field that pulls a plunger or contactor. This action closes a high-current circuit between the battery and the motor, allowing the cart to move.
Golf cart solenoids typically operate at 36V or 48V, depending on the cart model. They are rated for heavy-duty use, as they must handle the significant current required to power electric motors.
Common Signs Of Solenoid Failure
Identifying solenoid issues early can prevent further electrical system damage. Key symptoms include:
- Clicking sound but no movement when pressing the accelerator
- No response or power when the key is turned on
- Intermittent operation (cart moves sometimes but not always)
- Visible damage such as burnt or melted terminals
Types Of Golf Cart Solenoids
Golf carts may use different solenoids depending on the manufacturer and voltage requirements. The table below outlines the main varieties:
| Solenoid Type | Voltage | Application | Common Brands |
|---|---|---|---|
| Continuous Duty | 36V, 48V | Standard Cart Operation | EZGO, Club Car |
| Intermittent Duty | 12V, 36V, 48V | Starter Circuits | Yamaha, ParCar |
| Heavy-Duty Upgrade | 36V, 48V | High-Performance Carts | Aftermarket |
How Solenoids Fit Into The Golf Cart Electrical System
The solenoid acts as a gatekeeper in the cart’s primary electrical circuit. It ensures that high current only flows when the system is ready, preventing accidental starts and protecting wiring from overloads. Proper solenoid function is thus fundamental to safe cart operation.
Tools And Safety Precautions
Testing a solenoid involves working with electrical circuits. Safety and the right tools are essential for accurate, injury-free results. Below are the recommended tools, safety gear, and preparation steps.
Essential Tools For Solenoid Testing
- Digital multimeter (preferably with auto-ranging capability)
- Insulated screwdrivers for disconnecting terminals
- Wrenches (typically 10mm or 13mm for battery/solenoid nuts)
- Protective gloves and safety glasses
- Owner’s manual or wiring diagram (for reference)
Choosing The Right Multimeter
When selecting a multimeter, prioritize features like:
- Voltage range up to 60V DC or higher
- Resistance measurement (Ohms)
- Continuity buzzer for quick checks
- Clear digital display
A table comparing multimeter features for golf cart work:
| Feature | Basic Multimeter | Advanced Multimeter |
|---|---|---|
| Voltage Range | Up to 600V DC | Up to 1000V DC |
| Auto-Ranging | No | Yes |
| Continuity Test | Yes | Yes (with sound) |
| Data Hold | No | Yes |
| Price | $15-$30 | $50-$100 |
Safety Precautions
- Disconnect the battery before removing or testing the solenoid to prevent shock or short-circuit.
- Avoid wearing metal jewelry while working around batteries or terminals.
- Always test the multimeter on a known voltage source before use.
- Work in a well-ventilated area to avoid battery gas buildup.
Preparing The Golf Cart
- Park the cart on a flat, stable surface and set the parking brake.
- Turn off the ignition and remove the key.
- Disconnect the negative battery cable first, then the positive.
- Wait several minutes for capacitors to discharge before touching any wiring.
Warning: Never bypass safety procedures, especially when testing high-current circuits.

Credit: discover.hubpages.com
Step-by-step Guide: Testing A Golf Cart Solenoid With A Multimeter
A systematic approach ensures accurate diagnosis. This section covers the three main solenoid tests: continuity, resistance, and voltage drop.
Identifying Solenoid Terminals
Most solenoids have four terminals:
- Two large terminals (high-current): Connect to battery and motor/controller.
- Two small terminals (low-current): Connect to ignition switch and controller.
Refer to your cart’s wiring diagram to confirm terminal functions.
Test 1: Continuity Check (basic)
This verifies if the solenoid coil is intact or open.
Steps:
- Set the multimeter to Ohms (Ω) or continuity mode.
- Place probes on the two small terminals.
- A reading between 2, 50 Ohms (varies by model) indicates a good coil.
- No reading (infinite resistance) means an open coil, solenoid needs replacement.
Example: On a 2018 Club Car, a healthy solenoid measured 3.5 Ohms; a faulty one read “OL” (over limit).
Test 2: Activation Test (intermediate)
Checks if the solenoid “clicks” and closes the high-current circuit when activated.
Steps:
- Reconnect battery cables.
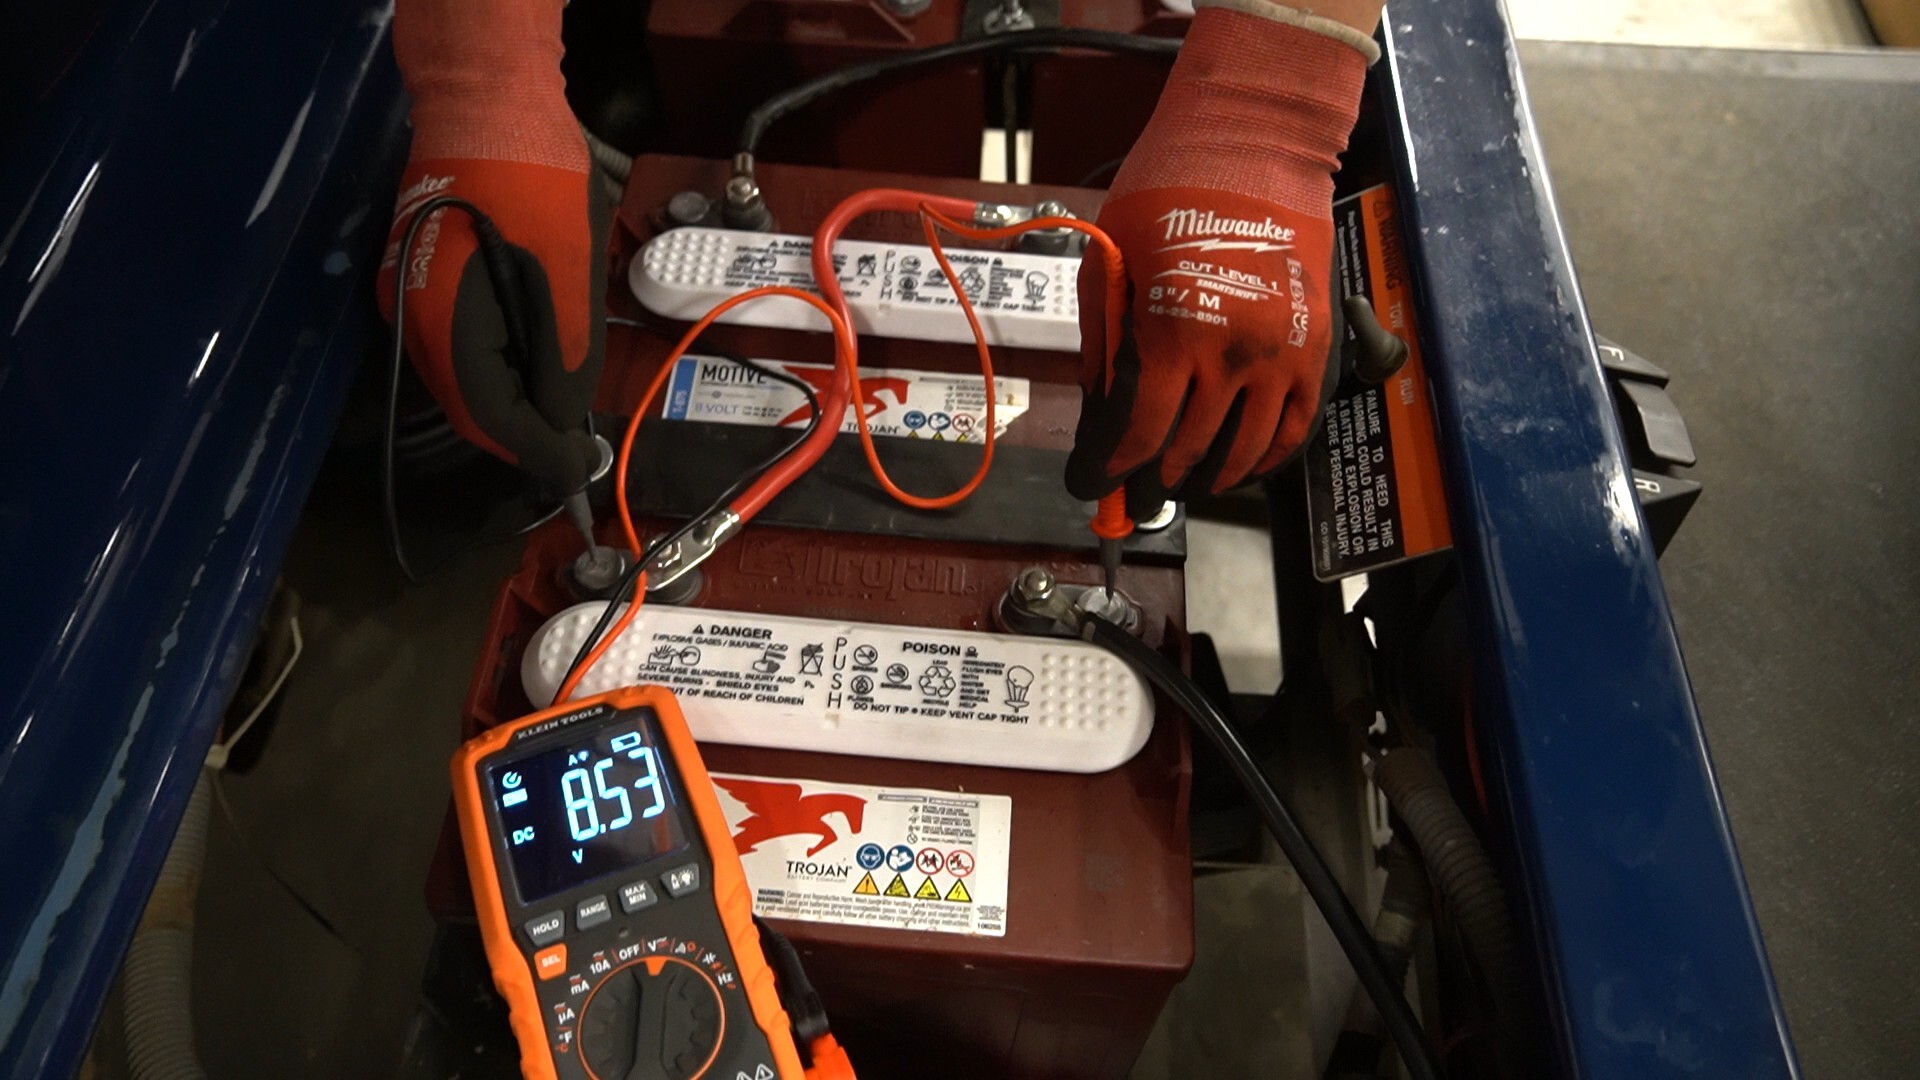
- Set the multimeter to DC Volts.
- Place probes on the two large terminals.
- Turn the key on and press the accelerator.
- If voltage drops from battery voltage to near zero, the solenoid is closing properly.
- If voltage stays high, the solenoid is not closing, check for a faulty coil or control circuit.
Pro Tip: Listen for a distinct “click” when the solenoid activates. No sound often indicates a failed coil or wiring issue.
Test 3: Voltage Drop Test (advanced)
Assesses contact wear or burning inside the solenoid.
Steps:
- With the key on and pedal pressed, place one probe on each large terminal.
- Set the multimeter to DC Volts.
- A reading below 0.3V indicates good contacts.
- Higher readings (e.g., 1, 2V) suggest pitted or burnt contacts, replace the solenoid.
Example: In my experience, a 1.5V drop across a Club Car solenoid caused sluggish performance and motor overheating.
Test 4: Bench Test (for Removed Solenoids)
If you remove the solenoid from the cart:
- Use a 12V power source to energize the small terminals.
- Check continuity across the large terminals with the multimeter.
- Closed circuit = working; open circuit = faulty.
Troubleshooting Table: Symptoms Vs. Test Results
| Symptom | Continuity Test | Activation Test | Voltage Drop Test | Likely Problem |
|---|---|---|---|---|
| No “click”, no motion | OL (open) | No voltage drop | N/A | Open coil or wiring |
| Clicks, but no movement | Normal | No voltage drop | High voltage | Burnt contacts |
| Intermittent operation | Fluctuates | Inconsistent | Variable | Loose wiring/weak coil |

Credit: nicksgolfcarts.com
Real-world Examples And Case Studies
Applying theory to real scenarios makes diagnostics more relatable and actionable. Here are three practical case studies that illustrate common solenoid issues and solutions.
Case Study 1: No-click, No-start On A 2017 Ezgo Txt
Scenario: Cart failed to start, no clicking sound from the solenoid.
Diagnosis Steps:
- Battery voltage tested at 38.2V (normal for a 36V system).
- Multimeter showed OL across small solenoid terminals.
- Bench test confirmed open coil.
Outcome: Replaced solenoid; cart returned to normal function.
Case Study 2: Slow Acceleration On A 2015 Club Car Precedent
Scenario: Cart would start, but acceleration was sluggish.
Diagnosis Steps:
- Solenoid “clicked” but voltage drop test showed 1.2V across large terminals.
- Continuity test normal.
- Contacts inside solenoid were pitted due to age.
Outcome: After replacing the solenoid, voltage drop fell to 0.08V and acceleration improved.
Case Study 3: Intermittent Power Loss On A Yamaha Drive
Scenario: Cart sometimes lost power, especially on hills.
Diagnosis Steps:
- Multimeter showed fluctuating resistance across small terminals.
- Activation test occasionally failed.
- Inspection revealed loose wiring at the control circuit.
Outcome: Tightened connections; no solenoid replacement needed.
Pro Tip: Always check wiring harnesses and connectors as part of your troubleshooting routine. Many “solenoid” issues are actually caused by corroded or loose terminals.
Advanced Diagnostic Strategies
For technicians and advanced DIYers, these strategies go beyond basic solenoid checks and address related electrical system issues.
Diagnosing Control Circuit Problems
Not all solenoid failures are due to the solenoid itself. Issues in the key switch, accelerator micro-switch, or controller can prevent the solenoid from engaging.
- Use the multimeter to test for voltage at the small terminals when the key is on and the pedal is pressed.
- No voltage means a control circuit problem, not a solenoid fault.
Testing Under Load
Some solenoids only fail under high current. Simulate normal cart operation (with wheels elevated and safely blocked) and measure voltage drop under load.
- Excessive voltage drop under load (but not at rest) indicates failing contacts or internal arcing.
Using An Oscilloscope
For advanced users, an oscilloscope can visualize solenoid actuation and contact bounce.
- A clean “step” waveform indicates healthy contacts.
- Irregular or noisy signals suggest worn contacts.
Upgrading To Heavy-duty Solenoids
High-performance or lifted carts may benefit from aftermarket heavy-duty solenoids. These units handle greater current loads and are less prone to premature failure.
- Compare OEM and aftermarket specs before upgrading.
- Ensure compatibility with your cart’s controller and wiring.
Example: Preventing Repeat Failures
In fleets where solenoids fail frequently, inspect for:
- Undersized wiring
- Overheated connectors
- Controller faults causing excessive coil cycling
Implementing preventive upgrades can extend solenoid life and reduce downtime.
Maintenance Tips For Long-term Solenoid Health
Regular maintenance reduces solenoid-related failures and extends the life of your golf cart’s electrical system.
Visual Inspection Routine
- Check for corrosion or discoloration at terminals.
- Inspect for cracked housings or melted plastic.
- Tighten all electrical connections to manufacturer torque specs.
Battery And Charging System Care
- Weak or overcharged batteries stress the solenoid contacts.
- Test battery voltage and replace weak units promptly.
Cleaning And Lubrication
- Use a contact cleaner (non-residue) on terminals.
- Apply dielectric grease to connections to prevent corrosion.
Scheduled Replacement
- In high-use carts (fleet or rental), replace solenoids every 2, 3 years as preventive maintenance.
Warning: Only use manufacturer-approved replacement parts to avoid warranty issues or electrical incompatibility.
Common Mistakes And Troubleshooting Pitfalls
Avoid these errors for accurate diagnostics and safe repairs.
Skipping Battery Checks
Always verify battery health before blaming the solenoid. Low voltage can mimic solenoid failure.
Ignoring Safety
Testing with connected batteries and exposed terminals risks serious injury. Always disconnect power where possible.
Misreading Multimeter Settings
Set the multimeter to the correct range and test mode. Using the wrong setting can lead to incorrect diagnoses or meter damage.
Overlooking Wiring And Connectors
Many “bad solenoid” symptoms are due to corroded, loose, or damaged wiring. Inspect all related harnesses.
Failing To Document Results
Record all test readings and steps. This helps track intermittent faults and provides a baseline for future troubleshooting.
When To Call A Professional
While many solenoid tests are beginner-friendly, certain situations require professional help:
- Complex controller issues or persistent error codes
- Repeated solenoid failures after replacement
- Unusual wiring modifications or aftermarket upgrades
A certified golf cart technician can access specialized diagnostic tools and wiring diagrams. For those less comfortable with electrical work, it’s always safer to consult an expert.
Pro Tip: Many golf cart shops offer free or low-cost electrical system diagnostics. Take advantage of these services for peace of mind.
Frequently Asked Questions
What Causes A Golf Cart Solenoid To Fail?
Solenoids most often fail due to contact wear, overheating, or moisture ingress. Over time, the internal contacts can become pitted or burnt from repeated switching of high current. Exposure to water or chemicals can corrode the coil or terminals. In some cases, wiring issues or a weak control circuit can cause the solenoid coil to overheat and fail prematurely.
Is It Safe To Bypass A Faulty Golf Cart Solenoid Temporarily?
Bypassing a solenoid is not recommended, even temporarily, due to the risk of uncontrolled power flow. Without the solenoid acting as a switch, the motor can engage unexpectedly, posing a safety hazard. Additionally, bypassing can damage wiring or other components by exposing them to unregulated current. Always repair or replace the solenoid rather than bypassing it.
Can I Use A Car Solenoid On A Golf Cart?
While some car solenoids may appear similar, they are typically designed for intermittent duty and 12V operation, not continuous use at 36V or 48V. Using an automotive solenoid can lead to rapid failure or unsafe operation in a golf cart. Always use a solenoid rated for your cart’s voltage and current requirements, as specified by the manufacturer.
How Do I Know If My Golf Cart Solenoid Is Oem Or Aftermarket?
OEM (Original Equipment Manufacturer) solenoids will have the manufacturer’s logo and part number stamped on the housing. Aftermarket units may differ in size, color, or markings. Compare your solenoid’s labeling to official parts catalogs, or consult your cart’s service manual. If in doubt, purchase replacements from an authorized dealer or Golf Car Catalog to ensure compatibility.
Are There Any Online Resources For Golf Cart Wiring Diagrams?
Yes, many manufacturers provide wiring diagrams in their service manuals or on their official websites. Reputable resources like Wikipedia also summarize standard golf cart electrical layouts. For brand-specific diagrams, visit the official sites for EZGO, Club Car, or Yamaha, or consult online forums and communities dedicated to golf cart maintenance.
Properly testing and diagnosing your golf cart solenoid can dramatically improve reliability and performance. Whether you’re a beginner learning the basics or an advanced user seeking deeper insights, mastering these procedures empowers you to maintain your vehicle with confidence. By following safety guidelines, using the right tools, and applying both foundational and advanced troubleshooting steps, you’ll minimize downtime and repair costs, keeping your golf cart in top condition for years to come.