
Diesel engines rely on a series of intricate components to operate efficiently, and among the most critical are the glow plugs. These small, robust heaters help ignite the fuel-air mixture in diesel engines, especially during cold starts. Yet, even the most reliable glow plugs can degrade or fail over time, causing hard starting, rough idling, increased emissions, or even engine misfires. Diagnosing glow plug health early is crucial to maintaining optimal engine performance and preventing expensive repairs down the line.
Whether you’re a beginner with minimal automotive experience or an advanced DIYer looking to refine your diagnostic skills, testing glow plugs with a multimeter is a practical and essential technique. This comprehensive guide demystifies the process, offering step-by-step instructions, expert insights, and advanced troubleshooting strategies to empower you to confidently assess and replace faulty glow plugs, saving both time and money.
Key Takeaways
- Testing glow plugs with a multimeter is a straightforward yet vital procedure for diesel engine maintenance.
- Both beginners and seasoned mechanics can use this guide, which covers safety, step-by-step testing, and advanced diagnostics.
- Early detection of faulty glow plugs prevents hard starts, misfires, and unnecessary fuel consumption.
- Selecting the appropriate multimeter settings and understanding glow plug specifications is essential for accurate diagnosis.
- Real-world scenarios and case studies illustrate best practices and troubleshooting techniques.
Credit: www.yourmechanic.com
Understanding Glow Plugs And Their Role In Diesel Engines
Glow plugs are heating elements designed to preheat the combustion chambers in diesel engines, facilitating easier starting in cold conditions. Unlike gasoline engines, which use spark plugs, diesel engines rely on compression and heat to ignite fuel. Glow plugs bridge the gap when ambient temperatures are too low for efficient ignition.
How Glow Plugs Work
When the ignition is activated, glow plugs receive electrical current, causing their tips to heat up rapidly, reaching temperatures between 1,000°F to 1,800°F (538°C to 982°C). This preheats the air in the cylinder, allowing diesel fuel to ignite upon injection. Once the engine reaches operating temperature, glow plugs are usually switched off by a relay.
Types Of Glow Plugs
There are two main types:
- Metal Glow Plugs: The traditional and most common type, made from metal alloys. They heat up quickly but may have a shorter lifespan.
- Ceramic Glow Plugs: Made from advanced ceramics, these can reach higher temperatures more rapidly and maintain heat longer, offering improved performance and durability.
Common Signs Of Faulty Glow Plugs
- Difficulty starting the engine, especially in cold weather
- White smoke from the exhaust during startup
- Rough idling or engine knocking after ignition
- Increased fuel consumption
- Illuminated check engine light or glow plug warning indicator
Why Testing Matters
A single failed glow plug can compromise the entire engine’s performance. According to the U.S. Department of Energy, unresolved ignition issues can reduce diesel engine efficiency by up to 5% (DOE Guide). Early testing mitigates the risk of further mechanical damage and unnecessary fuel expenses.

Credit: www.youtube.com
Essential Tools And Safety Precautions
Before diving into diagnostics, gathering the right tools and adhering to safety protocols is imperative. Both beginners and advanced users should never overlook the basics of safe, effective automotive work.
Required Tools And Equipment
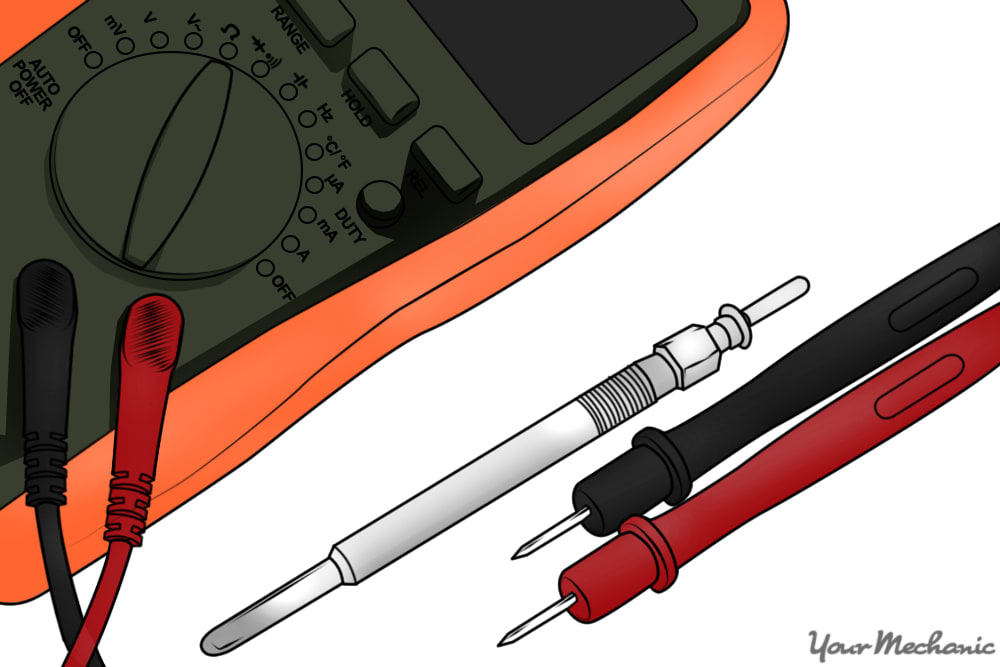
- Digital Multimeter (with resistance/ohm, voltage, and continuity settings)
- Protective gloves and safety glasses
- Wrenches or sockets (to access and remove glow plugs if needed)
- Service manual for your vehicle model (contains specifications)
- Notebook or smartphone (for recording test results)
Preparing Your Work Area
- Work in a well-ventilated area to avoid inhaling exhaust fumes.
- Allow the engine to cool fully before starting work, hot components can cause severe burns.
- Disconnect the negative battery terminal to reduce the risk of electrical shorts.
Multimeter Basics For Beginners
A multimeter measures electrical properties such as voltage, resistance (ohms), and continuity. For glow plug testing, the focus is primarily on resistance (ohm) measurement, but voltage checks can also be valuable for advanced diagnostics.
- Resistance: Indicates the flow of electrical current. Low resistance (typically 0.5, 2.0 ohms) means a healthy glow plug. High or infinite resistance usually signals a failure.
- Voltage: Helps verify power supply to the glow plug system.
Safety Best Practices
- Never test glow plugs with the engine running.
- Always use insulated tools to prevent accidental shorts.
- Wear gloves and safety glasses to protect against burns and debris.
- Keep your workspace organized to avoid misplaced tools or parts.
Pro Tip: Take photos of the engine bay before disconnecting any wires. This visual reference will simplify reassembly.

Credit: www.wikihow.com
Step-by-step Guide: Testing Glow Plugs With A Multimeter
This section breaks down the testing process into clear, actionable steps suitable for all experience levels.
Step 1: Access The Glow Plugs
- Locate the glow plugs: Consult your vehicle’s service manual for the exact location. Typically, glow plugs are found on the cylinder head, near the intake manifold.
- Remove engine covers if necessary, using the appropriate tools.
- Identify and disconnect the electrical connectors from each glow plug.
Step 2: Setting Up The Multimeter
- Turn on the digital multimeter.
- Set the dial to the lowest ohm (Ω) range, usually 200Ω or 2kΩ, depending on your device.
- Ensure the multimeter leads are clean and undamaged.
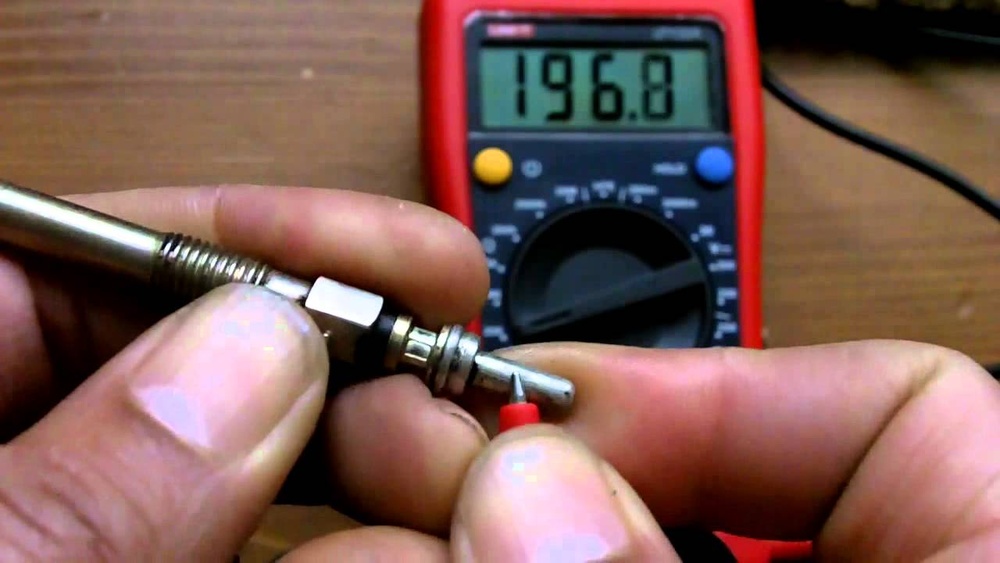
Step 3: Testing Glow Plug Resistance
- Touch the black (negative) lead to the engine block or a clean ground point.
- Touch the red (positive) lead to the terminal of the first glow plug.
- Read the resistance value displayed on the multimeter.
- Record the readings for each glow plug in your notebook or smartphone.
Acceptable Resistance Range: Most healthy glow plugs have a resistance between 0.5 and 2.0 ohms. Always check your vehicle’s service manual for specific values.
Step 4: Interpreting Results
- 0.5, 2.0 ohms: Glow plug is likely functional.
- Above 2.0 ohms: Possible internal damage or degradation.
- Infinite or OL (Open Loop): Glow plug has failed and requires replacement.
- Zero or near-zero: Potential short circuit; replacement needed.
| Resistance (Ohms) | Condition | Action Required |
|---|---|---|
| 0.5, 2.0 | Normal | No action |
| 2.1, 5.0 | Degraded | Monitor or replace |
| >5.0 or OL | Open circuit/Failed | Replace immediately |
| 0 or near 0 | Short circuit | Replace immediately |
Step 5: Voltage Supply Check (advanced)
If all glow plugs test within spec but issues persist:
- Set your multimeter to DC voltage.
- Reconnect the battery and turn the ignition to the ‘on’ position (do not start).
- Touch the red lead to the glow plug terminal and the black lead to ground.
- A reading matching your system voltage (typically 12V) should appear. If not, check relays, wiring, or control modules.
Warning: Only perform voltage checks if you are comfortable working with live circuits and understand the risks of accidental shorts.
Step 6: Reassemble And Test
- Reconnect all glow plug wiring.
- Reinstall any engine covers.
- Reconnect the battery terminal.
- Start the engine and observe performance.
Example: When I tested the glow plugs on my 2008 Ford F-250, I found cylinder 3 reading 5.8 ohms while the others were at 1.2 ohms. Replacing just that plug eliminated hard starting issues in cold weather.
Advanced Diagnostic Techniques And Troubleshooting
While basic resistance testing covers most scenarios, advanced troubleshooting can help pinpoint elusive issues and ensure comprehensive diagnostics.
Testing Glow Plugs Out Of The Engine
For the most accurate assessment, remove the glow plug and test resistance between the terminal and threaded body. This eliminates false readings from corroded or dirty connections.
- Resistance should remain within spec. Any deviation indicates a failing plug.
Visual Inspection
- Check for carbon deposits, oil contamination, or physical damage to the tip.
- Inspect threads and electrical connectors for corrosion or wear.
Continuity Test
Set the multimeter to continuity mode (often indicated by a soundwave symbol). Place one lead on the terminal and the other on the plug body. A beep indicates continuity; silence means an open circuit.
Assessing Glow Plug Relay And Circuit
A faulty relay or control circuit may mimic glow plug failure.
- Check relay operation using the vehicle’s service manual.
- Inspect fuses and wiring for breaks, corrosion, or loose connections.
Using Clamp Meters (for Advanced Users)
A clamp meter can measure current draw when the glow plug is energized. Compare readings to manufacturer specifications. Significant deviations may indicate internal faults.
| Test Method | Skill Level | Equipment Needed | Accuracy |
|---|---|---|---|
| In-engine resistance check | Beginner | Multimeter | Good |
| Out-of-engine resistance check | Intermediate | Multimeter, wrenches | Very Good |
| Current draw measurement | Advanced | Clamp meter | Excellent |
| Visual inspection | All levels | None | Fair |
Common Glow Plug System Failures
- Failed relay or timer module
- Corroded wiring or connectors
- Control unit software errors
- Incorrect voltage supply
Advanced diagnostics may require scanning tools to access error codes from the engine control unit (ECU).
Real-world Examples And Case Studies
Learning from actual diagnostic scenarios can provide both beginners and experienced users with practical context and problem-solving strategies.
Example 1: Fleet Maintenance Scenario
A commercial delivery company noticed a spike in fuel consumption and complaints of rough starts across several vehicles. Upon systematic testing, technicians found that 30% of the fleet’s glow plugs exceeded 3.0 ohms. After replacing the faulty plugs, fleet fuel economy improved by an estimated 8% over the next quarter, verified through internal logs.
Example 2: Diy Enthusiast’s Experience
In my experience working on a 2014 Volkswagen Jetta TDI, a persistent check engine light was ultimately traced to a single glow plug reading 6. 1 ohms. Despite the plug visually appearing normal, resistance testing revealed the hidden issue. Replacing the plug resolved the warning light and restored smooth operation.
Example 3: Agricultural Equipment
A farmer’s tractor failed to start reliably in cold mornings. Inspection showed all glow plugs within specification, but the relay was not delivering voltage. Replacing the relay (costing under $30) restored proper function, preventing costly downtime during planting season.
What These Cases Teach
- Testing saves time and money by targeting only the components that need replacement.
- Resistance readings don’t lie, even if a glow plug looks fine, it can still be faulty.
- Systematic diagnostics (testing all plugs and the relay) yield the best results.
Selecting The Right Multimeter For Glow Plug Testing
Not all multimeters are created equal, and selecting the right one can impact both the accuracy of your results and the ease of your testing process.
Key Features To Look For
- Low-resistance accuracy (ability to measure below 2 ohms)
- Auto-ranging capability for simplicity
- Clear display with backlighting
- Continuity buzzer for quick checks
- Sturdy, insulated leads for safety
Popular Multimeter Models (2026)
Below is a comparison of three commonly recommended digital multimeters suitable for automotive diagnostics:
| Model | Resistance Range | Auto-Ranging | Continuity Buzzer | Approx. Price (USD) |
|---|---|---|---|---|
| Fluke 117 | 0.1Ω, 40MΩ | Yes | Yes | $200 |
| AstroAI DM6000AR | 0.1Ω, 60MΩ | Yes | Yes | $40 |
| Klein Tools MM400 | 0.1Ω, 40MΩ | Yes | Yes | $50 |
Calibration And Maintenance Tips
- Regularly calibrate your multimeter using a known resistor to ensure accuracy.
- Replace batteries promptly to avoid false readings.
- Store in a dry, dust-free location.
Where To Buy
- Local automotive stores
- Online retailers
- Direct from manufacturers
For official product details and safety certifications, consult the Wikipedia page on Multimeters.
Preventative Maintenance For Diesel Glow Plug Systems
Routine checks and preventative measures can extend the lifespan of your glow plugs and prevent unexpected failures.
Recommended Maintenance Schedule
- Test glow plugs every 12 months or 20,000 miles, whichever comes first.
- Inspect wiring and connectors during routine oil changes.
- Clean battery terminals to ensure consistent voltage supply.
Choosing Quality Replacement Parts
- Use OEM or reputable aftermarket glow plugs.
- Replace all plugs at once if more than half show signs of wear.
Proper Installation Practices
- Torque to manufacturer specifications using a torque wrench to prevent thread damage.
- Apply anti-seize compound to the threads if recommended by the manufacturer.
- Avoid over-tightening, which can crack ceramic plugs.
Environmental Considerations
Faulty glow plugs can increase emissions. Timely replacement not only benefits engine performance but also helps reduce environmental impact by limiting unburned fuel output.
Pro Tip: Keep a spare set of glow plugs and fuses in your vehicle if you operate in remote or cold regions.
Frequently Asked Questions
What Happens If I Drive With A Faulty Glow Plug?
Driving with a faulty glow plug can result in rough starts, increased emissions, and reduced engine efficiency. Over time, unburned fuel can contaminate the exhaust system and damage the diesel particulate filter (DPF), leading to expensive repairs. While the engine may still run, especially in warm weather, it’s best to address the issue promptly.
Can I Test Glow Plugs Without Removing Them?
Yes, most glow plugs can be tested for resistance without removal by disconnecting the electrical connector and using a multimeter. However, for the most accurate readings, especially if resistance values are borderline, removing the plug and testing directly between the terminal and the body is advised.
How Do I Know If My Glow Plug Relay Is Bad?
Symptoms of a bad relay include no voltage at the glow plug terminals, persistent hard starts, and multiple glow plug error codes. Testing involves checking for voltage at the glow plug connectors during the pre-glow cycle and listening for an audible “click” from the relay when the ignition is switched on. Relays can also be tested separately with a multimeter for continuity and switching function.
Is It Safe To Use Aftermarket Glow Plugs?
Aftermarket glow plugs from reputable brands are generally safe and can offer performance and price advantages. However, poorly made plugs may not meet OEM specifications, leading to early failure or engine issues. Always verify compatibility with your vehicle’s make and model, and check user reviews or professional recommendations before purchase.
Can A Faulty Glow Plug Cause Other Engine Problems?
Absolutely. In addition to starting issues and increased emissions, a bad glow plug can cause rough idling, misfires, and even contribute to cylinder washdown (where unburned fuel washes away lubricating oil), accelerating engine wear. In severe cases, it can trigger warning lights or even force the vehicle into limp mode.
Diesel engine reliability and efficiency hinge on the health of their glow plug systems. By mastering the process of testing glow plugs with a multimeter, both beginners and seasoned enthusiasts can catch issues early, enhance performance, and prevent costly repairs.
With the knowledge and confidence gained from this guide, you’re equipped to keep your diesel engine running smoothly, whatever the weather.