
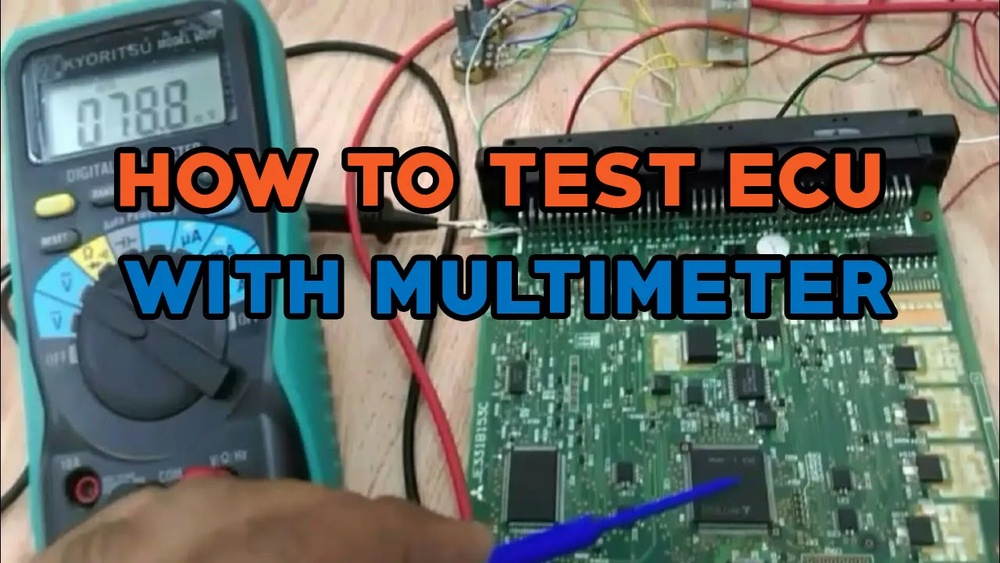
Testing an engine control module (ECM) with a multimeter is a crucial skill for anyone maintaining or diagnosing modern vehicles. The ECM, often called the car’s “brain,” manages vital engine functions, including fuel injection, ignition timing, and emissions controls. If your vehicle suffers from unexplained performance issues, erratic idling, or starting problems, a faulty ECM could be the culprit.
Learning to test an ECM with a multimeter can save time, money, and prevent unnecessary part replacements.
Whether you’re a novice wanting to understand the basics or an advanced technician seeking comprehensive diagnostic guidance, this article equips you with step-by-step instructions, real-world examples, and expert tips. With the right approach, a multimeter becomes an indispensable diagnostic tool, allowing you to verify ECM health before considering costly replacements.
By mastering these techniques, you empower yourself to make informed decisions and ensure your vehicle operates reliably.
Key Takeaways
- ECM testing with a multimeter can diagnose electrical faults before expensive replacements.
- Safety precautions and correct multimeter settings are critical for accurate results.
- The process includes checking voltage, resistance, and continuity on ECM connectors and related sensors.
- Real-world examples illustrate common ECM failure symptoms and testing outcomes.
- Advanced tips enhance diagnostic accuracy, including waveform analysis and sensor simulation.
- A structured, step-by-step approach ensures both beginners and professionals can follow and apply these methods.
Understanding The Ecm And Its Role
The engine control module (ECM) is a sophisticated electronic unit responsible for managing engine operation. It processes sensor inputs to control ignition timing, fuel injection, idle speed, and emissions systems. Modern ECMs utilize microprocessors, memory chips, and complex circuitry, making them sensitive to electrical faults, power surges, and environmental stress.
How The Ecm Works
The ECM receives data from numerous sensors, such as:
- Crankshaft position sensor
- Throttle position sensor
- Oxygen sensors
- Coolant temperature sensor
Using this information, the ECM adjusts engine parameters for optimal performance and efficiency. For instance, a faulty oxygen sensor can lead the ECM to miscalculate fuel delivery, causing rough idling or poor fuel economy.
Common Ecm Failure Symptoms
Identifying ECM issues early can prevent costly repairs. Typical symptoms include:
- Erratic engine behavior (misfiring, stalling, or surging)
- No start condition
- Check engine light activation
- Unresponsive sensors or actuators
- Difficulty shifting (in automatic transmissions)
Example: A 2012 Ford Focus exhibited intermittent stalling and non-starting. Diagnostics revealed inconsistent signals at the ECM’s input pins, traced to a corroded ground wire, a fault easily detected with a multimeter.
Ecm Location And Accessibility
ECMs are typically located:
- Under the dashboard
- Near the engine bay firewall
- Behind the glovebox
Consult your vehicle’s manual or a reputable resource like Wikipedia for exact placement. Accessibility may require removing panels or protective covers.

Credit: www.youtube.com
Multimeter Basics: Setup And Safety
Before testing the ECM, understanding your multimeter is essential. Even for beginners, mastering basic settings and safety is straightforward with practice.
Types Of Multimeters
There are two main types:
- Digital multimeter (DMM): Displays readings numerically, offers higher accuracy.
- Analog multimeter: Uses a needle gauge, less common but still used for visual trends.
Digital multimeters are recommended for ECM diagnostics due to their precision and ease of use.
Multimeter Functions For Ecm Testing
Key settings include:
- DC Voltage (V): Measures electrical potential across ECM pins.
- Resistance (Ω): Checks for open or short circuits.
- Continuity: Confirms uninterrupted electrical paths.
Pro Tip: Always start with a DMM’s auto-ranging setting if available, it simplifies measurement and avoids incorrect scale selection.
Safety Precautions
Working with automotive electronics poses risks. Follow these guidelines:
- Disconnect the battery before removing ECM connectors.
- Avoid testing on a running engine unless specified.
- Use insulated probes and gloves.
- Consult the vehicle’s wiring diagram to prevent accidental shorts.
Warning: Never probe ECM pins with power applied unless instructed by an official service manual. Incorrect probing can damage sensitive circuitry.

Credit: www.youtube.com
Step-by-step Guide: Testing The Ecm With A Multimeter
This section provides a structured approach for beginners and advanced users, covering every diagnostic stage.
1. Preparation And Reference Gathering
Before testing:
- Obtain the vehicle’s wiring diagram and ECM pinout chart.
- Identify test points: Power supply, ground, sensor inputs, and outputs.
- Gather tools: Multimeter, probes, jumper wires, and safety gear.
Example: In my experience, referencing a manufacturer’s pinout chart prevented misidentifying ground versus signal pins, saving hours of troubleshooting.
2. Power Supply And Ground Pin Testing
A healthy ECM requires stable power and ground connections.
Testing Power Pins
- Set the multimeter to DC voltage.
- With the ignition ON, probe the ECM power pin and a chassis ground.
- Expected voltage: Typically 12.6V to 14.2V (consult your manual).
If voltage is below specification, check for blown fuses, corroded connectors, or faulty ignition relays.
Testing Ground Pins
- Set the multimeter to continuity mode.
- Probe ECM ground pin and chassis ground.
- A reading near zero ohms indicates a good ground.
If resistance exceeds 0.1 ohms, inspect wiring for corrosion or loose connections.
3. Sensor And Actuator Signal Testing
Sensors provide essential input to the ECM. Testing these signals verifies proper communication.
Checking Sensor Input Pins
- Identify sensor signal pin (e.g., throttle position, oxygen sensor).
- Probe the pin with the multimeter set to DC voltage or resistance.
- Compare readings to manufacturer specifications.
Example: A Toyota Camry’s throttle position sensor should deliver 0.5V (closed) and 4.5V (fully open). Deviations suggest sensor or ECM faults.
Actuator Output Testing
Actuators like fuel injectors or ignition coils receive commands from the ECM.
- Probe output pins with the multimeter set to continuity or resistance.
- Compare resistance values to official specs.
Warning: Never test actuator outputs with engine running unless directed by a technical manual.
4. Continuity And Circuit Integrity Checks
Ensuring uninterrupted circuits between ECM and connected components is vital.
- Set the multimeter to continuity mode.
- Probe both ends of each wire between sensor/actuator and ECM.
- A beep or zero-ohm reading confirms good wiring.
High resistance or no continuity signals broken wires or faulty connectors.
5. Advanced Diagnostic Techniques
Experienced technicians can employ deeper diagnostic methods for ECM evaluation.
Voltage Drop Testing
- Measure voltage across power supply and ground pins while actuators operate.
- Excessive voltage drops (>0.5V) indicate wiring or connector issues.
Waveform Analysis
Some advanced multimeters or oscilloscopes allow visualization of ECM-generated signals.
- Connect probes to signal pins.
- Observe pulse width or frequency for injectors, ignition coils, etc.
Example: In a Honda Civic, inconsistent injector pulse width revealed ECM transistor failure, a diagnosis confirmed by waveform analysis.
Sensor Simulation
Use specialized tools to simulate sensor outputs, verifying ECM response.
- Apply simulated voltage or resistance.
- Monitor ECM output with multimeter.
Pro Tip: Sensor simulators can confirm ECM’s ability to process inputs, ruling out external sensor faults.

Credit: www.blikai.com
Real-world Examples And Case Studies
Learning from practical scenarios enhances understanding for both beginners and advanced users.
Case Study 1: Power Supply Fault
A 2015 Chevrolet Malibu failed to start, with no engine cranking. Multimeter testing revealed 8.5V at the ECM power pin, well below spec. Inspection found a corroded fuse and loose battery cable. After repair, ECM voltage normalized, and the vehicle started reliably.
Case Study 2: Sensor Signal Failure
A Nissan Altima exhibited rough idling and check engine light. Multimeter readings at the ECM’s oxygen sensor pin were unstable, fluctuating between 0.2V and 0.8V. Replacing the faulty sensor resolved the issue.
Case Study 3: Ground Circuit Issue
A Ford F-150 intermittently stalled while driving. Multimeter continuity testing showed 2.1 ohms between ECM ground pin and chassis, far above acceptable limits. Cleaning the ground point restored normal operation.
Case Study 4: Advanced Waveform Analysis
A Subaru Impreza’s fuel injectors were not firing consistently. Using a multimeter with waveform capability, the technician identified erratic pulse signals from the ECM. Replacing the ECM fixed the injector timing.
Common Ecm Test Results Comparison
Testing ECMs across various vehicles yields a range of results. The table below summarizes typical readings and their implications:
| Test Location | Expected Reading | Possible Issue | Action |
|---|---|---|---|
| Power Pin | 12.6V – 14.2V | <12V: Supply Fault | Check battery, fuses |
| Ground Pin | <0.1 Ohm | >0.1 Ohm: Ground Fault | Clean/repair ground |
| Sensor Input | 0.5V – 4.5V (varies) | Out of range: Faulty sensor/ECM | Replace sensor/ECM |
| Actuator Output | Manufacturer spec | Open circuit/high resistance | Repair wiring/actuator |
Tools And Resources For Accurate Ecm Testing
Having the right tools and information is essential for reliable diagnostics.
Essential Tools
- Digital multimeter (auto-ranging preferred)
- Vehicle-specific wiring diagram
- ECM pinout chart
- Insulated probes
- Sensor simulator (advanced users)
- Oscilloscope (for waveform analysis)
Trusted Information Sources
For wiring diagrams, pinouts, and specifications, consult:
- Official service manuals
- Manufacturer technical bulletins
- Automotive forums
- AutoShop101 for technical articles and guides
Training And Certification
Advanced ECM diagnostics often require formal training. ASE certification or manufacturer-specific courses are recommended for professionals. Beginners can benefit from online tutorials, community college courses, and hands-on practice.
Pro Tip: Always use manufacturer data for ECM pinout and voltage specs. Generic charts can lead to misdiagnosis.
Advanced Suggestions For Professionals
For those seeking to deepen their diagnostic capabilities, several advanced strategies can further improve ECM testing accuracy.
Using Oscilloscopes For Signal Analysis
An oscilloscope can visualize complex ECM signals, such as injector control pulses or ignition timing. This tool reveals anomalies hidden from traditional multimeter readings.
- Attach probes to signal outputs.
- Observe waveform shape, amplitude, and frequency.
- Compare to known good patterns.
Example: Diagnosing intermittent misfire, waveform analysis revealed a missing ignition pulse, leading to ECM replacement.
Sensor Simulation And Load Testing
Simulating sensor inputs allows testing ECM responsiveness without actual sensor faults.
- Use sensor simulators to send controlled signals.
- Observe ECM output (e.g., injector activation).
- Confirm ECM’s decision-making process.
Pro Tip: Simulators can replicate temperature, position, or speed sensors, aiding in bench-testing ECMs outside the vehicle.
Bench Testing Ecms
For severe faults, removing the ECM and bench testing isolates it from vehicle wiring.
- Connect ECM to regulated power supply and simulated sensors.
- Measure outputs with multimeter or oscilloscope.
- Compare to manufacturer specs.
Warning: Bench testing requires precise wiring and technical expertise. Errors can damage the ECM.
Data Logging And Scan Tools
Professional scan tools interface with the ECM, displaying live data, error codes, and real-time sensor readings.
- Use scan tools alongside multimeter measurements for comprehensive diagnostics.
- Data logging tracks intermittent faults missed during brief tests.
Example: A BMW’s ECM intermittently lost crankshaft sensor signal. Data logging pinpointed the fault during specific engine RPMs.
Troubleshooting Ecm Test Challenges
Even experienced technicians encounter obstacles when testing ECMs. Understanding common challenges improves success rates.
Dealing With Intermittent Faults
Intermittent issues, such as random stalling or sensor dropout, can complicate diagnostics.
- Wiggle test: Gently move connectors while monitoring multimeter readings.
- Heat test: Apply heat to ECM and observe changes, thermal expansion can expose solder cracks.
Identifying Wiring Harness Problems
Wiring harnesses often cause hidden ECM faults.
- Visually inspect for chafing, corrosion, or broken wires.
- Use continuity and resistance tests along harness paths.
Example: A Jeep Grand Cherokee’s ECM showed erratic sensor readings. Harness inspection revealed rodent damage, a short-circuit easily found with a multimeter.
Avoiding False Positives
Improper multimeter setup or inaccurate pinout charts can lead to false diagnosis.
- Double-check settings and reference diagrams.
- Cross-verify readings with scan tool data.
Warning: Never rely solely on multimeter results. Combine physical testing with electronic diagnostics for best outcomes.
Comparing Ecm Testing Methods
Different methods yield varying levels of accuracy and insight. The table below compares common ECM diagnostic approaches:
| Method | Accuracy | Required Tools | Use Case |
|---|---|---|---|
| Multimeter Testing | High (for voltage/resistance) | Multimeter | Power, ground, continuity checks |
| Oscilloscope Analysis | Very High | Oscilloscope | Signal waveform diagnostics |
| Scan Tool Diagnostics | Medium-High | Scan tool | Error codes, live data |
| Bench Testing | Highest | Power supply, simulators, multimeter | Isolated ECM evaluation |
Frequently Asked Questions
How Can I Avoid Damaging The Ecm During Multimeter Testing?
To prevent ECM damage, always use insulated probes, consult the vehicle’s wiring diagram for correct pin identification, and disconnect the battery when removing connectors. Avoid applying excessive voltage or current to sensitive pins. Never probe with power applied unless specifically directed by a service manual.
What Are The Most Common Ecm Test Mistakes Made By Beginners?
Common errors include misidentifying power and ground pins, setting the multimeter to the wrong mode, and failing to reference manufacturer specifications. Beginners often overlook continuity checks or ignore intermittent faults caused by loose connectors or corroded wires.
Can I Test An Ecm Outside The Vehicle?
Yes, bench testing is possible but requires a regulated power supply, accurate pinout charts, and simulated sensor inputs. This method isolates the ECM from vehicle wiring, allowing for detailed diagnostics. However, it is best performed by professionals with technical expertise to avoid accidental damage.
What Should I Do If Ecm Readings Are Within Spec But Symptoms Persist?
If ECM test results are normal but engine issues continue, consider testing related sensors, actuators, and wiring harnesses. Use scan tools to check for stored error codes or intermittent faults. In rare cases, ECMs can fail internally without affecting voltage or resistance readings, seek professional diagnosis if problems remain.
Are Aftermarket Ecms Reliable For Replacement?
Aftermarket ECMs vary in quality and compatibility. Some may lack original programming or use inferior components, leading to unpredictable engine behavior. Always verify compatibility with your vehicle’s make, model, and year. When possible, use original equipment manufacturer (OEM) ECMs for best reliability and performance.
Mastering ECM testing with a multimeter is an essential skill for vehicle diagnosis and repair. Whether you’re a beginner learning the basics or a seasoned technician applying advanced techniques, the combination of careful measurement, proper reference materials, and real-world troubleshooting delivers accurate results.
By investing in quality tools and knowledge, you can diagnose ECM faults confidently, minimize unnecessary replacements, and ensure your vehicle runs smoothly for years to come.