
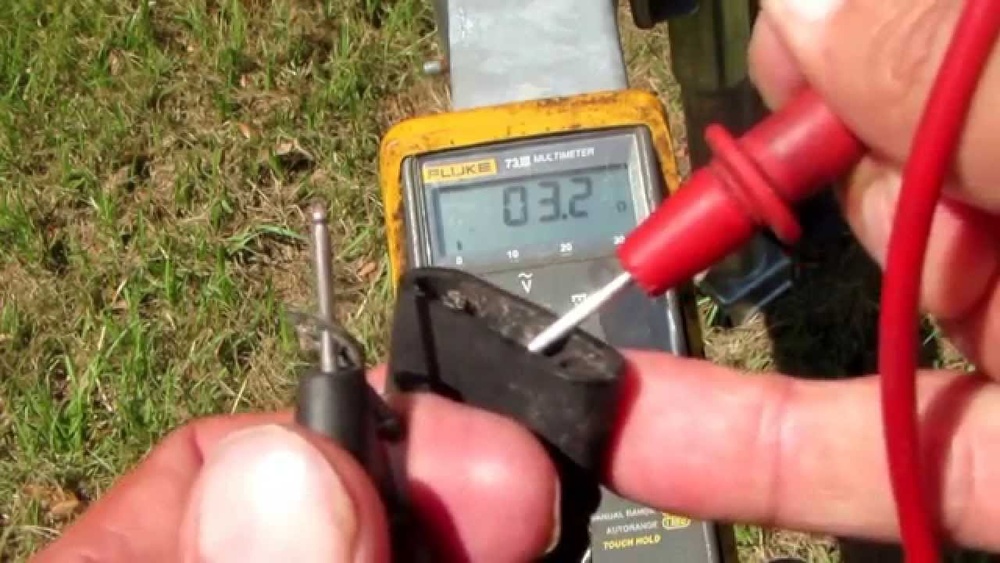
Checking trailer lights is a critical step for anyone towing a trailer, whether for business or recreation. Faulty lights aren’t just inconvenient, they’re illegal and potentially dangerous, leading to accidents or costly fines. Yet, many find the idea of using a multimeter intimidating, picturing a complex device best left to seasoned electricians.
The truth is, with a little guidance, anyone can learn to use a multimeter to test trailer lights accurately. This skill empowers trailer owners to troubleshoot issues quickly, avoid unnecessary repairs, and ensure their rig is always road-legal and safe.
This comprehensive guide demystifies the process, providing both beginner-friendly explanations and advanced troubleshooting tips. From understanding multimeter basics to interpreting your results and fixing common problems, you’ll gain the confidence and know-how to maintain your trailer’s lighting system efficiently. Whether you’re prepping for a long road trip or simply performing routine maintenance, this article walks you through every essential step, backed by expert insights, practical examples, and data-driven comparisons.
Key Takeaways
- A multimeter is an essential tool for accurately diagnosing trailer light problems.
- Basic tests include continuity, voltage, and ground checks, each serving a unique troubleshooting purpose.
- Common trailer lighting issues can be quickly identified and resolved with structured, step-by-step testing.
- Safety and legal compliance depend on regularly checking and maintaining all trailer lights.
- Advanced users can leverage the multimeter for wiring diagnosis, connector inspection, and preventive maintenance.
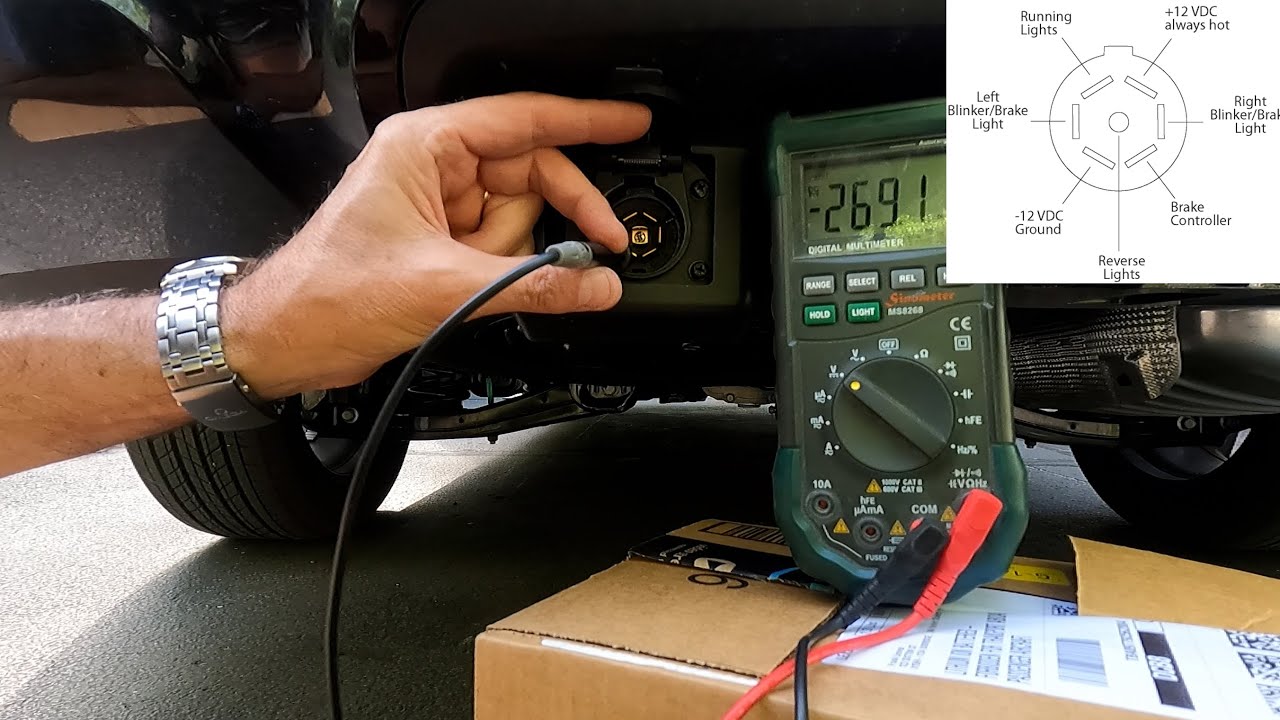
Credit: www.youtube.com
Understanding Trailer Light Systems
Modern trailer lighting systems consist of several interconnected components, each vulnerable to wear, corrosion, and electrical faults. Understanding how these systems function is key to effective troubleshooting.
Typical Trailer Light Wiring Layouts
Most trailers use a 4-way, 5-way, or 7-way connector to interface with the tow vehicle. Each pin serves a specific function, such as tail lights, brake lights, and turn signals. The most common is the 4-way flat connector, found on small utility trailers, while larger trailers may use the 7-way round plug for additional features like electric brakes.
Typical functions for a 4-way connector:
- Ground (white)
- Tail/running lights (brown)
- Left turn/brake (yellow)
- Right turn/brake (green)
Understanding which wire controls each function helps you target your testing efficiently.
How Trailer Light Circuits Operate
When you activate a turn signal or brake pedal, your tow vehicle sends a 12V signal through the connector to the trailer light. A poor connection, damaged wire, or faulty bulb interrupts this signal. Testing with a multimeter helps pinpoint exactly where the circuit fails.
Common Problems In Trailer Light Systems
- Corroded connections at the trailer plug or light sockets.
- Damaged wiring from road debris or pinching.
- Burned-out bulbs or faulty LED units.
- Blown fuses in the tow vehicle.
- Improper grounding, often causing dim or intermittent lights.
Example: A trailer owner notices the right turn signal is dim. Testing reveals 7.5V at the light instead of 12V, traced to a corroded ground wire.

Credit: www.wikihow.com
Introduction To Multimeters For Trailer Light Testing
A multimeter is a versatile tool that measures voltage, continuity, resistance, and more. For trailer light diagnosis, it’s indispensable for beginners and experienced users alike.
Types Of Multimeters
There are two main types:
- Analog multimeters: Use a needle to display values. They’re less common today but useful for observing fluctuating readings.
- Digital multimeters (DMMs): Display results on an LCD and are more accurate, user-friendly, and widely available.
When choosing a multimeter, prioritize models with auto-ranging and a clear display for ease of use.
Key Multimeter Features For Trailer Diagnosis
- Voltage measurement (DC 0, 20V range)
- Continuity tester (beep function)
- Resistance (Ohms, Ω)
- Removable probes for easy pin or socket access
Pro Tip: For trailer work, select a DMM with a robust casing and replaceable fuses, as accidental shorts can occur during probe testing.
Safety Precautions
- Always test with the trailer disconnected from the vehicle’s ignition (unless testing live signals).
- Avoid touching metal probe tips together during use.
- Wear gloves and safety glasses when working around open wires.
- Never test a circuit above your multimeter’s rated voltage.
Preparing To Test Trailer Lights
Before starting, gather all necessary tools and set up your work area for efficient, safe testing.
Tools And Materials Checklist
- Digital multimeter
- Trailer wiring diagram (specific to your make/model)
- 12V test light (optional for quick checks)
- Electrical contact cleaner
- Assorted screwdrivers and pliers
- Replacement bulbs or LED modules
- Dielectric grease (for reassembly)
Locating Trailer Light Connectors
Trailer connectors are typically found:
- Near the trailer tongue
- Under the rear bumper of the tow vehicle
- At the rear of each light fixture
Consult your owner’s manual or an online resource for a wiring diagram (such as the Wikipedia: Trailer Connector).
Preparing The Trailer And Tow Vehicle
- Park on a level surface and chock the wheels.
- Disconnect the trailer from the tow vehicle (unless signal testing is required).
- Ensure all light switches on the tow vehicle are accessible.
- Clean plug connectors with a contact cleaner to ensure accurate readings.
Example: When I tested my utility trailer, a quick spray of contact cleaner on the 4-way plug eliminated intermittent voltage drops during testing.

Credit: www.youtube.com
Step-by-step Guide: Checking Trailer Lights With A Multimeter
This section provides a detailed, beginner-friendly walkthrough, followed by advanced troubleshooting tips.
Step 1: Checking For Power At The Connector
- Set your multimeter to DC voltage (20V range is typical).
- Insert the black probe into the ground pin (usually white wire).
- Insert the red probe into the pin for the function you wish to test (e.g., left turn).
- Activate the function (e.g., turn on left blinker in the tow vehicle).
- Read the display. You should see 12, 13V for a healthy signal.
| Connector Pin | Function | Expected Voltage | Common Issue if Low |
|---|---|---|---|
| White | Ground | 0V | Poor grounding |
| Brown | Tail/Running | 12V | Blown fuse, broken wire |
| Yellow | Left Turn/Brake | 12V (flashing) | Faulty signal wire |
| Green | Right Turn/Brake | 12V (flashing) | Corroded connector |
If you see less than 12V, there may be a wiring issue, dirty connector, or blown fuse.
Step 2: Testing Continuity Of Trailer Wiring
Continuity testing checks if a wire is intact from end to end.
- Disconnect trailer from vehicle.
- Set multimeter to continuity mode (look for the speaker or diode symbol).
- Touch one probe to the connector pin and the other to the corresponding light socket or wire end.
- Listen for the beep (or check for a low resistance value).
If there’s no beep or the reading is very high, the wire may be broken or corroded.
Step 3: Checking Ground Connections
Poor grounding is a leading cause of dim or malfunctioning lights.
- Set the multimeter to resistance (Ohms, Ω).
- Place one probe on the trailer frame (bare metal).
- Place the other probe on the ground wire at the connector.
- A low reading (close to 0Ω) means a good ground. High resistance indicates a problem.
Pro Tip: Clean the ground connection with a wire brush and re-test until you achieve a low-resistance reading.
Step 4: Testing At The Light Socket
If you have power at the connector but the light isn’t working:
- Remove the light lens or bulb.
- Set multimeter to DC voltage.
- Probe the socket terminals while activating the light function.
- Expect 12V at the socket for a functioning circuit.
If there’s voltage but the light doesn’t work, the bulb or LED unit is likely faulty.
Step 5: Advanced Troubleshooting (shorts, Open Circuits, And Voltage Drop)
For persistent or intermittent issues, advanced users should:
- Check for shorts: Set the multimeter to continuity and test between each pin and ground. There should be no continuity except at the ground pin.
- Inspect for voltage drop: Activate the light and measure voltage at both the connector and the socket. A significant drop (over 1V difference) indicates a wiring or connector issue.
Example: A boat trailer repeatedly blew the right turn fuse. Testing revealed a short between the green wire and the frame, caused by insulation damage near a mounting clamp.
Common Trailer Light Problems And Solutions
Understanding the most frequent issues helps you fix problems faster and prevent future failures.
Faulty Bulbs Or Led Modules
Symptoms: One or more lights not working; other functions on the same circuit operate normally.
- Test: Check socket voltage. If voltage is present, replace the bulb or LED.
- Solution: Use only compatible bulbs/LEDs as per the trailer’s manual.
Corroded Or Damaged Connectors
Symptoms: All lights fail, flicker, or work intermittently.
- Test: Inspect and clean connector pins. Measure voltage at both sides of the connector.
- Solution: Clean with contact cleaner or replace the connector if pins are corroded or loose.
Broken Or Shorted Wires
Symptoms: Only certain lights fail, or fuses blow repeatedly.
- Test: Perform continuity checks along the suspect wire. Flex wiring gently while testing to reveal hidden breaks.
- Solution: Repair or replace damaged wire segments. Protect new wiring with loom or conduit.
Poor Ground Connections
Symptoms: Dim lights, erratic operation, or all lights on one side malfunction.
- Test: Measure resistance from the ground pin to the trailer frame.
- Solution: Clean, tighten, or relocate ground connection points.
Blown Fuses In Tow Vehicle
Symptoms: No trailer lights work; vehicle lights are functional.
- Test: Locate and check trailer light fuse in the vehicle’s fuse box.
- Solution: Replace fuse. If it blows again, check trailer wiring for shorts.
| Problem | Symptom | Primary Testing Method | Solution |
|---|---|---|---|
| Burned-out Bulb | Single light out | Socket voltage check | Replace bulb |
| Corroded Connector | All/intermittent lights | Visual/voltage test at plug | Clean/replace connector |
| Broken Wire | One circuit fails | Continuity test | Repair/replace wire |
| Poor Ground | Dim/flickering lights | Resistance test | Clean ground point |
| Blown Fuse | No trailer lights | Fuse inspection | Replace/check for shorts |
Real-world Examples And Case Studies
Case Study 1: Utility Trailer With Intermittent Brake Light
A user noticed the brake lights on his utility trailer worked only when the road was dry. Using a multimeter, he found normal voltage at the connector but low voltage at the light socket during rain. Investigation revealed water intrusion corroding the socket contacts.
Cleaning and sealing the socket resolved the issue.
Case Study 2: Boat Trailer Suffering From Blown Fuses
A boat trailer repeatedly blew the right turn signal fuse. A multimeter continuity check between the green wire and the trailer frame showed a short circuit. Upon inspection, the wire had been pinched under a bracket, exposing the copper. Repairing the wire and securing it properly stopped the fuse from blowing.
Case Study 3: Car Hauler With Dim Running Lights
A car hauler’s running lights were noticeably dim. Voltage checks showed a 2. 5V drop between the tow vehicle connector and the trailer sockets. This was traced to a corroded main ground wire. Replacing the ground wire restored full brightness.
Case Study 4: Enclosed Trailer With No Left Turn Signal
The left turn signal on an enclosed trailer failed to operate. The owner used a multimeter to check continuity from the plug to the light, finding an open circuit. A break was found in the wire near the trailer hinge, where flexing had eventually caused it to snap.
Splicing in a new wire fixed the turn signal.
Case Study 5: Advanced User, Voltage Drop Troubleshooting
An advanced user with a large horse trailer noticed LED tail lights flickering when the brakes were applied. Using a multimeter, he measured voltage drop across each connection point, eventually pinpointing a high-resistance splice inside the trailer wall. Replacing the splice eliminated the flicker.
Pro Tip: Always check for voltage drop under load, problems may only appear when lights are switched on, not during idle voltage checks.
Advanced Tips For Professionals And Experienced Diyers
For those comfortable with electrical testing, a multimeter enables proactive diagnosis and deeper system insights.
Using Multimeter For Preventive Maintenance
- Periodically measure voltage at all sockets to catch developing issues before failure.
- Check continuity of ground circuits during annual trailer servicing.
- Test resistance of LED modules (should be within manufacturer specs).
Diagnosing Connector Wear And Pin Tension
- Test for voltage drop while wiggling connectors; movement-induced drops suggest worn pins.
- Use probe adapters for accurate, hands-free readings in tight spaces.
Tracing Complex Wiring Harnesses
- Label wires and use color-coded alligator clips for multi-point testing.
- Use the multimeter’s min/max function to capture intermittent shorts or voltage sags during road tests.
Integrating Multimeter Data With Other Tools
- Combine with a clamp meter to measure current draw on each light circuit, verifying proper operation.
- Log results in a maintenance database for trend analysis and warranty tracking.
Pro Tip: For trailers stored outside, proactively seal connectors with dielectric grease and use marine-grade heat-shrink terminals for repairs.
Comparing Multimeter Testing To Other Methods
While test lights and visual inspections are useful, multimeters offer greater diagnostic accuracy and flexibility.
| Testing Method | Pros | Cons | Best Use Case |
|---|---|---|---|
| Multimeter | Precise voltage/continuity, advanced diagnosis | Requires learning curve, two hands | Full troubleshooting, advanced repairs |
| Test Light | Simple, quick go/no-go test | No voltage measurement, can miss weak circuits | Quick checks at connector |
| Visual Inspection | No tools required, instant for obvious issues | Misses hidden faults, not diagnostic | Bulb/connector checks, first step |
| Scan Tool (Advanced Vehicles) | Reads vehicle-side errors, advanced data | Expensive, not trailer-specific | Integrated tow systems, commercial fleets |
Pro Tip: Use a multimeter to verify repairs made after using a test light, this ensures full system health and legal compliance.
Maintenance Best Practices And Preventive Checks
Routine maintenance extends the life of your trailer lighting system and minimizes road-side surprises.
Monthly And Pre-trip Inspections
- Test all lights (brake, turn, tail, and marker) before every trip.
- Check voltage at the connector if any light is dim or non-functional.
- Inspect wiring for abrasion, pinching, or insulation damage.
Annual Deep-dive With Multimeter
- Perform continuity and voltage checks on every circuit.
- Clean and lubricate connector pins with dielectric grease.
- Replace any suspect wires, connectors, or ground points.
Protecting Against Corrosion
- Seal all wiring splices with heat-shrink tubing.
- Use marine-grade connectors for trailers exposed to water.
- Store trailers under cover when possible.
Keeping Documentation
- Maintain a wiring diagram and test results in your trailer’s logbook.
- Record any repairs or upgrades, including parts used and test values.
Example: A commercial fleet reduced trailer downtime by 30% after implementing annual multimeter-based light system audits (source: Fleet Maintenance Magazine).
Frequently Asked Questions
How Often Should I Check My Trailer Lights With A Multimeter?
For safety and legal compliance, it’s wise to check your trailer lights with a multimeter at least before every long trip or monthly during regular use. If your trailer is used commercially or in harsh environments, a quick voltage and continuity check every few weeks helps catch potential failures early.
Can I Use A Multimeter To Test Led Trailer Lights, Or Only Incandescent Bulbs?
Yes, you can use a multimeter to test both LED and incandescent trailer lights. The testing procedure is the same, measure voltage at the socket and check continuity of the wiring. For LEDs, ensure the polarity is correct during testing, as LEDs only operate with the correct positive and negative connections.
What Should I Do If I Find Voltage At The Connector But Not At The Light Socket?
If voltage is present at the trailer connector but missing at the light socket, there is likely a break, short, or high-resistance connection somewhere along the wire run. Use the multimeter’s continuity function to check each section of wire between the connector and the socket, flexing the wire to reveal intermittent faults.
Is It Safe To Test Trailer Lights With The Trailer Connected To The Vehicle?
Yes, it is generally safe to test for voltage and function with the trailer connected, especially when activating turn signals or brake lights. However, for continuity or resistance testing, always disconnect the trailer from the tow vehicle to avoid damaging vehicle electronics or getting false readings.
Are There Any Smartphone Apps Or Wireless Tools That Can Replace A Multimeter For Trailer Light Testing?
While some wireless diagnostic tools and smartphone apps exist, they often require special adapters and do not offer the versatility or accuracy of a traditional digital multimeter. For the most comprehensive and reliable trailer light testing, a dedicated multimeter remains the best choice. For a detailed overview of trailer wiring standards, refer to the Owens & Minor Trailer Wiring Guidelines.
Ensuring your trailer lights are functioning properly not only keeps you compliant with the law but also protects everyone on the road. By mastering the use of a multimeter, even as a beginner, you gain control over your trailer’s safety and reliability, minimizing costly repairs and unexpected breakdowns.
With regular checks, preventive maintenance, and the confidence to troubleshoot both simple and complex issues, you’ll travel with peace of mind no matter the journey ahead.