
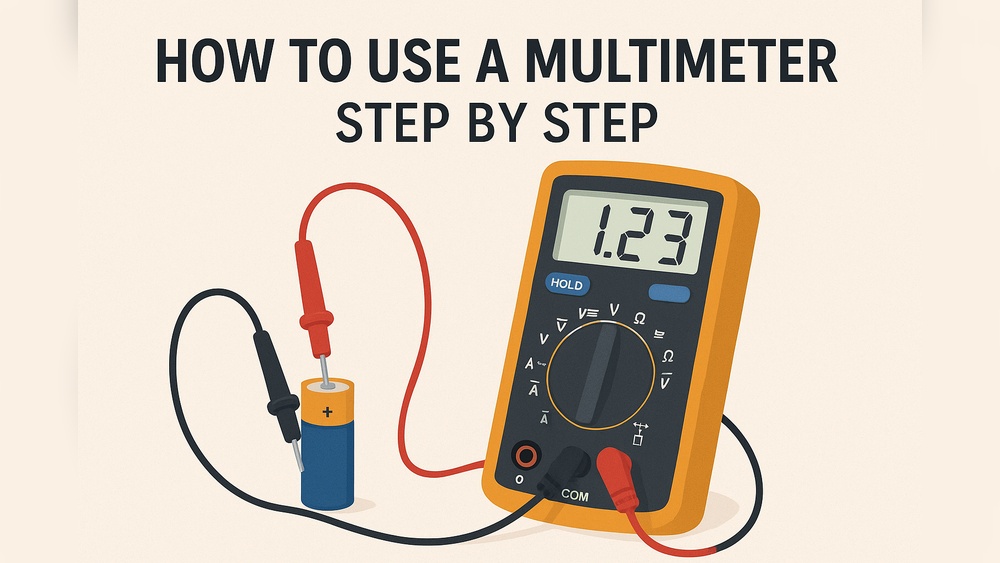
Using a multimeter can seem intimidating if you’ve never handled one before, but mastering this tool opens up a world of possibilities for diagnosing and troubleshooting electrical issues, whether you’re fixing a household appliance, working on a car, or pursuing electronics as a hobby. A multimeter is an essential instrument for both beginners and seasoned professionals, helping you measure voltage, current, resistance, and much more with precision.
Understanding how to use a multimeter step by step not only empowers you to solve everyday problems but also deepens your grasp of electrical theory and safe practices. This guide will provide a comprehensive, beginner-friendly walkthrough while also diving into advanced techniques, expert tips, and real-world examples.
By the end, you’ll be equipped to confidently tackle a wide range of electrical measurements and gain insights that only come with hands-on experience and a teacher’s perspective.
Key Takeaways
- Multimeters measure voltage, current, resistance, continuity, and more, making them versatile diagnostic tools.
- Safety is paramount: Always follow proper procedures to avoid shock or damaging equipment.
- Step-by-step instructions guide beginners from setup to advanced troubleshooting.
- Comparison tables help you choose the right multimeter and function for your needs.
- Real-world examples illustrate practical applications in home, automotive, and electronics contexts.
- Expert tips and advanced techniques enhance accuracy and troubleshooting skills.

Credit: www.wikihow.com
Understanding The Multimeter: Types, Features, And Functions
A multimeter is a multifunctional device that combines several electrical measurement tools into a single, compact unit. Before diving into the steps, it’s crucial to understand what a multimeter is, the types available, and the primary features you’ll use.
What Is A Multimeter?
A multimeter (also known as a volt/ohm meter or VOM) is an electronic measuring instrument that combines several measurement functions. The three most common are:
- Voltage (Volts, V)
- Current (Amperes, A)
- Resistance (Ohms, Ω)
Modern digital multimeters (DMMs) typically also include functions for continuity, diode testing, and sometimes temperature or frequency.
Analog Vs. Digital Multimeters
There are two main types of multimeters:
| Feature | Analog Multimeter | Digital Multimeter (DMM) |
|---|---|---|
| Display | Needle & Scale | Digital LCD/LED |
| Accuracy | Lower | Higher |
| Ease of Use | Requires interpretation | Easy to read |
| Durability | More robust | May be sensitive to drops |
| Extra Features | Few | Many (e.g., auto-ranging, data hold) |
For beginners and most professionals, a digital multimeter is recommended due to its accuracy, ease of use, and additional features.
Key Features And Symbols
Most digital multimeters include:
- Rotary dial: Selects measurement mode (V, A, Ω, etc.)
- Probes/leads: Red (positive) and black (common/ground)
- LCD display: Shows numerical readings
- Input jacks: Where you plug in the probes, typically marked as COM (common), VΩmA, and 10A or 20A for high current
Common symbols:
- V: Voltage (DC or AC, often V⎓ for DC, V~ for AC)
- A: Current (A⎓ for DC, A~ for AC)
- Ω: Resistance
- Diode symbol: Tests diodes
- Sound wave/continuity: Audible continuity test
Pro Tip:
When choosing your first multimeter, opt for one with auto-ranging, it automatically selects the measurement range, reducing the chance of incorrect readings or damaging the meter.

Credit: www.wikihow.com
Getting Started: Preparing Your Multimeter For Use
Before making any measurement, it’s important to prepare your multimeter properly. This section guides you through essential setup steps that prevent errors and ensure safety.
Step 1: Inspect Your Multimeter And Probes
- Check for physical damage (cracks, damaged wires, loose connectors).
- Ensure the battery is fresh and installed correctly.
- Confirm the probes are intact, with no exposed wire or bent tips.
Step 2: Set Up The Probes
- Insert the black probe into the COM (common) jack.
- Insert the red probe into the appropriate jack:
- For voltage or resistance: Use the port labeled VΩmA.
- For high current (usually >200mA): Use the 10A or 20A port.
Step 3: Power On And Select Measurement Type
- Turn the rotary dial to the desired measurement (e.g., V⎓ for DC voltage).
- For auto-ranging meters, no need to set a range. For manual-ranging, select a range higher than the expected value.
Step 4: Safety Precautions
- Ensure your hands are dry and you’re not standing in water.
- Never touch metal probe tips together during measurement.
- Double-check meter settings before connecting to a circuit.
Warning: Measuring current incorrectly (e.g., placing probes across a voltage source instead of in series with the load) can blow a fuse or damage the meter.
Example:
In my experience, students often overlook the importance of connecting the probes to the correct ports, leading to inaccurate readings or even blown fuses. Always check the port labels before proceeding.
:max_bytes(150000):strip_icc()/how-to-use-a-multimeter-5194980-01-acb6dc0e02254358b597206a4b1ba48e.jpg "How Do You Use A Multimeter Step By Step")
Credit: www.thespruce.com
Step-by-step Guide: Measuring Voltage, Current, And Resistance
Now that you’re familiar with the setup, let’s walk through the most common measurements you’ll perform with a multimeter. Each function requires a slightly different technique, so follow the steps closely.
Measuring Voltage
Voltage measurement is essential for checking batteries, wall outlets, and electronic circuits.
How To Measure Dc Voltage
- Set the dial to DC voltage (V⎓).
- Plug probes: Black to COM, red to VΩ.
- Connect probes: Place black probe on the negative/ground point, red probe on the positive.
- Read the display: The voltage appears on the screen.
Example: Checking a 1.5V AA battery. Place the black probe on the flat end (negative), the red on the raised end (positive). A healthy battery should read close to 1.5V.
How To Measure Ac Voltage
- Set the dial to AC voltage (V~).
- Plug probes: As above.
- Connect probes: Across the two points you want to measure (e.g., both prongs of an outlet).
- Read the display.
Warning: AC voltage (such as from wall outlets) can be dangerous. Always use one hand, keep fingers behind probe guards, and never touch metal tips.
Measuring Current
Current measurement is more advanced, as it requires breaking the circuit and connecting the meter in series.
How To Measure Dc Current
- Move the red probe to the high-current port (10A or 20A) if expecting large currents.
- Set the dial to DC current (A⎓).
- Break the circuit: Disconnect one end of the wire or component.
- Connect probes: Place the meter between the two open ends, so current flows through the meter.
- Read the display.
Pro Tip: Start with the highest current range, then move down for accuracy.
How To Measure Ac Current
Not all multimeters measure AC current directly. For household AC, use a clamp meter or an advanced multimeter with a clamp attachment.
Measuring Resistance
Resistance checks the opposition to current flow in a component (like a resistor).
- Set the dial to Ω.
- Ensure power is OFF in the circuit to avoid damage.
- Connect probes across the component.
- Read the display.
Example: Testing a 1kΩ resistor. The meter should read close to 1000Ω.
Continuity And Diode Testing
- Continuity: Set dial to continuity (soundwave symbol). Touch probes together; a beep confirms function. Use on wires or fuses to check for breaks.
- Diode Test: Set to diode symbol. Place probes across the diode; a forward voltage (e.g., 0.6V for silicon) indicates functionality.
Troubleshooting Common Measurement Errors
- No reading: Check probe ports, dial setting, and battery.
- Overload/OL: Select a higher range or check for open circuit.
- Negative readings: Swap probe polarity.
Real-world Examples: Multimeter Applications In Everyday Life
Understanding theory is valuable, but applying your multimeter in real-life scenarios cements your knowledge. Here are practical examples from home, automotive, and electronics troubleshooting.
Example 1: Checking A Dead Outlet At Home
A wall outlet isn’t powering devices. To diagnose:
- Set meter to AC voltage (V~).
- Insert probes into outlet slots.
- Read voltage: If it reads ~120V (US) or ~230V (Europe), the outlet is live. If 0V, check the breaker or wiring.
Example 2: Testing A Car Battery
Car won’t start, suspecting a weak battery:
- Set meter to DC voltage (V⎓).
- Black probe to battery negative, red to positive.
- Read voltage: Below 12.4V indicates a weak battery.
Example 3: Diagnosing A Faulty Extension Cord
Cord isn’t powering devices:
- Set to continuity.
- Unplug cord.
- Probe each plug prong to corresponding socket hole.
- Beep indicates a good connection; silence means a break inside.
Example 4: Measuring Current Draw Of A Device
Want to know how much current a phone charger draws:
- Break the positive wire.
- Connect meter in series on DC current (A⎓).
- Read current: Should match device rating.
Example 5: Identifying A Burned-out Resistor
In electronics repair, suspect a resistor is bad:
- Power off device.
- Set to resistance (Ω).
- Probe across resistor.
- OL (overload) or much higher value means it’s failed.
These examples showcase how a multimeter is invaluable for quick diagnostics, saving time and money on repairs.
Advanced Techniques: Maximizing Your Multimeter’s Potential
Once you’re comfortable with basic measurements, advanced features and techniques can enhance your troubleshooting and diagnostic abilities.
Using Auto-ranging Vs. Manual Ranging
Auto-ranging meters automatically select the appropriate range, ideal for beginners. Manual-ranging gives advanced users more control, helpful when measuring rapidly changing signals or for greater accuracy.
Measuring Capacitance And Frequency
Some DMMs offer extra functions:
- Capacitance: Set dial to capacitance (F). Discharge capacitor, connect probes, read value.
- Frequency: Set dial to Hz, connect probes across signal source.
These are useful for advanced electronics work, such as testing capacitors in power supplies or measuring signal frequencies in audio equipment.
Data Hold And Min/max Functions
- Data Hold: Freezes the current reading on the display, useful in tight spaces.
- Min/Max: Captures the lowest/highest value during fluctuating measurements.
Relative (δ) Mode
Measures the difference from a reference value. For example, zero the meter on a test lead, then measure a resistor to exclude lead resistance.
Using A Clamp Meter For High Currents
For high-current AC measurements, a clamp multimeter can measure current by clamping around a wire, no need to break the circuit.
Example:
When I tested a high-power air conditioner, I used a clamp meter to safely measure the current draw without disconnecting wires, ensuring accuracy and safety.
Advanced Troubleshooting: Signal Tracing
In complex circuits, use the multimeter to follow voltage/current at various points, identifying where a signal is lost or where excessive voltage drop occurs.
Pro Tip:
Keep a logbook of measurements for each device you test. This helps spot trends over time and speeds up future diagnostics.
Choosing The Right Multimeter For Your Needs
The best multimeter for you depends on your intended use, budget, and required features. Below is a comparison of popular multimeter types for different scenarios.
| Use Case | Recommended Multimeter Type | Key Features | Price Range (USD) |
|---|---|---|---|
| Beginner/Home Use | Basic Digital Multimeter | Auto-ranging, voltage/resistance/continuity | $10 – $50 |
| Automotive | Automotive DMM | DC amps, RPM, temperature, duty cycle | $30 – $120 |
| Professional/Electrician | Industrial DMM | CAT III/IV safety, True RMS, high accuracy | $80 – $300+ |
| Electronics Hobbyist | Advanced DMM | Capacitance, frequency, microamps, PC interface | $50 – $200 |
Warning: When working on household AC or industrial systems, always use a meter rated for the environment (e.g., CAT III/IV for high-voltage circuits).
Safety Guidelines: Preventing Hazards And Damage
Multimeters are safe when used correctly, but mistakes can cause injury or damage. Follow these essential safety practices:
General Safety Tips
- Always start with the highest range when unsure of the measurement magnitude.
- Never measure resistance or continuity on a live circuit.
- Check probe insulation for cracks and replace if damaged.
- Wear safety glasses when working near high voltage or current.
Fuses And Internal Protection
Most quality multimeters have internal fuses to protect against overload. If your meter stops measuring current, check and replace the fuse with the correct rating.
Cat Ratings
Multimeters are categorized by CAT ratings (I-IV), indicating the level of surge protection:
- CAT I: Small electronics
- CAT II: Appliances, household circuits
- CAT III: Distribution panels, industrial
- CAT IV: Utility-level, outdoor
Always use a meter with an appropriate CAT rating for your application.
Handling High Voltage
- One hand rule: Keep one hand behind your back to reduce shock risk.
- Use insulated tools and stand on an insulated mat.
Example:
A professional electrician always checks for voltage with the meter before touching wires, even if the breaker is off, circuits can be miswired.
Advanced Measurement Techniques: Accuracy And Troubleshooting
For those seeking to master multimeter use, understanding measurement accuracy, error sources, and advanced troubleshooting is crucial.
Understanding Measurement Accuracy
- Accuracy is how close your reading is to the true value, often specified as ±(percent of reading + digits).
- Use quality meters for critical measurements; cheaper models may have greater error.
Dealing With Parasitic Voltages
Sometimes, you’ll measure voltage where none should exist, often due to induced voltages or floating wires. Use the meter’s low-impedance (LoZ) mode if available to eliminate ghost readings.
Four-wire (kelvin) Measurement
For low-resistance measurements, advanced meters use four probes to eliminate lead resistance, improving accuracy.
Troubleshooting With Multimeters
- Voltage drop: Check across wires and connectors to find high-resistance faults.
- Signal tracing: Follow the signal from input to output to locate failures.
- Component isolation: Remove and test suspect parts out of circuit for accurate readings.
| Troubleshooting Scenario | Meter Setting | Expected Reading | Action if Faulty |
|---|---|---|---|
| Dead light switch | AC Voltage | 120V (US) | Check breaker/wiring |
| No sound from speaker | Continuity | Beep (good wire) | Replace wire |
| Blown fuse | Resistance | ~0Ω (good) | Replace fuse |
Pro Tip:
When troubleshooting intermittent faults, use the meter’s min/max feature to catch voltage drops or surges that happen too quickly to see.
Maintaining And Calibrating Your Multimeter
Proper care ensures your multimeter remains accurate and reliable for years.
Regular Cleaning
- Wipe the meter and probes with a damp cloth, avoid solvents.
- Keep the display and dial free from dust and debris.
Battery Replacement
- Replace the battery as soon as the low battery indicator appears to avoid erratic readings.
- Use the recommended battery type.
Fuse Replacement
- Always replace blown fuses with the exact type and rating specified in the manual.
- Never bypass or use improvised fuses.
Calibration
For professional or high-precision work, annual calibration by a certified lab is recommended. This ensures readings remain within the manufacturer’s specified accuracy.
Storing Your Multimeter
- Store in a protective case to prevent physical damage.
- Keep away from extreme temperatures and moisture.
Example: A colleague’s multimeter lost accuracy after being left in a hot car trunk, always store your meter in a controlled environment.
Frequently Asked Questions
What Is The Difference Between Auto-ranging And Manual-ranging Multimeters?
Auto-ranging multimeters automatically select the most appropriate measurement range for the value being tested, making them very user-friendly for beginners. Manual-ranging models require you to set the range yourself, which can be faster and more precise for advanced users who know the expected value.
Auto-ranging is ideal for general use, while manual-ranging offers more control for specific applications.
Can A Multimeter Be Used To Test Rechargeable Batteries And Power Banks?
Yes, a multimeter can test the voltage of rechargeable batteries and power banks. However, for lithium-ion batteries and power banks, it’s important to measure only when the device is powered off and to avoid shorting the terminals. Some advanced multimeters also measure battery internal resistance, which gives more insight into battery health.
How Do I Know If My Multimeter Is Suitable For High-voltage Or Industrial Applications?
Check your multimeter’s CAT rating (e.g., CAT III, CAT IV) and maximum voltage specification, usually found in the manual or on the case. For industrial or high-voltage work, use a meter rated at least CAT III or IV, with appropriate surge protection. For further guidance, refer to standards outlined by the IEC 61010.
Why Does My Multimeter Show A Small Voltage When Measuring An Open Circuit?
This is often caused by capacitive coupling or “phantom voltage” from nearby live wires. High-impedance meters can detect these stray voltages, but they cannot deliver current. For a more accurate reading, use a low-impedance (LoZ) function if your meter has it, which drains the phantom voltage.
Is It Possible To Damage A Multimeter, And How Can I Prevent It?
Yes, common causes of damage include measuring voltage or current in the wrong mode, exceeding the meter’s maximum ratings, or using the wrong probe ports. Always double-check settings before measuring, use the correct CAT-rated meter for the environment, and refer to your meter’s manual for safe operation. For more information, consult reputable guides such as the Fluke Multimeter Guide.
Mastering the use of a multimeter is a skill that pays dividends across countless DIY, automotive, and professional projects. With the right approach, attention to safety, and practice, you’ll gain both confidence and accuracy in your measurements, whether you’re just starting or pushing into advanced troubleshooting.
The combination of step-by-step guidance, practical examples, and expert tips provided here ensures that you’re well-equipped to tackle any electrical measurement task with your multimeter.