
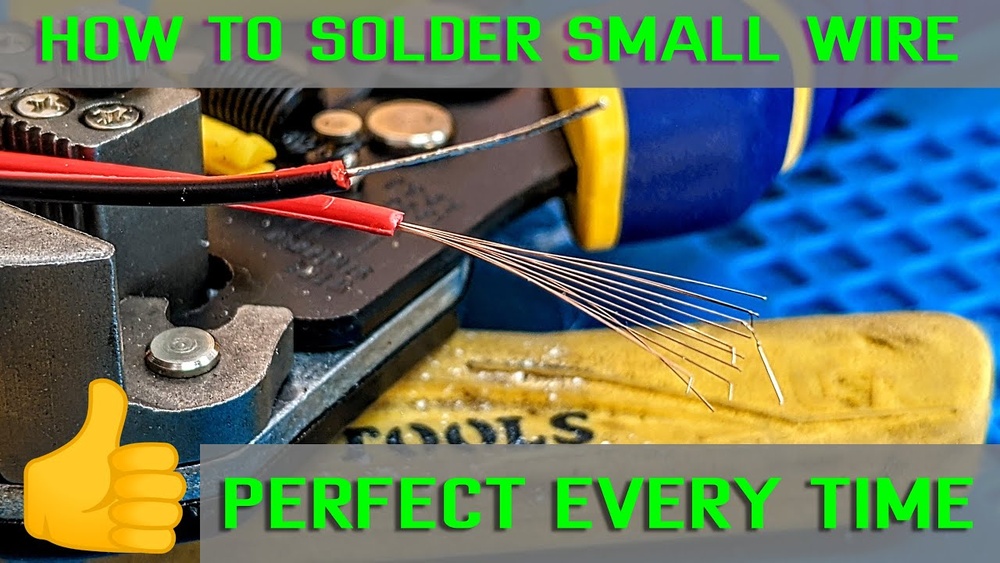
Soldering small wires is an essential skill for electronics enthusiasts, professional technicians, and engineers working on intricate electrical assemblies. Whether repairing delicate headphones, assembling microcontroller circuits, or crafting custom wire harnesses, the ability to create reliable solder joints can make the difference between a project’s success or failure. Yet, soldering small wires brings unique challenges: limited working space, risk of heat damage, and the need for precision. Mastering the best practices for soldering small wires not only ensures strong electrical connections but also extends the lifespan of devices and components.
Precision soldering is not just about joining two conductors, it’s about understanding the science of materials, the right choice of tools, and applying proven techniques that minimize errors. Through years of hands-on experience and careful study, professionals have developed workflows and safety protocols that yield consistent, high-quality results.
This article draws from expert knowledge, real-world examples, and industry standards to guide you through every step of soldering small wires, from preparation to inspection. Whether you’re a hobbyist aiming for cleaner projects or a technician responsible for mission-critical repairs, the insights below will equip you with the skills and confidence to achieve exceptional solder joints on even the tiniest wires.
Key Takeaways
- Proper preparation is crucial for successful soldering of small wires, including cleaning and tinning.
- Choosing the right soldering tools, iron, tip, and solder type, directly affects joint quality and reliability.
- Heat control and technique are vital to prevent insulation damage and achieve strong, conductive joints.
- Safety measures and workspace organization reduce risk and improve efficiency.
- Post-soldering inspection ensures joints meet electrical and mechanical standards.
- Real-world examples reveal how professionals overcome common soldering challenges.

Credit: www.matthewsvolvosite.com
Understanding The Fundamentals Of Soldering Small Wires
Precision soldering requires a solid grasp of the physical processes at play and the challenges unique to small wire connections. The quality of a solder joint is determined by the interplay of heat, materials, and technique.
The Science Behind A Good Solder Joint
A strong solder joint relies on the metallurgical bond formed when molten solder fuses with the base metals, typically copper conductors, at a microscopic level. The solder, an alloy (commonly tin-lead or lead-free tin-silver-copper), flows over the cleaned metal surfaces, creating both mechanical and electrical continuity.
Key attributes of a good small-wire solder joint:
- Bright and shiny appearance indicating proper wetting
- Minimal excess solder, just enough to cover the joint
- Smooth, concave fillet without blobs or spikes
- No visible gaps between wire and pad or terminal
Challenges Unique To Small Wires
Small wires, those with gauges from 28 AWG down to 40 AWG or thinner, pose several challenges:
- Limited surface area makes heat transfer tricky and increases the risk of overheating
- Thin insulation is easily damaged by excessive heat
- Fine conductors can break under mechanical stress or poor handling
- Flux residue is harder to clean from small spaces
Addressing these issues requires careful tool selection, precise technique, and attention to detail throughout the soldering process.
Types Of Small Wires Commonly Soldered
Understanding the types of small wires encountered in electronics can guide material and technique choices:
| Wire Type | Common Applications | Typical Gauge | Insulation Material |
|---|---|---|---|
| Solid Core Copper | Breadboards, jumper wires | 22, 30 AWG | PVC, Teflon |
| Stranded Copper | Audio cables, robotics | 28, 36 AWG | PVC, silicone |
| Litz Wire | RF coils, precision instruments | 30, 40+ AWG | Enamel, silk |
| Magnet Wire | Motors, transformers | 32, 44 AWG | Polyurethane, enamel |

Credit: www.overclockers.com
Essential Tools And Materials For Soldering Small Wires
The right equipment can dramatically improve both the quality and efficiency of small-wire soldering. In my experience, investing in reliable, precision-focused tools pays off in fewer errors and better results.
Soldering Irons And Tips
Choosing the correct soldering iron is foundational:
- Temperature-controlled irons provide precise heat, crucial for small wires.
- Fine-point tips (conical or needle-shaped) allow access to tight spaces and deliver heat exactly where needed.
- Low-wattage irons (15, 30W) are preferred for wires under 28 AWG to avoid overheating.
Pro Tip: Use a stand with a cleaning sponge or brass wool to maintain tip cleanliness and temperature stability.
Solder Types And Flux
Selecting the right solder and flux is key:
- Lead-free solder (Sn96.5/Ag3.0/Cu0.5) is environmentally preferred, but has a higher melting point.
- 60/40 tin-lead solder melts at ~188°C (370°F), offering easier flow and wetting (use where allowed).
- Rosin-core solder includes flux for cleaning as you solder; for stubborn oxidized wires, add extra rosin flux.
Comparison of Solder Types for Small Wires:
| Solder Type | Melting Point | Flux Type | Best For |
|---|---|---|---|
| 60/40 Tin-Lead | 188°C / 370°F | Rosin | Prototyping, repairs |
| Lead-Free (SAC305) | 217°C / 423°F | Rosin or No-Clean | RoHS-compliant builds |
| Silver-Bearing | 221°C / 430°F | No-Clean | High-reliability, audio |
Ancillary Tools
A well-equipped workspace should include:
- Fine-tipped tweezers for positioning wires
- Wire strippers with adjustable stops to avoid nicking conductors
- Helping hands or PCB vise to stabilize parts during soldering
- Magnifying glass or microscope for inspecting joints
- Isopropyl alcohol and lint-free wipes to clean flux residue
Safety Equipment
Protect yourself and your workspace:
- Fume extractor or small fan to remove solder fumes
- Heat-resistant mat to prevent burns or damage
- Safety glasses for eye protection
Credit: www.youtube.com
Step-by-step Process: Soldering Small Wires With Precision
Mastering the sequence of steps for soldering small wires is essential for repeatable, high-quality results. Each stage builds upon the last, from preparation to inspection.
Preparing Wires And Workspace
Start with a clean, organized workspace. Lay out all necessary tools within easy reach and ensure adequate lighting. Preparation steps include:
- Cut wires to length using sharp cutters to avoid crushing.
- Strip insulation carefully; for small wires, use precision strippers or thermal wire strippers to prevent conductor damage.
- Twist stranded wires gently to prevent fraying.
- Clean wire ends with isopropyl alcohol to remove oils or oxidation.
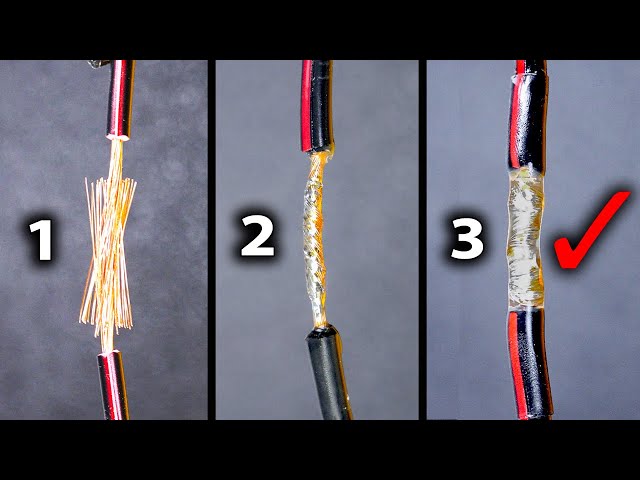
- Tin the wires by applying a small amount of solder to the exposed conductor, ensuring an even, shiny coating.
Pro Tip: For enamel-coated wires (like magnet wire), gently scrape off insulation with a blade or heat the tip until the enamel melts before tinning.
Setting The Correct Temperature
- Adjust the iron to just above the solder’s melting point (e.g., 350°C/662°F for lead-free).
- Allow the iron to fully heat and verify with a tip thermometer if available.
- Wipe the tip on a damp sponge or brass wool for optimal heat transfer.
Joining The Wires
For small wires, several joining techniques are effective:
Inline Splice (western Union Splice)
- Overlap stripped ends by 5, 10 mm.
- Twist together securely.
- Apply heat to the joint and feed solder until fully wetted.
Lap Joint (side-by-side)
- Lay wires parallel with stripped ends overlapping.
- Apply a bit of flux to the joint.
- Heat both wires simultaneously, then apply solder.
Soldering To Pads Or Terminals
- Insert tinned wire through pad hole or onto terminal.
- Apply iron to pad and wire together, then feed solder.
- Remove iron and allow joint to cool undisturbed.
Pro Tip: Always heat the joint, not the solder. Solder should flow onto the heated metal, not just melt on the iron tip.
Cooling And Inspecting
- Let the joint cool naturally; do not blow on it as this can cause cracks.
- Visually inspect for a shiny, concave solder fillet.
- Gently tug the wire to confirm mechanical strength.
- Use a continuity tester to verify electrical connection.
Cleaning Residue
- Remove flux residue with isopropyl alcohol and a lint-free swab, especially important for small wires in high-density circuits.
Advanced Techniques And Pro Tips For Reliable Small Wire Soldering
As projects grow in complexity, advanced techniques and nuanced knowledge become invaluable. These methods help ensure reliability, even under demanding conditions.
Heat Management Strategies
- Pre-tin both parts (wire and pad/terminal) before final joining to minimize heat exposure.
- Use heat sinks (small alligator clips) on wires to absorb excess heat and protect insulation.
- For ultra-fine wires, consider a temperature-limited soldering station to avoid overheating.
Soldering Multi-stranded And Shielded Wires
Multi-stranded wires are prone to fraying and cold joints:
- Twist strands tightly and pre-tin for easy handling.
- For shielded cables, fold back the shield and solder separately to maintain signal integrity.
Example: When repairing a pair of in-ear headphones, I found that folding the shield away from the audio core before soldering minimized shorts and produced a more robust repair.
Using Solder Paste And Hot Air
For extremely fine wires or surface-mount pads:
- Solder paste can be applied with a micro-syringe.
- A hot air rework station allows for controlled, even heating.
- This technique is common in manufacturing or microelectronic repair.
Soldering Under Magnification
- A microscope or high-magnification lens helps identify cold joints or stray strands.
- Inspection under magnification ensures the smallest defects are caught and corrected.
Repairing And Removing Old Solder
- Use desoldering braid or a vacuum pump to remove excess solder.
- Clean surfaces thoroughly before re-soldering to ensure a fresh bond.
Real-world Examples And Case Studies
Learning from real-world scenarios highlights practical problem-solving and the impact of best practices.
Example 1: Repairing A Broken Headphone Cable
A common repair involves reconnecting ultra-thin wires in earbud cables (often 32, 38 AWG). The wires are enamel-coated and color-coded.
Steps taken:
- Gently stripped the enamel with a blade and cleaned with alcohol.
- Tinned the wires with extra rosin flux to ensure solder adhesion.
- Used a temperature-controlled iron set to 320°C to avoid melting insulation.
- Joined the wires with a lap joint, using tweezers for positioning.
- Insulated the joint with heat-shrink tubing for durability.
Example 2: Assembling A Microcontroller Harness
When building a custom harness for a robotics project:
- Used stranded 28 AWG wires to connect sensors to a microcontroller board.
- Pre-tinned wires and pads for quick soldering.
- Employed a PCB vise and magnifier for stability and inspection.
- Checked each connection with a continuity meter before final assembly.
Example 3: Restoring Vintage Electronics
Restoring a 1970s radio, I encountered oxidized, fine-gauge magnet wires.
- Used chemical flux to clean oxidized wire ends.
- Carefully soldered using a low-wattage iron to prevent overheating.
- Tested the circuit after each joint to verify function and avoid troubleshooting later.
Common Mistakes And How To Avoid Them
Even experienced technicians can fall prey to errors. Recognizing and preventing common mistakes is crucial.
Overheating And Damaging Insulation
- Excessive heat can melt or shrink insulation, exposing conductors and risking shorts.
- Always use the lowest effective temperature and limit heat exposure time (typically under 2 seconds for small wires).
Cold Solder Joints
- Result from insufficient heating, leaving a dull, grainy appearance.
- Ensure both wire and pad are heated thoroughly before applying solder.
Excess Solder Or Solder Bridges
- Using too much solder can cause bridges between adjacent wires or pads.
- Apply just enough solder to cover the joint; remove excess with desoldering braid.
Inadequate Mechanical Connection
- Solder should not be the only thing holding wires together, mechanically twist or loop wires before soldering for robustness.
Incomplete Cleaning
- Residual flux can attract moisture and corrosion.
- Always clean joints with isopropyl alcohol post-soldering.
Quality Control And Inspection Of Soldered Small Wires
Ensuring each joint meets quality standards is vital for both safety and performance, especially in professional or mission-critical applications.
Visual And Mechanical Inspection
- Inspect for shiny, concave fillets, no cracks, and absence of stray strands.
- Use a magnifier to check for subtle defects.
- Perform a gentle pull test to verify mechanical integrity.
Electrical Testing
- Continuity testing with a multimeter confirms electrical connection.
- Insulation resistance testing ensures no shorts between adjacent conductors.
Comparative Table: Visual Inspection Criteria
| Feature | Acceptable Joint | Defective Joint |
|---|---|---|
| Appearance | Shiny, smooth, concave | Dull, grainy, irregular |
| Coverage | Full coverage, no gaps | Partial coverage, exposed wire |
| Excess Solder | Minimal, neat fillet | Blobs, spikes, bridges |
| Mechanical Strength | Withstands gentle pull | Breaks or moves easily |
Documentation And Record-keeping
- For professional work, document each step and test result, especially in regulated industries.
- Photograph joints for later reference if issues arise.
Rework Protocols
- If a joint fails inspection, desolder and clean before reattempting.
- Repeated heating can degrade conductors; limit rework cycles.
Safety Considerations When Soldering Small Wires
Safety is paramount, especially when working with fine wires and potentially hazardous materials.
Handling Lead-based Solder
- Lead is toxic; always wash hands after use and avoid inhaling fumes.
- Use lead-free solder where possible to minimize exposure risk.
- Dispose of waste solder and wipes according to local regulations.
Ventilation And Fume Extraction
- Soldering produces fumes from flux and metals.
- Use a fume extractor or work in a well-ventilated area.
- Avoid soldering in enclosed, poorly ventilated spaces.
Personal Protective Equipment
- Safety glasses protect from accidental splashes of molten solder.
- Heat-resistant gloves can prevent burns, especially for beginners.
Electrical Safety
- Unplug soldering irons when not in use.
- Allow tools to cool on a heat-resistant surface.
Fire Safety
- Keep flammable materials away from the soldering area.
- Have a fire extinguisher nearby, especially in professional shops.
For more on soldering safety, the Wikipedia Soldering Safety section offers additional guidelines.
Frequently Asked Questions
What Is The Best Way To Strip Insulation From Ultra-fine Wires Without Damaging Them?
For ultra-fine wires (30 AWG and smaller), use thermal wire strippers that melt insulation without applying mechanical force, greatly reducing the risk of nicking or breaking the wire. Alternatively, precision mechanical strippers with adjustable tension can be used carefully, but always test on scrap wire first.
Is It Necessary To Use Additional Flux When Soldering Small Wires With Rosin-core Solder?
While rosin-core solder contains some flux, additional flux can be beneficial when working with oxidized wires, surfaces with old solder, or challenging alloys. A small dab of high-quality rosin or no-clean flux can improve wetting and joint reliability, especially on wires exposed to air for long periods.
How Can I Prevent Solder Joints From Becoming Brittle In High-vibration Environments?
To combat brittleness, mechanically secure wires before soldering, twist or loop them for strength. After soldering, reinforce the joint with heat-shrink tubing or conformal coating to absorb mechanical stress. Avoid excessive solder, which can create rigid, fracture-prone joints.
What Is The Safest Way To Solder Wires Near Sensitive Components?
When working near heat-sensitive components, use heat sinks (such as alligator clips) to draw heat away from the component. Work quickly and efficiently, using the lowest effective temperature, and allow each joint to cool naturally before proceeding to the next.
Can I Use A Butane Soldering Iron Or Soldering Gun For Small Wire Work?
Butane irons and large soldering guns often provide too much uncontrolled heat for small wires, increasing the risk of insulation damage or cold joints. Precision, temperature-controlled electric soldering irons with fine tips are strongly recommended for small wire applications.
If you’re looking for additional tips and guidelines, the iFixit Soldering Guide is a reputable resource.
Mastering the art of soldering small wires is a blend of science, technique, and patience. With the right tools, careful preparation, and a commitment to quality, you can achieve reliable, long-lasting connections in even the most compact electronics projects. Whether you’re restoring vintage gear, building cutting-edge prototypes, or making everyday repairs, these best practices will serve as the foundation for your success.