
Soldering is a foundational technique in electronics, jewelry making, plumbing, and even stained glass artistry. Despite its widespread application, many beginners and even seasoned professionals overlook one critical practice: tinning the soldering iron. This seemingly simple step is often bypassed, yet it can spell the difference between a flawless joint and a failed connection. Whether you’re repairing a circuit board or crafting a custom wire harness, knowing why and how to tin your soldering iron is pivotal for consistent, high-quality results.
When I first started soldering, I underestimated the importance of tinning. I found myself frustrated with stubborn solder, oxidized tips, and unreliable joints. After speaking with experienced technicians and revisiting expert guides, I realized that skipping the tinning process was the root of my issues.
In this article, we’ll explore the science behind tinning, its practical benefits, and actionable tips to maintain your tools and elevate your soldering skills.
Key Takeaways
- Tinning a soldering iron ensures optimal heat transfer, prevents oxidation, and extends tip life.
- Skipping tinning leads to poor solder joints, increased tip wear, and maintenance headaches.
- Regular tinning is essential for both leaded and lead-free soldering applications.
- Real-world examples show that consistent tinning can reduce rework and improve soldering efficiency.
- Different tip coatings and solder types affect tinning frequency and technique.
- Proper tinning is a cornerstone of professional and hobbyist soldering success.
The Science Behind Tinning A Soldering Iron
Understanding the metallurgical principles behind tinning is crucial for appreciating its impact on soldering outcomes. When a soldering iron heats up, its tip, usually made of copper with an iron coating, is exposed to air. This exposure initiates oxidation, where the metal reacts with oxygen to form an insulating layer, often visible as dullness or blackening.
Oxidation: The Soldering Iron’s Hidden Enemy
Oxidation forms rapidly at soldering temperatures (250°C to 400°C or 480°F to 750°F). The oxidized layer acts as a thermal barrier, impeding heat transfer from the tip to the workpiece. Without proper heat delivery, the solder may not flow well, resulting in cold joints, a common cause of electrical failures.
How Tinning Prevents Oxidation
Applying a thin layer of molten solder (tinning) to the tip forms a protective barrier. This solder coating isolates the iron surface from oxygen, significantly slowing further oxidation. The tin layer also acts as an effective thermal conductor, ensuring quick and consistent heat transfer.
The Role Of Solder Composition
Different solder alloys interact with the tip differently. Leaded solder (Sn63Pb37) wets and coats tips easily, while lead-free solders (typically containing tin, silver, and copper) require higher temperatures and can increase oxidation rates. This makes tinning even more critical when working with modern, lead-free materials.
Heat Transfer Efficiency
A properly tinned tip maximizes thermal conductivity. The solder layer acts as a bridge, efficiently transferring heat from the iron to the solder and components. This not only speeds up the process but also reduces thermal stress on sensitive electronic parts.

Credit: www.reddit.com
Practical Benefits Of Tinning
The advantages of tinning go beyond theory. In real-world soldering, this routine step impacts everything from joint quality to tool longevity.
Enhancing Solder Flow And Joint Quality
A tinned tip readily accepts and transfers solder, enabling smooth, controlled flow onto the workpiece. This is particularly important for surface mount and fine-pitch components, where even minor inconsistencies can compromise connections. Tinning ensures a shiny, well-formed joint with minimal effort.
Extending Soldering Tip Life
Repeated heating and cooling, combined with exposure to flux and oxidation, wears down soldering tips. Tinning acts as a sacrificial layer, the solder erodes before the underlying metal does. Consistent tinning can double or triple tip lifespan, reducing replacement costs and downtime.
Improving Work Efficiency
A well-tinned tip heats up target areas more efficiently, allowing for faster soldering cycles and less time spent troubleshooting cold or incomplete joints. In manufacturing environments, this translates to measurable productivity gains and lower rework rates.
Reducing Maintenance And Cleaning
Oxidized tips require aggressive cleaning, often with abrasive pads or chemical tip refreshers. By maintaining a tinned surface, users can simply wipe the tip on a damp sponge or brass wool, minimizing wear and the need for harsh treatments.
Example: Electronics Assembly Line
On a high-volume electronics assembly line, technicians who consistently tinned their soldering irons reported 30% fewer tip replacements annually compared to those who did not. This not only saved money but also reduced interruptions and improved overall product quality.

Credit: softsoldering.com
Step-by-step Guide To Tinning A Soldering Iron
Developing a consistent tinning routine is essential for both beginners and experts. The following steps detail how to properly tin your soldering iron for optimal results.
Preparing The Soldering Iron
- Power on the iron and set it to the recommended temperature for your solder type (typically 350°C for leaded, 370-400°C for lead-free).
- Allow the tip to reach full operating temperature.
Cleaning The Tip
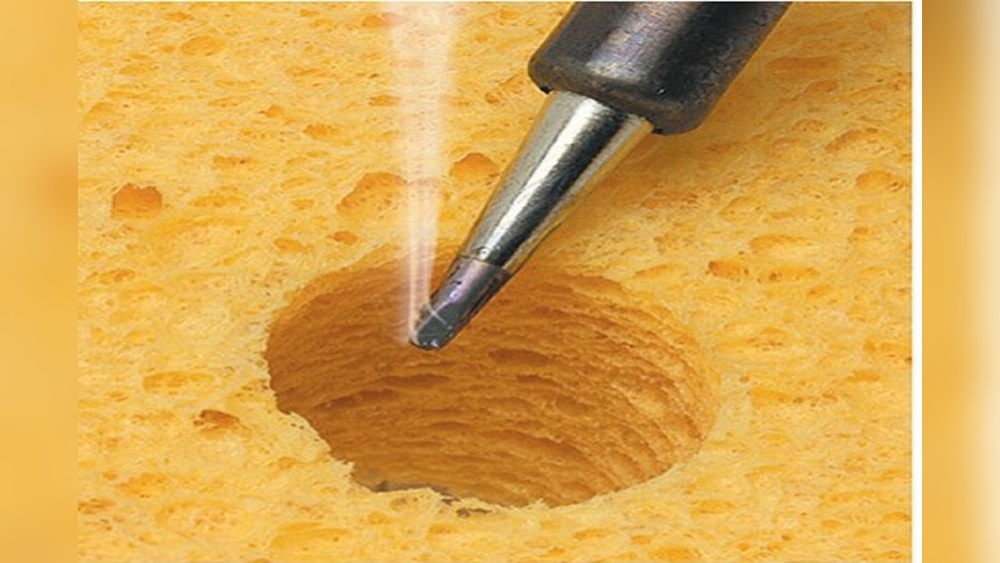
- Wipe the tip gently on a damp cellulose sponge or brass wool to remove old solder and debris.
- If the tip is heavily oxidized, use a tip cleaner or reconditioner paste as directed by the manufacturer.
Applying Solder
- Feed fresh solder onto the tip, rotating it to ensure complete coverage.
- The solder should flow evenly, forming a shiny, mirror-like coating.
Final Touches
- Wipe off any excess solder, leaving a thin, uniform layer.
- Repeat this process every 10-15 minutes during extended use, and always before shutting off the iron.
Example: Hobbyist Soldering Session
During a three-hour hobbyist soldering session, tinning the tip every 15 minutes prevented oxidation build-up, resulting in consistently strong joints and minimal cleanup at the end.
Common Mistakes And How To Avoid Them
- Over-tinning: Applying too much solder can cause drips and contamination.
- Under-tinning: Bare patches expose the tip to oxidation and reduce performance.
- Neglecting lead-free requirements: Lead-free tips may require more frequent tinning due to higher operating temperatures.
Pro Tip: Always tin the tip before storing the soldering iron. This provides a protective layer during cool-down and storage, ensuring the tip is ready for your next project.

Credit: www.electrolock.com
Tinning Techniques For Different Soldering Iron Tips
Not all soldering tips are created equal. The material, shape, and coating influence both the tinning process and the frequency required.
Comparison Table: Soldering Tip Types And Tinning Requirements
| Tip Material/Coating | Tinning Frequency | Special Notes |
|---|---|---|
| Copper (Uncoated) | Every 5-10 minutes | Oxidizes quickly; requires constant tinning |
| Iron-Plated Copper | Every 10-15 minutes | Standard for most electronics work |
| Nickel or Chrome-Plated | Less frequent (every 20-30 minutes) | Harder to wet; use aggressive flux if needed |
| Special Alloy Tips | As directed by manufacturer | Follow specific instructions for longevity |
Chisel Vs. Conical Tips
- Chisel tips: Offer a broader surface area, making them easier to tin and clean.
- Conical tips: Require careful rotation to ensure full coverage.
Smd Vs. Through-hole Soldering
- SMD (Surface Mount Device) tips: Tend to be smaller and require precise tinning to avoid bridging tiny pads.
- Through-hole tips: Can handle slightly more solder but still benefit from a thin, even layer.
Lead-free Vs. Leaded Solder
Lead-free solders (e.g., SAC305) often require higher temperatures and can be more aggressive on tips. Tinning with lead-free solder is essential to prevent premature tip erosion, especially for RoHS-compliant production.
Example: Educational Robotics Kit
When assembling an educational robotics kit with lead-free solder, students who maintained a tinned tip throughout the session reported fewer failed joints compared to those who only tinned at the start.
Real-world Impacts Of Skipping Tinning
Neglecting to tin your soldering iron doesn’t just result in minor inconveniences, it can cause significant setbacks, especially in professional environments.
Increased Defect Rates
Un-tinned tips struggle to transfer heat efficiently, leading to:
- Cold solder joints (weak electrical connections)
- Bridged joints (short circuits)
- Excessive solder usage
Higher Maintenance Costs
Oxidized tips often require:
- Frequent replacement
- Special cleaning products (which add cost and time)
- More downtime for maintenance
Table: Impact Of Tinning Frequency On Soldering Outcomes
| Tinning Practice | Average Joint Quality | Tip Replacement Interval | Maintenance Time per Month |
|---|---|---|---|
| Frequent (every 10-15 mins) | High (95% pass rate) | 6 months | 15 minutes |
| Occasional (once per session) | Moderate (80% pass rate) | 3 months | 30 minutes |
| Rare/Never | Poor (65% pass rate) | 1 month | 1 hour |
Case Study: Small-batch Manufacturing
A small-batch electronics manufacturer noticed a spike in returns due to faulty solder joints. After auditing their assembly process, they realized technicians were not consistently tinning tips. With mandatory tinning every 15 minutes, defect rates dropped by 20% within one production cycle.
Example: Diy Audio Amplifier Build
In an online DIY audio forum, users who reported problems with hum and signal dropout often traced the issue back to poor solder joints. Many admitted to skipping the tinning step, highlighting its importance even for hobbyist projects.
Maintenance And Troubleshooting For Soldering Iron Tips
Proper tip care goes hand-in-hand with tinning. A well-maintained tip ensures longevity and consistent performance.
Cleaning Best Practices
- Use brass wool for regular cleaning; it removes oxidized solder without damaging the tip.
- Avoid using abrasive materials (e.g., sandpaper) which can strip protective coatings.
Recognizing And Restoring Oxidized Tips
Signs of oxidation include:
- Dull, blackened surface
- Poor solder wetting
- Sluggish heat transfer
Restoration steps:
- Use a commercial tip reactivator or a mixture of flux and fresh solder.
- Heat the tip and apply the mixture, then wipe clean and re-tin.
When To Replace The Tip
Tips should be replaced if:
- The plating is pitted or worn through.
- The tip cannot be tinned after cleaning and reactivation.
- Solder refuses to wet the tip, even with aggressive flux.
Storage And Shutdown
Always apply a final tinning layer before power-off. This protects the tip during cool-down and storage, reducing oxidation during downtime.
Pro Tip: Store the soldering iron in a holder with the tip facing downward. This prevents excess solder from running back toward the handle and keeps the tip ready for immediate use.
Tinning In Specialized Soldering Applications
Not all soldering jobs are equal. Certain industries and tasks have unique tinning requirements.
High-reliability Electronics (aerospace, Medical Devices)
- IPC standards require strict tip maintenance, including regular tinning, to ensure zero-defect production environments.
- Tinned tips are essential for consistent wetting on gold, silver, or heavily oxidized surfaces.
Jewelry And Artistic Soldering
- Artists often use custom-shaped tips. Tinning is vital to avoid discoloration or pitting of precious metals.
- Consistent tip condition ensures aesthetic quality and strong mechanical bonds.
Plumbing And Heavy-gauge Soldering
- Larger tips and higher temperatures increase oxidation risk. Tinning with lead-free plumbing solder is necessary for clean, reliable joints.
Surface Mount Technology (smt) Rework
- Ultra-fine tips require micro-tinning for precise heat control.
- Skipping tinning can easily damage delicate pads and components.
Comparison Of Tinning Products And Accessories
A variety of products are available to assist with tinning and tip maintenance. Choosing the right accessories can streamline the process.
Table: Tinning Products And Their Applications
| Product Type | Best Use Case | Advantages | Disadvantages |
|---|---|---|---|
| Tip Tinner/Paste | Reviving oxidized tips | Quick results, easy to use | Can be messy, expensive |
| Brass Wool Cleaner | Routine cleaning during use | No water needed, minimal tip wear | Needs replacement over time |
| Cellulose Sponge | General cleaning | Cheap, widely available | Can cause thermal shock |
| Flux Pen | Applying flux before tinning | Precise, clean application | Extra step, added cost |
Choosing The Right Solder
Selecting the right solder for tinning is important:
- Leaded solder (e.g., Sn63Pb37) is easier to work with but may not be RoHS compliant.
- Lead-free solder (e.g., SAC305) is required for most commercial products; use appropriate temperatures.
Accessory Recommendations
- Soldering iron stands with integrated cleaning stations make tinning easier and safer.
- Tip tinner blocks are invaluable for reviving old or neglected tips.
Pro Tip: Keep a dedicated roll of high-quality solder just for tinning. This ensures clean, uncontaminated tinning for best results.
Frequently Asked Questions
What Happens If I Never Tin My Soldering Iron?
If you never tin your soldering iron, the tip will rapidly oxidize, forming a barrier that drastically reduces heat transfer. This results in poor solder wetting, unreliable joints, and significantly shortens the life of your soldering tip. You may also find that solder simply beads up and falls off the tip, making it nearly impossible to create quality connections.
Can I Use Any Type Of Solder For Tinning?
While you can technically use most types of solder for tinning, it’s best to match the solder to your application. For electronics, use high-purity rosin-core solder (leaded or lead-free as required). For plumbing or jewelry, use the appropriate specialty solder.
Always avoid acid-core solder for electronics, as it can damage components and tips.
How Do I Restore A Heavily Oxidized Soldering Iron Tip?
To restore a heavily oxidized tip, heat the iron and apply a commercial tip tinner or a mix of flux and fresh solder. Allow the mixture to react, then wipe the tip clean and re-tin. If this fails, and the tip remains black or pitted, it’s often best to replace it.
Persistent oxidation indicates that the protective plating may have worn through.
Is Tinning Necessary With Temperature-controlled Soldering Stations?
Yes, tinning remains essential even with temperature-controlled stations. Although these stations reduce overheating and oxidation, the tip is still exposed to air and flux, both of which can cause degradation. Regular tinning ensures consistent performance and extends the life of your investment in high-quality equipment.
How Often Should I Re-tin My Soldering Iron During Use?
A good rule of thumb is to re-tin the tip every 10, 15 minutes during active soldering, and always before turning the iron off. If you notice the tip becoming dull or solder not wetting properly, tin immediately. Frequency may increase with lead-free solders or when working at higher temperatures.
References
Tinning a soldering iron is a simple habit that pays significant dividends in both productivity and quality. By understanding and applying the principles and techniques outlined above, you’ll not only protect your tools but also produce reliable, professional-grade work, whether you’re building the next great invention or repairing a cherished device.
Regular tinning transforms soldering from a frustrating chore into a rewarding craft.