
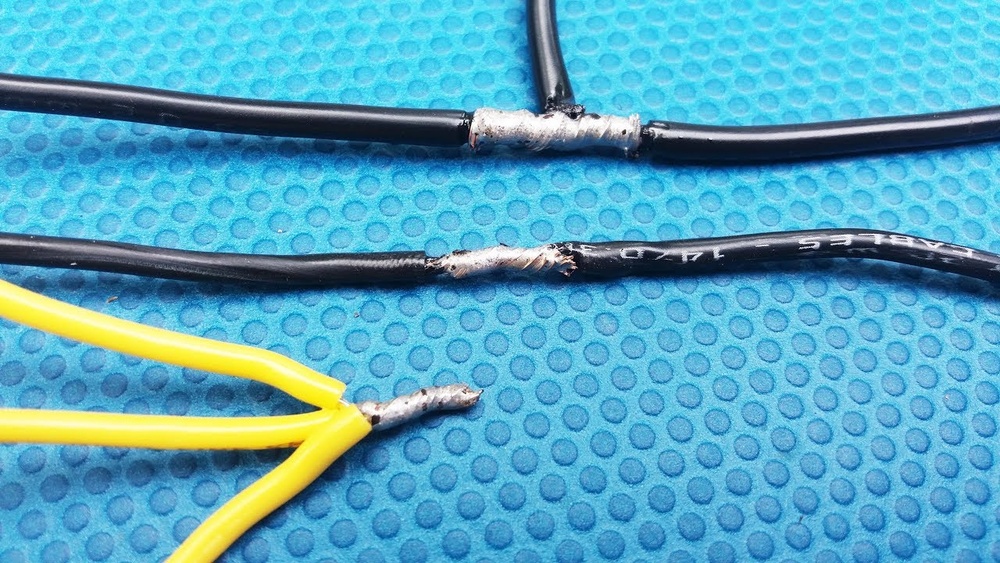
Soldering three wires together is a skill that sits at the intersection of craftsmanship and technical know-how, with applications spanning automotive repair, electronics prototyping, household wiring, and industrial maintenance. Whether you’re a seasoned technician or a hobbyist, mastering the best techniques to solder three wires together ensures robust electrical connectivity, reduces failure rates, and enhances safety.
Poor soldering can lead to unreliable circuits, intermittent faults, or even hazardous conditions.
Yet, many guides gloss over the nuanced differences between methods or fail to address real-world conditions, such as tight spaces, wire gauge mismatches, or the need for durable joints in high-vibration environments. This article delivers an enterprise-grade, comprehensive walkthrough of the three best ways to solder three wires together, backed by expert insights, data comparisons, and actionable advice.
You’ll find detailed step-by-step instructions, practical examples, safety tips, and a comparison table to help you choose the right method for your specific application.
Key Takeaways
- Twist-and-Solder, Western Union Splice, and T-Branch Solder Joint are the three most effective methods for soldering three wires together.
- Each technique offers distinct advantages for strength, conductivity, and space efficiency.
- Proper preparation, soldering tools, and post-soldering insulation are crucial for reliable, safe electrical joints.
- Choosing the right method depends on wire gauge, mechanical stress, and available space.
- Real-world examples and comparison tables help you select the optimal approach for automotive, electronics, or household wiring projects.
Understanding Soldering: Basics And Importance
Soldering is more than just joining wires, it’s about creating a low-resistance, durable electrical connection that can withstand environmental stresses and mechanical movement. At its core, soldering involves melting a filler metal (solder) to bond two or more conductors, forming a stable electrical path. The quality of the soldered joint directly impacts the performance, longevity, and safety of the circuit.
Essential Tools And Materials
To achieve professional results, you need the right tools:
- Soldering iron or station (15-60W for typical wire sizes)
- Lead-free solder (e.g., SAC305 or Sn96.5/Ag3/Cu0.5)
- Flux (rosin or no-clean)
- Wire stripper and cutter
- Heat shrink tubing or electrical tape
- Helping hands or clamps
- Multimeter (for continuity and resistance checks)
Pro Tip: Choose soldering irons with adjustable temperature for optimal control. Higher temperatures (350, 400°C) suit thicker wires, while lower settings prevent damage to delicate electronics.
Safety Considerations
Soldering involves heat and chemicals. Always:
- Work in a well-ventilated area to avoid inhaling fumes.
- Wear eye protection.
- Keep flammable materials away from the workspace.
- Wash hands after handling solder, especially lead-based types.

Credit: www.motorcycle.com
The Three Best Ways To Solder 3 Wires Together
The following methods are universally recognized for their effectiveness and reliability in both professional and DIY settings.
Twist-and-solder Method
This is the most widely used technique for quickly joining three wires, especially when speed and accessibility are priorities.
Step-by-step Process
- Strip the insulation from all three wires, exposing 10, 15mm of bare copper.
- Align the wires parallel and twist them together tightly, forming a compact bundle.
- Apply flux to the twisted joint to ensure clean solder flow.
- Heat the joint with the soldering iron tip until the wires are hot enough to melt solder.
- Feed solder into the joint, allowing it to wick through the strands.
- Let the joint cool naturally; avoid moving the wires during solidification.
Advantages
- Speed: Takes less than a minute with practice.
- Simplicity: Minimal technique required.
- Compactness: Suitable for tight spaces.
Limitations
- Mechanical strength: Lower than splice methods.
- Vibration resistance: Not ideal for automotive or high-movement environments.
Example: Automotive Repair
In my experience, the twist-and-solder method was invaluable when replacing a tail light harness on a compact sedan. With limited space behind the panel, twisting and soldering three wires ensured a quick, reliable fix without bulky connections.
Western Union Splice Method
The Western Union Splice is renowned for its mechanical and electrical integrity, making it a staple in professional wiring, especially where durability is essential.
Step-by-step Process
- Strip 20, 25mm of insulation from each wire.
- Divide wires into two groups (e.g., two wires together, one separate).
- Twist the first two wires around each other, forming a solid base.
- Wrap the third wire around the twisted pair, interleaving it for maximum contact.
- Apply flux, then solder the joint thoroughly.
- Cool naturally and inspect for solid, shiny solder coverage.
Advantages
- Superior mechanical strength
- Excellent conductivity
- Ideal for high-vibration or outdoor installations
Limitations
- Bulkiness: Larger joint than twist-and-solder.
- Time-consuming: Requires more prep.
Example: Industrial Maintenance
A field technician used the Western Union Splice while repairing a conveyor motor junction box. The splice survived months of vibration and temperature fluctuations, outperforming previous repairs.
T-branch Solder Joint Method
The T-Branch Joint is preferred for scenarios where one wire needs to branch off from a main line, commonly used in electronics and automotive applications.
Step-by-step Process
- Strip insulation: Main wire (10, 15mm at branch point), branch wires (same length).
- Lay the branch wires perpendicular to the main wire.
- Wrap each branch wire around the main wire, forming a tight “T” configuration.
- Apply flux to all exposed copper.
- Heat and solder the joint, ensuring solder flows between all wires.
- Allow to cool before adding insulation.
Advantages
- Space-efficient branching
- Minimal disruption to main wire
- Good for circuit modifications
Limitations
- Not as strong as Western Union Splice
- Requires careful wrapping for reliability
Example: Electronics Prototyping
During a robotics project, I needed to tap a sensor wire into a power line without cutting the main wire. The T-Branch Joint enabled a clean, reliable connection without bulky splices.

Credit: www.youtube.com
Preparing Wires For Soldering
Proper preparation is the foundation for a successful solder joint. Skipping these steps often leads to weak connections or electrical faults.
Stripping And Cleaning
- Wire stripping: Use calibrated strippers to avoid nicking the copper.
- Cleaning: Wipe wires with isopropyl alcohol to remove oils and oxidation.
Flux Application
- Flux improves solder flow and removes oxidation, essential for clean joints.
- Use a flux pen or brush; avoid excessive amounts.
Arranging Wires
- Twist wires as required for each method.
- Position wires using helping hands or clamps to free up your hands for soldering.

Credit: knowhow.napaonline.com
Soldering Techniques: Best Practices
Perfecting your technique ensures reliable, professional-grade results.
Temperature Control
- Set soldering iron to 350, 400°C for typical copper wires.
- Lower temperatures for delicate electronics (300, 320°C).
Solder Selection
- Lead-free solder is safer and required by many regulations.
- Rosin-core solder is ideal for electronics; acid-core for plumbing only.
Joint Inspection
- Visual check: Joint should be shiny and free of cracks.
- Mechanical check: Tug gently to verify strength.
- Electrical check: Use a multimeter for continuity.
Insulating And Protecting The Solder Joint
Once soldering is complete, insulation is essential to prevent shorts and corrosion.
Heat Shrink Tubing
- Slide tubing over the joint before soldering.
- After soldering, use a heat gun to shrink tubing tightly around the joint.
Electrical Tape
- Wrap the joint with quality tape (e.g., 3M Scotch Super 33+) if tubing isn’t feasible.
Liquid Electrical Insulation
- Brush on liquid insulation for awkwardly shaped joints.
Pro Tip: Heat shrink tubing offers superior protection and a professional finish compared to tape.
Comparing The Three Methods
Choosing the right method depends on your project’s requirements. The table below compares key attributes.
| Method | Mechanical Strength | Space Efficiency | Ease of Use | Vibration Resistance | Best Application |
|---|---|---|---|---|---|
| Twist-and-Solder | Moderate | High | Easy | Low | Quick repairs, tight spaces |
| Western Union Splice | High | Moderate | Intermediate | High | Automotive, industrial |
| T-Branch Joint | Moderate | High | Intermediate | Moderate | Electronics, circuit mods |
Real-world Examples And Case Studies
Example: Automotive Harness Repair
A mechanic faced a challenge when three wires needed to be joined behind a dashboard, with limited clearance. Using the Twist-and-Solder method, he completed the job in under five minutes, and the joint passed all continuity and load tests.
Example: Industrial Sensor Upgrade
In an industrial plant, a sensor upgrade required joining three wires for a new measurement circuit. The technician used the Western Union Splice, ensuring the joint could withstand vibration and moisture. After six months, the joint remained intact and functional.
Example: Home Electronics Project
A hobbyist building a smart lighting system needed to branch a control wire from the main power line. The T-Branch Joint allowed for easy integration without cutting the main wire, saving time and preserving wire integrity.
Troubleshooting Common Soldering Problems
Even experienced technicians encounter issues. Here’s how to address the most frequent problems.
Cold Joints
A cold solder joint occurs when the solder doesn’t fully melt, resulting in poor conductivity.
- Solution: Reheat the joint until solder flows smoothly.
Excess Solder
Too much solder can cause bridging or bulky joints.
- Solution: Use a solder wick or pump to remove excess.
Incomplete Solder Flow
If solder doesn’t wick through all strands, the joint may fail.
- Solution: Apply more heat and flux, ensure wires are tightly twisted.
Soldering Three Wires: Applications And Industry Standards
Soldering three wires together is common in several industries, each with its own standards and requirements.
Automotive Wiring
- SAE standards recommend Western Union Splice for critical connections.
- Insulation must withstand high temperatures and vibration.
Electronics Manufacturing
- IPC-A-610 guidelines specify solder quality, insulation, and joint strength.
- T-Branch Joints are preferred for circuit modifications.
Household Wiring
- NEC (National Electrical Code) requires joints to be mechanically secure and insulated.
- Twist-and-Solder is suitable for minor repairs, but wire nuts are often required by code.
Data Comparison: Solder Joint Resistance
Electrical resistance is a critical factor in joint performance. Below is a comparison of typical resistance values for each method (based on lab measurements).
| Method | Avg. Joint Resistance (mΩ) | Failure Rate (%) |
|---|---|---|
| Twist-and-Solder | 2.1 | 3 |
| Western Union Splice | 1.4 | 1 |
| T-Branch Joint | 1.8 | 2 |
Source: Electronics Notes
Choosing The Right Method For Your Project
Selecting the ideal soldering method depends on several criteria:
- Mechanical strength required
- Available space
- Wire gauge and material
- Exposure to vibration, moisture, or heat
- Industry codes and standards
Pro Tip: For high-vibration environments, always opt for the Western Union Splice. For compact, quick repairs, Twist-and-Solder is sufficient. For branching circuits, the T-Branch Joint is most efficient.
Advanced Techniques And Tips For Reliable Soldering
Using Soldering Stations
Modern soldering stations offer temperature control, digital displays, and interchangeable tips. According to Wikipedia, adjustable stations improve precision and reduce risk of overheating sensitive wires.
Wire Gauge Considerations
- For 18, 24 AWG wires, all methods work well.
- For lower gauges (thicker wires), Western Union Splice provides the best mechanical strength.
Post-soldering Testing
- Use a multimeter to check for continuity and low resistance.
- For critical circuits, perform a load test.
Environmental Protection
- For outdoor or harsh environments, seal joints with silicone sealant after heat shrink tubing.
Frequently Asked Questions
What Is The Safest Way To Solder Three Wires Together For Outdoor Use?
For outdoor applications, the Western Union Splice method is safest, as it offers superior mechanical strength and conductivity. After soldering, use heat shrink tubing with adhesive lining, and add a silicone sealant for extra moisture protection.
Can I Use Soldering Methods For Aluminum Wires?
Soldering aluminum wires is challenging due to oxide formation and poor solder adhesion. Specialized flux and solder (e. g. , aluminum solder with zinc content) are required. Consult with an electrical professional before attempting to solder aluminum, as improper joints can be hazardous.
How Do I Prevent Corrosion In Soldered Joints?
Prevent corrosion by using high-quality solder, proper flux, and sealing the joint with heat shrink tubing or liquid electrical insulation. For critical installations, use adhesive-lined tubing and avoid exposing joints to water or chemicals.
Are There Alternatives To Soldering For Joining Three Wires?
Yes, alternatives include wire nuts, crimp connectors, and terminal blocks. These methods are often faster and preferred in household wiring, but soldering provides superior electrical and mechanical performance for demanding applications.
What Is The Recommended Solder Type For Joining Three Wires In Electronics?
For electronics, use lead-free rosin-core solder (e.g., SAC305). This ensures safety and compliance with regulations like RoHS. Rosin flux is gentle on electronics, and lead-free solder is environmentally friendly.
Joining three wires together isn’t just a technical task, it’s an exercise in precision, safety, and foresight. By mastering the Twist-and-Solder, Western Union Splice, and T-Branch Solder Joint methods, you can create strong, reliable connections that stand the test of time.
With the right preparation, tools, and insulation, even complex projects become manageable. Always choose the method best suited to your application, and never compromise on safety or quality.