
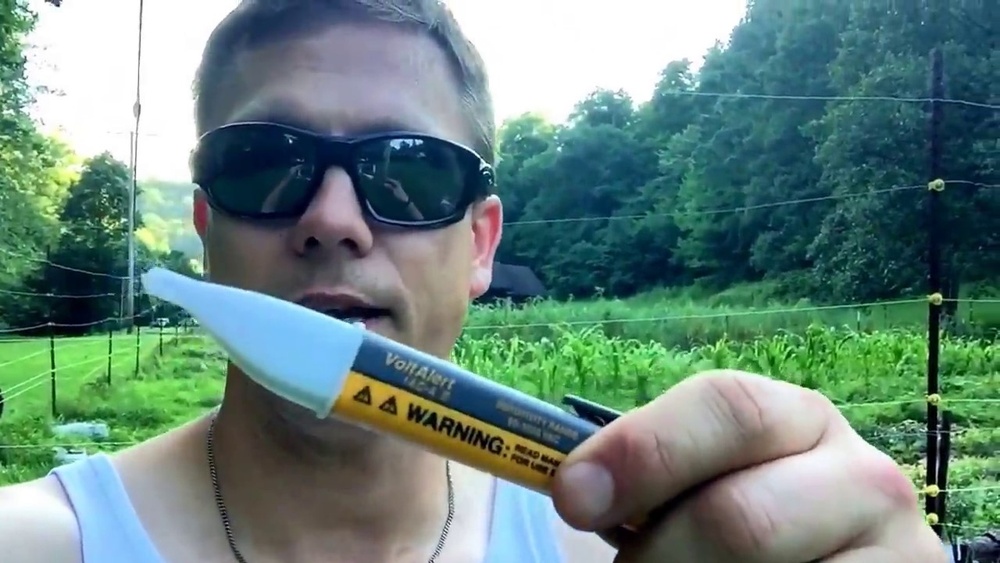
Testing an electric fence with a multimeter is both a practical skill and an essential safety measure for anyone managing livestock, protecting property, or maintaining perimeter security. Whether you’re a beginner seeking straightforward guidance or an advanced user aiming to fine-tune your electric fencing system, understanding how to properly use a multimeter can save time, money, and prevent potential hazards.
Many electric fence issues stem from poor connections, damaged wires, or faulty energizers, detecting these problems before they escalate is crucial.
In my experience, one of the most common errors is relying solely on a visual inspection or assuming the energizer is always performing as expected. A multimeter provides an objective, data-driven method to evaluate voltage, continuity, and grounding, giving you confidence your fence is functioning correctly.
This article will walk you through every step, from safety basics and equipment selection to advanced troubleshooting techniques, illustrated with real-world examples and comparative data to ensure both beginners and experts benefit from this comprehensive guide.
Key Takeaways
- Multimeters are essential for diagnosing and optimizing electric fence performance.
- Safety is paramount: Proper preparation and procedure prevent accidents.
- Step-by-step testing helps identify issues like low voltage, poor grounding, and wire breaks.
- Advanced tips enable users to fine-tune voltage, test under load, and interpret data accurately.
- Real-world examples and tables provide context for common troubleshooting scenarios.
Understanding Electric Fences And Multimeters
Electric fences deliver a controlled high-voltage pulse to deter animals or intruders. The system consists of an energizer (power source), conductor wires, insulators, posts, and ground rods. When a person or animal touches the fence, they complete the circuit, causing a brief, non-lethal shock.
A multimeter is a handheld device used to measure electrical values such as voltage (V), current (A), and resistance (Ω). For electric fence testing, the primary focus is on DC or pulsed voltage, ensuring the system is delivering adequate shock to serve its intended purpose.
Types Of Electric Fences
- Permanent fences: Typically use high-tensile wire and robust insulators for long-term installations.
- Temporary fences: Lightweight, often using polywire or tape for rotational grazing or short-term security.
- Solar-powered fences: Use solar panels to charge the energizer, common in remote locations.
Types Of Multimeters
- Analog multimeters: Use a needle display; less common today due to lower accuracy and durability.
- Digital multimeters (DMMs): Most popular, offering easy-to-read LCD screens and a range of measurement modes.
How Electric Fences Work
The energizer sends high-voltage, low-current pulses through the fence wire. The system is grounded using metal rods, ensuring a completed circuit when the fence is touched. Effective operation depends on several variables:
- Voltage output: Typically 2,000, 10,000 volts, depending on application.
- Pulse duration: Usually less than 1 millisecond.
- Grounding efficiency: Poor grounding is a leading cause of weak fences.

Credit: www.wikihow.com
Essential Safety Precautions
Testing an electric fence involves exposure to high voltage, even though the current is low, the shock can be uncomfortable or startling.
Preparing For Testing
- Wear insulated gloves and rubber-soled boots.
- Keep the area clear of children and pets.
- Inform others working nearby of your testing activity.
Multimeter Safety Settings
- Always set the multimeter to the appropriate voltage range (typically above 10,000V for electric fences).
- Use a multimeter rated for high-voltage pulse measurement, standard household meters may not be suitable.
- Inspect test leads and probes for damage before use.
Pro Tip:
If your multimeter is not rated for high-voltage pulse testing, use a specialized electric fence voltmeter. Attempting to measure high voltage with a standard multimeter can damage the device or cause injury.
Dealing With Weather And Environment
Rain or heavy dew can increase the risk of accidental shocks due to improved conductivity. Ensure hands and equipment are dry, and avoid testing during storms.

Credit: www.wikihow.com
Step-by-step Guide: Testing Electric Fence Voltage
Properly measuring electric fence voltage with a multimeter ensures your system is functioning as designed. This section covers the entire process, from setup to interpreting results.
Setting Up Your Multimeter
- Select Voltage Mode: Turn the dial to the highest DC voltage setting available.
- Insert Test Leads: Plug the black lead into the COM (common) jack and the red lead into the VΩ (voltage) jack.
- Check Battery: Ensure the multimeter’s battery is charged, low battery can cause inaccurate readings.
Testing The Fence Line
- Attach the Black Lead: Connect the black (ground) lead to a clean, unpainted section of the fence post or directly to the ground rod.
- Touch the Red Lead: Carefully touch the red (positive) lead to the fence wire.
- Read the Display: The voltage should briefly spike with each pulse. Record the highest value.
Example: When testing a solar-powered fence, I observed a reading of 8,500V, well within the recommended range for containing cattle.
Interpreting Voltage Readings
| Voltage Reading (V) | Fence Status | Typical Application |
|---|---|---|
| 8,000, 10,000 | Excellent | Predator control, horses, cattle |
| 5,000, 7,999 | Good | Sheep, goats, pigs |
| 2,000, 4,999 | Marginal | Pets, small animals |
| <2,000 | Poor | Insufficient for most purposes |
Troubleshooting Low Voltage
If your reading is below the target, consider:
- Checking for vegetation or debris touching the wire.
- Inspecting insulators for cracks or wear.
- Testing the energizer output directly.
Testing At Multiple Points
To identify where voltage drop occurs, test at:
- Energizer output terminal
- Midway along the fence line
- Furthest point from the energizer
Significant drops between points indicate a problem between those sections.

Credit: www.youtube.com
Advanced Diagnostics: Continuity And Ground Testing
Beyond voltage, effective fence management requires checking continuity (for wire breaks) and grounding efficiency.
Continuity Testing
A break in the wire will disrupt the circuit, resulting in weak or absent voltage.
- Set Multimeter to Continuity Mode: Indicated by a diode symbol.
- Connect Leads: One to each end of the suspected wire section.
- Listen for a Beep: Sound indicates a complete circuit; silence means a break.
Example: While troubleshooting a fence section, I found a section with no continuity. Closer inspection revealed a corroded splice causing the disconnect.
Ground System Testing
Poor grounding is a common cause of underperforming fences.
- Set Multimeter to Voltage Mode.
- Insert one probe into the earth 3 feet from the ground rod.
- Touch the other probe to the ground rod itself.
- Compare readings: Ideally, there should be minimal voltage difference.
| Voltage Difference (Ground Test) | Status | Recommendation |
|---|---|---|
| 0, 200V | Optimal | No action needed |
| 201, 500V | Marginal | Add more ground rods |
| >500V | Poor | Improve grounding system |
Resistance Measurement
High resistance in the fence line can reduce shock strength.
- Set multimeter to Ohms (Ω).
- Connect leads across a section of wire.
- Compare to manufacturer specs: Typical readings are a few ohms per 100 feet for high-tensile wire.
Testing The Energizer Directly
Disconnect the fence and test voltage at the energizer’s output terminals. If the reading is strong here but weak on the fence, the issue lies in the fence line or grounding.
Real-world Examples And Case Studies
Understanding how these techniques apply in practice helps bridge the gap between theory and implementation.
Example 1: Cattle Farm, Voltage Drops In Wet Weather
A midwestern cattle farmer noticed animals slipping through the fence after heavy rains. Testing with a digital multimeter revealed voltage at the energizer was 9,000V, but only 3,200V at the far end. Inspection found that wet grass was touching the lower wires, creating a path to ground and draining voltage.
After trimming vegetation and replacing a cracked insulator, the end-of-line voltage returned to 8,700V.
Example 2: Solar-powered Fence In Remote Area
A solar-powered fence protecting a wildlife preserve failed intermittently. Using a multimeter, the technician found the output dropped below 2,000V during cloudy periods. Further testing of the solar panel and battery circuit revealed a weak battery. Replacing the battery restored voltage to a consistent 7,500V, securing the perimeter.
Example 3: Hobbyist Garden, Wire Break Detection
A home gardener used a polywire fence to keep out rabbits but noticed bite marks and low performance. Continuity testing with a multimeter identified a break where a splice had loosened. After repairing the connection, the voltage returned to the recommended 4,500V, and animal incursions ceased.
Common Problems And Troubleshooting Tips
Electric fence systems can fail for numerous reasons. Here are typical issues and actionable troubleshooting advice.
Vegetation Contact
Grass, weeds, or branches touching the wire can drain energy from the system.
- Regularly mow or trim around the fence.
- Use higher wires where possible to reduce contact.
Insulator Degradation
UV exposure and weather can crack or degrade insulators.
- Inspect insulators at least twice a year.
- Replace any that show signs of wear.
Poor Connections
Loose or corroded wire connections interrupt voltage flow.
- Use proper connectors and check all joints.
- Apply anti-corrosion compound for long-term installations.
Faulty Energizer
If voltage is low at the energizer output, the energizer may be malfunctioning.
- Test with the fence disconnected to isolate the problem.
- Consult manufacturer specifications and consider replacement if necessary.
Inadequate Grounding
Improper grounding is the root cause of up to 80% of fence failures, according to Wikipedia.
- Use at least three ground rods, spaced 10 feet apart.
- Drive rods deep enough to reach moist soil.
Table: Troubleshooting Summary
| Problem | Possible Cause | Multimeter Test | Solution |
|---|---|---|---|
| Low voltage at fence end | Vegetation, poor connections | Voltage test at intervals | Clear growth, repair joints |
| No voltage | Wire break, bad insulator | Continuity test | Repair/replace section |
| Fluctuating voltage | Faulty energizer, loose wires | Test energizer output | Replace energizer, tighten wires |
| High resistance | Corroded wires, long runs | Ohms test | Replace wire, add ground rods |
Advanced Techniques For Electric Fence Optimization
For experienced users or those seeking to maximize fence performance, consider these advanced strategies.
Pulse Load Testing
Simulate the load an animal creates by using a resistor (e. g. , 500Ω) between the fence and ground during testing. This evaluates real-world shock strength.
- Connect the resistor across the fence and ground.
- Measure voltage drop, should remain above recommended levels.
Data Logging And Remote Monitoring
Advanced multimeters or fence testers can log voltage data over time, detecting intermittent faults.
- Use data loggers for large or remote systems.
- Integrate with remote monitoring for automated alerts.
Seasonal Adjustments
Soil moisture and vegetation growth change seasonally, affecting grounding efficiency and voltage.
- Test grounding after heavy rains or droughts.
- Adjust ground rods and maintain clear lines as needed.
Integrating With Other Security Systems
For high-security applications, integrate electric fencing with alarms or cameras.
- Use relay outputs from the energizer to trigger alarms if voltage drops unexpectedly.
Professional-grade Equipment
For complex or commercial setups, consider investing in specialized electric fence testers, which are designed for high-voltage pulse measurement and often include additional diagnostic features.
- Brands such as Gallagher, Speedrite, and Zareba offer robust options for advanced users.
Gallagher Electric Fencing provides detailed guides and product recommendations for both beginners and advanced users.
Maintenance Schedule And Best Practices
Regular testing and maintenance are crucial for reliable fence operation.
Monthly Checklist
- Test voltage at energizer and farthest fence point.
- Inspect for vegetation contact.
- Check insulator condition.
Seasonal Tasks
- Deep-clean ground rods and connections.
- Test soil moisture and adjust grounding accordingly.
- Re-evaluate fence layout for animal pressure changes.
Record Keeping
Document all testing results, repairs, and adjustments. This helps identify recurring issues and plan future upgrades.
When To Call A Professional
If you encounter persistent low voltage, multiple wire breaks, or complex grounding problems, consult an electric fence technician for a comprehensive assessment.
Frequently Asked Questions
What If My Multimeter Only Goes Up To 1,000 Volts?
Standard multimeters typically can’t measure the high voltage pulses from electric fences safely or accurately. Instead, use a specialized electric fence voltmeter designed for pulsed, high-voltage systems. Attempting to use a regular multimeter can result in inaccurate readings or damage to the device.
Can I Test An Electric Fence When It’s Wet Outside?
Yes, but exercise extra caution. Wet conditions increase conductivity, making accidental shocks more likely and sometimes causing voltage readings to appear lower due to increased grounding losses. Always wear insulated gloves and boots, and try to test after the fence has dried for the most consistent results.
How Often Should I Test My Electric Fence With A Multimeter?
For most systems, monthly testing is sufficient, but after severe weather or if you notice decreased animal deterrence, test more frequently. Commercial or high-security installations may require weekly checks and detailed logging.
Is It Possible To Test The Fence Without Disconnecting It From The Energizer?
Yes. Most voltage and continuity tests can be performed with the system energized. However, for resistance or direct energizer output tests, disconnecting sections may be necessary to isolate faults accurately.
What Causes Intermittent Voltage Drops In My Fence?
Intermittent drops often stem from loose connections, shifting vegetation, or moisture-related grounding issues. Use your multimeter to test at different times of day and weather conditions to pinpoint the source. Data logging multimeters can help identify patterns associated with voltage fluctuations.
Properly testing your electric fence with a multimeter is both a beginner-friendly skill and an advanced maintenance technique. By following safety protocols, using the right equipment, and applying systematic troubleshooting, you ensure your fence remains effective, reliable, and safe, protecting your investment and the safety of animals or property.
Whether you’re maintaining a small garden fence or a multi-acre livestock enclosure, mastering these techniques will provide long-term peace of mind and operational efficiency.