
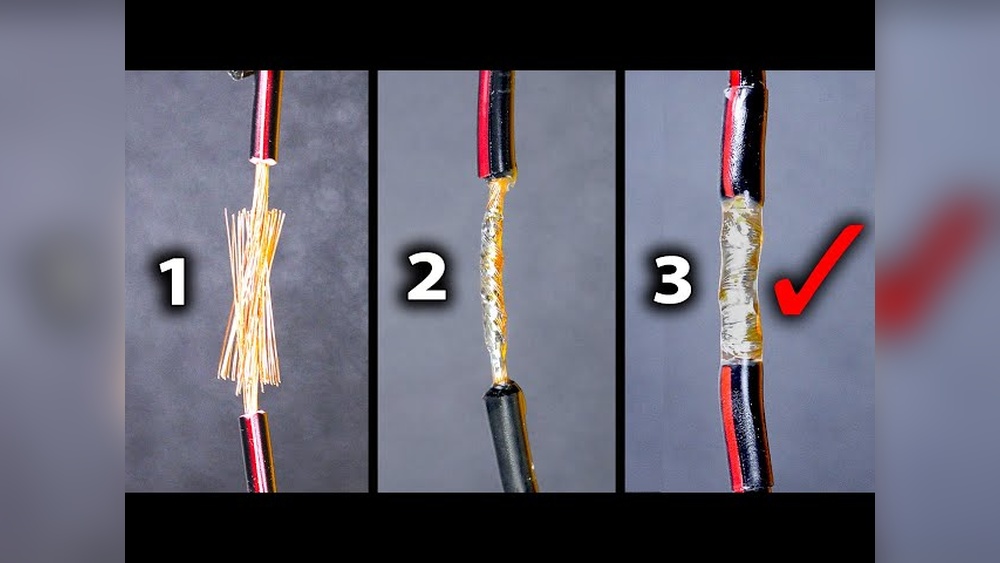
Soldering two wires together is a fundamental skill for anyone working with electronics, automotive repairs, or home DIY projects. Whether you’re restoring a vintage radio, fixing a broken appliance, or creating custom wiring for a hobby project, mastering the best way to solder wires is both practical and empowering.
A well-executed solder joint ensures reliable conductivity, minimizes resistance, and prevents future failures due to poor connections or corrosion.
However, the process is more nuanced than simply heating metal and melting solder. Variables such as wire type, solder composition, and even the type of soldering iron can significantly impact the quality of your connection. Understanding best practices, and avoiding common pitfalls, can make the difference between a lasting bond and a frustrating electrical issue.
This article delivers a comprehensive guide to the most effective, safest, and most reliable methods to solder two wires together, drawing on industry standards and hands-on experience.
Key Takeaways
- Proper preparation of wires and tools is crucial for strong, lasting solder joints.
- Choosing the right solder and flux ensures good conductivity and minimizes corrosion.
- Techniques such as Western Union splice provide maximum mechanical and electrical reliability.
- Safety practices protect you from burns and toxic fumes.
- Soldering is a skill that improves significantly with practice and attention to detail.
Essential Tools And Materials For Soldering Wires
Before you begin, assembling the right tools and materials is essential for effective and safe soldering. The quality of your equipment directly affects the reliability of your soldered connections.
Soldering Iron Selection
A soldering iron is the primary tool for joining wires. For most wire-to-wire connections, a 25, 60 watt soldering iron with a fine or chisel tip works best. Temperature-controlled models are preferable, as they maintain consistent heat, reducing the risk of cold solder joints.
Pro Tip: For delicate electronics, use a lower wattage iron (25, 40W); for automotive or heavy-gauge wires, opt for 40, 60W.
Solder Types
Lead-based solder (typically 60/40 tin/lead) melts at lower temperatures and flows smoothly, making it ideal for beginners. Lead-free solder (often tin/silver/copper) is eco-friendly but requires higher temperatures. For most wire soldering, use rosin-core solder, which contains flux to clean the joint as you work.
| Solder Type | Composition | Melting Point | Best For |
|---|---|---|---|
| Lead-Based | 60% Tin, 40% Lead | ~183°C (361°F) | General Electronics |
| Lead-Free | 96.5% Tin, 3% Silver, 0.5% Copper | ~217°C (423°F) | Eco-friendly Projects |
| Rosin-Core | Varies | Depends on Alloy | Wire Soldering |
Flux Selection
Flux is a chemical cleaning agent that removes oxidation, allowing solder to bond properly. Rosin flux is standard for electronics and wire soldering, while acid flux (never use on electronics) is reserved for plumbing.
Wire Preparation Tools
Having the right tools streamlines the process:
- Wire strippers: Remove insulation cleanly.
- Cutters: Trim excess wire or solder.
- Helping hands or clamps: Hold wires steady.
- Heat shrink tubing or electrical tape: Insulate joints after soldering.
Safety Equipment
Soldering exposes you to high temperatures and fumes. Always use:
- Safety glasses
- Fume extractor or work in a well-ventilated area
- Heat-resistant mat to protect your workspace

Credit: www.wikihow.com
Preparing Wires For Soldering
Preparation is often the most critical step in creating a solid, reliable solder joint. Skipping or rushing these steps can lead to weak connections, excess resistance, or premature failures.
Stripping And Cleaning The Wires
Begin by using a wire stripper to remove approximately ½ inch (12 mm) of insulation from each wire end. Take care not to nick or damage the copper strands, as this weakens the wire mechanically.
Next, inspect the exposed wire. If it appears tarnished or oxidized, lightly buff it with a fine emery cloth or isopropyl alcohol. Clean copper ensures the solder flows and bonds correctly.
Tinning The Wires
Tinning involves coating the bare wire with a thin layer of solder before joining. This step improves solder flow and reduces the risk of cold joints.
Steps for tinning:
- Heat the wire with your soldering iron for 1, 2 seconds.
- Apply solder to the wire (not the iron tip), allowing it to flow and coat the strands.
- Remove the iron and let the wire cool.
Tinned wires should appear shiny, with all strands bonded together.
Planning The Joint
Decide on the best joining method for your application. For most electrical repairs, a Western Union splice or a simple twist-and-solder method is ideal. For high-vibration environments (e.g., automotive wiring), choose a mechanical splice for extra strength.
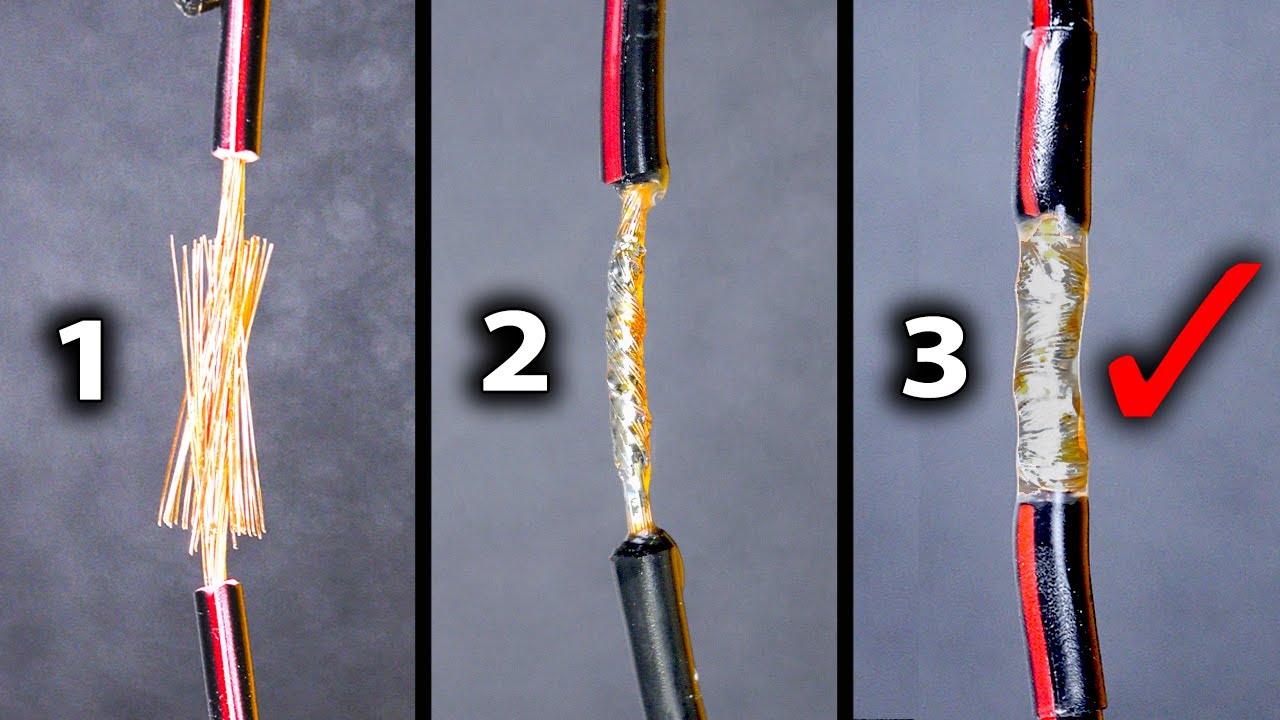
Pro Tip: Always slide heat shrink tubing onto the wire before soldering if you plan to insulate the joint afterward.
Credit: www.youtube.com
Step-by-step Guide: Soldering Two Wires Together
Executing a proper solder joint involves several precise steps, each contributing to the joint’s strength and conductivity.
Western Union Splice Method
The Western Union splice is recommended for its mechanical strength and reliability. It is commonly used in telecommunications and professional wiring.
Steps:
- Align the wires: Hold the stripped ends parallel and overlapping by about 1 inch.
- Twist wires together: Coil each wire tightly around the other 4, 6 times.
- Clamp the joint: Use helping hands or a clamp to stabilize.
- Heat the joint: Place the soldering iron under the twisted section for 2, 3 seconds.
- Apply solder: Feed solder to the top of the joint, allowing it to wick through the wires.
- Remove heat: Let the joint cool naturally, do not blow on it.
- Inspect: The joint should be shiny and fully coated with solder.
Inline Splice (twist-and-solder)
For non-critical applications, the inline splice is quicker but less mechanically robust.
- Twist wires together: Hold wires parallel and twist bare ends together.
- Tinning (optional): Pre-tin each wire before twisting for easier soldering.
- Solder: Heat the joint and apply solder until fully coated.
- Cool and inspect: Ensure no stray strands or cold joints.
Example: Automotive Wire Repair
When repairing a car’s wiring harness, the Western Union splice is preferred due to vibration and exposure. After soldering, always cover the joint with heat shrink tubing and use a heat gun for a tight seal, protecting against moisture and corrosion.
Soldering Multi-stranded Vs. Solid Core Wires
Multi-stranded wires are more flexible and require careful tinning to prevent stray strands. Solid core wires are easier to twist but can be brittle if bent after soldering.
| Wire Type | Advantages | Disadvantages | Best Use |
|---|---|---|---|
| Multi-Stranded | Flexible, Vibration Resistant | Harder to Tin, Stray Strands | Automotive, Robotics |
| Solid Core | Easy to Shape, Firm | Brittle, Less Flexible | Breadboards, Fixed Wiring |

Credit: www.docgreenwoodturner.com
Soldering Techniques And Best Practices
Mastering soldering goes beyond the basics. The following techniques ensure repeatable, high-quality results.
Temperature Control
Keep the soldering iron tip at the right temperature, generally 350, 400°C (660, 750°F) for most solders. Too cool, and solder won’t flow; too hot, and you risk burning insulation or lifting copper traces.
Solder Application Tips
- Always heat the joint, not the solder directly.
- Feed solder into the joint, letting it flow around and through the wires.
- Avoid using too much solder, which can create blobs and hide cold joints.
Avoiding Common Mistakes
- Cold joints: Appear dull and grainy; usually caused by inadequate heat.
- Overheating: Can burn insulation or loosen components.
- Insufficient solder: Leaves gaps, leading to weak connections.
- Movement during cooling: Weakens the bond, let joints cool naturally.
Warning: Never touch the iron tip directly, and always unplug it when not in use to prevent burns or fire hazards.
Cleaning And Maintenance
A clean soldering iron tip is critical. Use a damp sponge or brass coil to wipe off oxidation regularly. Replace tips that are heavily pitted or corroded.
Example: Home Appliance Repair
When fixing a broken lamp cord, a properly soldered and insulated joint can restore safe operation. In my experience, using a helping hand tool to stabilize wires ensures a clean, professional joint every time.
Insulating And Protecting The Joint
Once your wires are soldered, proper insulation is vital to prevent shorts, corrosion, and mechanical strain.
Heat Shrink Tubing
Heat shrink tubing is the gold standard for wire insulation. Slide the tubing over the joint before soldering, then move it into place and use a heat gun until it shrinks tightly around the joint.
Benefits:
- Provides a snug, protective seal.
- Resists abrasion, moisture, and chemicals.
- Looks professional.
Electrical Tape
For less critical projects, electrical tape can be used, but it is less durable and may unravel over time, especially in high-temperature environments.
Pro Tip: Use high-quality, UL-listed tape and wrap with at least 1.5 times overlap for reliability.
Liquid Electrical Tape
A brush-on alternative, liquid electrical tape is useful for odd-shaped joints or in tight spaces. It air-dries to a flexible, insulating coating.
Example: Outdoor Lighting Repair
For wiring exposed to rain or humidity, first use heat shrink tubing, then seal both ends with a dab of silicone sealant for extra moisture resistance.
Evaluating Solder Joint Quality
A visually appealing solder joint is not always a reliable one. Use these tests and standards to ensure electrical and mechanical integrity.
Visual Inspection
A good solder joint should be:
- Shiny and smooth.
- Fully cover all wire strands.
- Free of voids, cracks, or blobs.
- Insulation should not be melted or burned.
Mechanical Strength Test
Gently pull on the joint. A properly soldered and spliced connection should resist moderate tension without separating.
Electrical Continuity Test
Use a multimeter to check for continuity and low resistance across the joint. High resistance readings indicate a poor connection.
Example: Comparing Soldered Vs. Crimped Joints
| Connection Type | Mechanical Strength | Electrical Conductivity | Best Use |
|---|---|---|---|
| Soldered Joint | High | Excellent | Permanent Repairs |
| Crimp Connector | Moderate to High | Good | Field/Temporary Repairs |
| Wire Nut | Moderate | Good | Household Wiring |
Safety Considerations In Soldering
Safety is paramount when working with hot tools and potentially hazardous materials. Following best practices reduces the risk of burns, inhalation of toxic fumes, and fire.
Personal Protective Equipment
- Safety glasses: Protect eyes from solder splatter.
- Heat-resistant gloves: Useful when handling wires or heat shrink tubing.
- Closed-toe shoes: Shield feet from accidental drops.
Ventilation And Fume Extraction
Solder fumes, especially from lead-based solder and flux, can be hazardous. Always solder in a well-ventilated area or use a fume extractor. Avoid inhaling fumes directly.
Handling Lead-based Solder
Wash hands thoroughly after handling lead-based solder. Do not eat or drink in the soldering area. Store solder and flux out of reach of children and pets.
Fire Prevention
- Keep flammable materials away from the soldering station.
- Unplug the soldering iron when not in use.
- Never leave a hot iron unattended.
Warning: Soldering irons can reach temperatures over 800°F (425°C). Even brief contact can cause severe burns.
Real-world Examples And Case Studies
Example 1: Restoring Vintage Electronics
A hobbyist repairing a 1970s stereo amplifier used the Western Union splice method to replace brittle wiring. After tinning both wires and applying heat shrink tubing, the amp’s sound quality improved noticeably, and the repair has lasted for years without issue.
Example 2: Robotics Club Project
A high school robotics team chose lead-free solder for their competition robot to comply with safety regulations. Despite the higher melting point, the students achieved reliable connections by carefully controlling temperature and using rosin-core solder. The robot operated flawlessly throughout the event.
Example 3: Marine Wiring Repair
For a boat’s navigation lights, a marine technician used multi-stranded tinned copper wire, Western Union splices, and adhesive-lined heat shrink tubing. This combination resists corrosion from saltwater, providing years of reliable service.
Advanced Soldering Tips For Professionals
For those seeking to elevate their soldering skills, professional techniques and tools can further enhance quality and efficiency.
Using Soldering Stations
A soldering station with adjustable temperature and interchangeable tips offers greater control and precision. This is especially useful for repetitive or production work.
Applying Flux With Precision
Use a flux pen for targeted application, especially when working with older, oxidized wires or lead-free solder. This minimizes mess and improves joint quality.
Desoldering And Rework
Mistakes happen. Desoldering pumps and wick allow you to remove excess solder or repair joints without damaging wires. Heat the joint, apply the pump, and remove unwanted solder cleanly.
Integrating Solder Sleeves
For field repairs, especially in aviation or automotive work, solder sleeves (heat-shrink tubing with a pre-loaded solder ring) provide a fast, waterproof, and vibration-resistant solution. Simply slide over the wires, apply heat, and the sleeve solders and insulates in one step.
Pro Tip: Practice using solder sleeves on scrap wire to perfect timing and heat application.
Common Soldering Problems And Troubleshooting
Even experienced professionals encounter challenges. Here’s how to address the most frequent issues.
Cold Solder Joints
Symptoms: Dull, cracked appearance; poor conductivity.
Solution: Reheat the joint, add a small amount of fresh solder, and allow to cool naturally.
Solder Bridges
Symptoms: Excess solder connects adjacent conductors, causing shorts.
Solution: Use a solder wick to remove excess solder, then re-inspect and test.
Damaged Insulation
Symptoms: Melted or burned insulation near the joint.
Solution: Use a lower temperature, work quickly, and consider heat sinks or heat-resistant clamps.
Stray Wire Strands
Symptoms: Un-tinned strands sticking out of the joint.
Solution: Always twist and tin stranded wires before joining.
Example: Field Repair On Hvac System
During an emergency HVAC repair, a technician used a battery-powered soldering iron but struggled with cold joints due to wind and low temperature. Switching to a higher-power, corded iron and applying extra flux solved the problem.
Frequently Asked Questions
What Is The Best Solder For Joining Two Wires?
For most applications, rosin-core, lead-based solder (such as 60/40 tin/lead) is recommended due to its low melting point and smooth flow. For eco-sensitive environments or where regulations prohibit lead, lead-free solder (tin/silver/copper) is a safe alternative, though it requires higher temperature and careful technique.
Can I Solder Wires Without Flux?
While rosin-core solder contains flux and can be used without additional flux, adding extra flux ensures better cleaning and solder flow, especially on oxidized or older wires. For optimal results and joint reliability, always use flux, even with rosin-core solder.
Is It Safe To Use A Lighter Or Open Flame To Solder Wires?
Using a lighter or open flame is not recommended for soldering wires. Open flames are difficult to control, may overheat the wire, and produce poor-quality joints. Additionally, they present a significant fire hazard. Always use a temperature-controlled soldering iron for safe, effective results.
How Do I Solder Wires In Tight Or Hard-to-reach Places?
For confined spaces, use a pencil-tip soldering iron or a battery-powered mini iron. Pre-tin both wires outside the cramped area, then bring them together and reheat to fuse. Alternatively, solder sleeves can simplify joints in hard-to-reach areas, as they require only a heat source to complete the connection.
What Should I Do If My Solder Joint Fails The Continuity Test?
If a solder joint shows no continuity or high resistance on a multimeter, reheat the joint, add a small amount of fresh solder, and allow it to flow thoroughly through all wire strands. Double-check for cold joints, insufficient solder, or stray strands that may interfere with conductivity. If necessary, desolder and repeat the process with extra cleaning and fresh flux.
Soldering wires is a skill that blends technique, patience, and the right materials. With practice and adherence to best practices, you can create professional, reliable wire connections for any project. For further reading, consider checking out the comprehensive guide on Wikipedia or the in-depth tutorials on Adafruit. Whether you’re repairing, inventing, or building, a strong solder joint is the foundation of electrical reliability.