
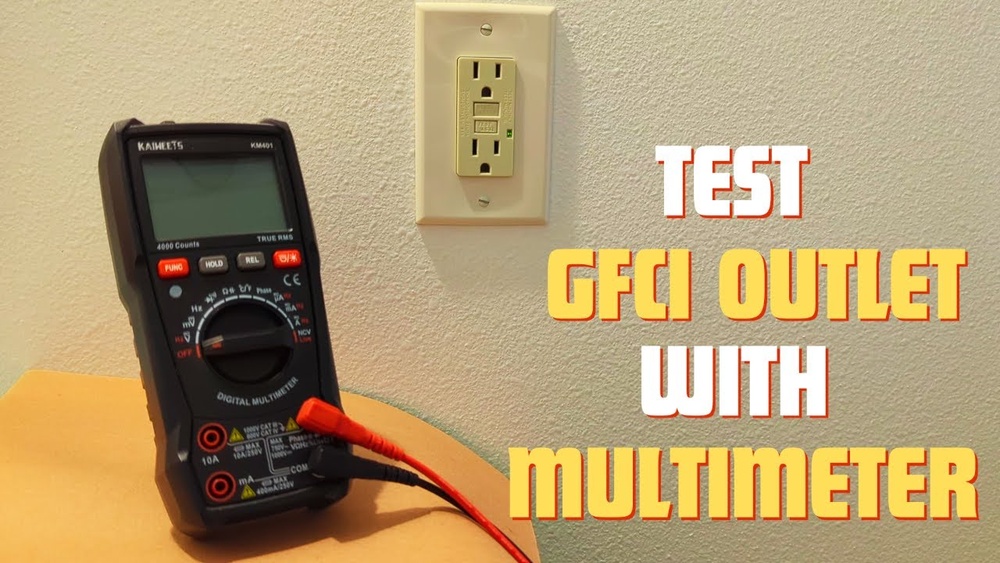
Testing a GFCI (Ground Fault Circuit Interrupter) outlet is a crucial skill for anyone invested in home safety, DIY electrical work, or property maintenance. Whether you’re a homeowner, landlord, or aspiring electrician, understanding how to properly test a GFCI outlet using a multimeter is invaluable.
GFCI outlets are designed to protect people from electric shock by shutting off power when they detect a ground fault. However, like any device, they can fail, and failure could leave you or your loved ones unprotected.
Many people assume that pressing the “test” and “reset” buttons on the outlet is enough. While this is a good start, these buttons don’t always reveal every potential wiring issue. Testing with a multimeter goes a step further, allowing you to confirm that the GFCI is wired correctly, functioning properly, and offering the protection it promises.
This guide will walk you through everything from basic principles to advanced troubleshooting, demystifying the process for beginners and offering expert insights for those ready to deepen their knowledge.
Key Takeaways
- GFCI outlets protect against electrical shock by detecting ground faults and shutting off power.
- Using a multimeter provides a more thorough test than the built-in “test” button alone.
- Proper testing ensures correct wiring, functionality, and protection for all users.
- Both beginners and advanced users will benefit from step-by-step instructions, safety tips, and troubleshooting advice.
- Regular testing and maintenance of GFCIs are critical for electrical safety in any property.

Credit: www.youtube.com
Understanding Gfci Outlets And Multimeters
Testing a GFCI outlet starts with understanding what it is and how it works. GFCI outlets are required by the National Electrical Code (NEC) in areas where electrical circuits could accidentally come into contact with water, such as bathrooms, kitchens, and outdoor spaces.
Their main job is to monitor the electrical current flowing in a circuit and quickly shut off power if they sense a difference in current between the “hot” and “neutral” wires, a sign that electricity may be leaking to the ground through an unintended path.
A multimeter is an essential tool for electrical diagnostics. It can measure voltage, current, and resistance, helping you identify live wires, confirm circuit integrity, and detect wiring faults. For GFCI testing, you’ll primarily use the voltage measurement feature, but advanced users can also check continuity and resistance to diagnose more complex issues.
How Gfci Outlets Work
GFCIs detect imbalances as small as 4-6 milliamps and can trip in as little as 1/40 of a second. This rapid response is what prevents serious injury or death from electric shock. When functioning correctly, a GFCI should trip and cut off power whenever a current leak is detected.
Types Of Gfci Outlets
There are several forms of GFCI protection:
- Receptacle GFCIs: The most common, installed in place of standard outlets.
- Circuit Breaker GFCIs: Installed in the breaker panel to protect an entire circuit.
- Portable GFCIs: Used with extension cords for temporary protection.
Why Use A Multimeter?
While the outlet’s test button checks the internal mechanism, a multimeter allows you to:
- Verify incoming power
- Confirm proper wiring
- Detect open grounds, reversed polarity, or wiring errors
- Test voltage under load for advanced troubleshooting
Essential Safety Precautions
Before beginning any electrical work:
- Turn off power at the circuit breaker if removing the outlet cover.
- Wear rubber-soled shoes and use insulated tools.
- Never touch exposed wires or terminals with bare hands.
- If unsure, consult a licensed electrician.
Pro Tip: Always double-check that your multimeter is functioning correctly by testing it on a known live outlet before use.
Tools And Preparations For Gfci Outlet Testing
To ensure a smooth and safe testing process, gather the right tools and set up your workspace properly. The following section breaks down what you need and how to prepare for both basic and advanced GFCI testing.
Essential Tools And Materials
For beginners, you’ll need:
- Digital multimeter (with voltage and continuity settings)
- Insulated screwdriver (for removing outlet covers)
- Non-contact voltage tester (optional but useful)
- Notebook and pen (for recording readings and observations)
For advanced troubleshooting, consider:
- GFCI outlet tester (for quick diagnostics)
- Clamp meter (for measuring current, if needed)
- Electrical wiring diagrams (for reference)
Setting Up Your Testing Area
- Clear the workspace of any water or clutter.
- Ensure adequate lighting.
- Inform others in the home that you’ll be working on the electrical system.
- If necessary, shut off power at the breaker panel before removing the outlet cover.
Inspecting The Gfci Outlet
Before using a multimeter, visually inspect the GFCI outlet for:
- Physical damage (cracks, discoloration, burn marks)
- Loose mounting or screws
- Signs of moisture or corrosion
If you notice any of these issues, replace the outlet before testing.
Safety Checklist
- Test the multimeter on a known live circuit.
- Wear personal protective equipment (PPE) such as gloves and goggles if needed.
- Verify the outlet is not supplying power before touching wiring.
- Keep a first aid kit nearby.
Credit: www.youtube.com
Step-by-step Guide: Testing Gfci Outlet With A Multimeter
Testing a GFCI outlet with a multimeter involves a systematic approach. Below, you’ll find beginner-friendly instructions, followed by advanced tips for those seeking a deeper understanding.
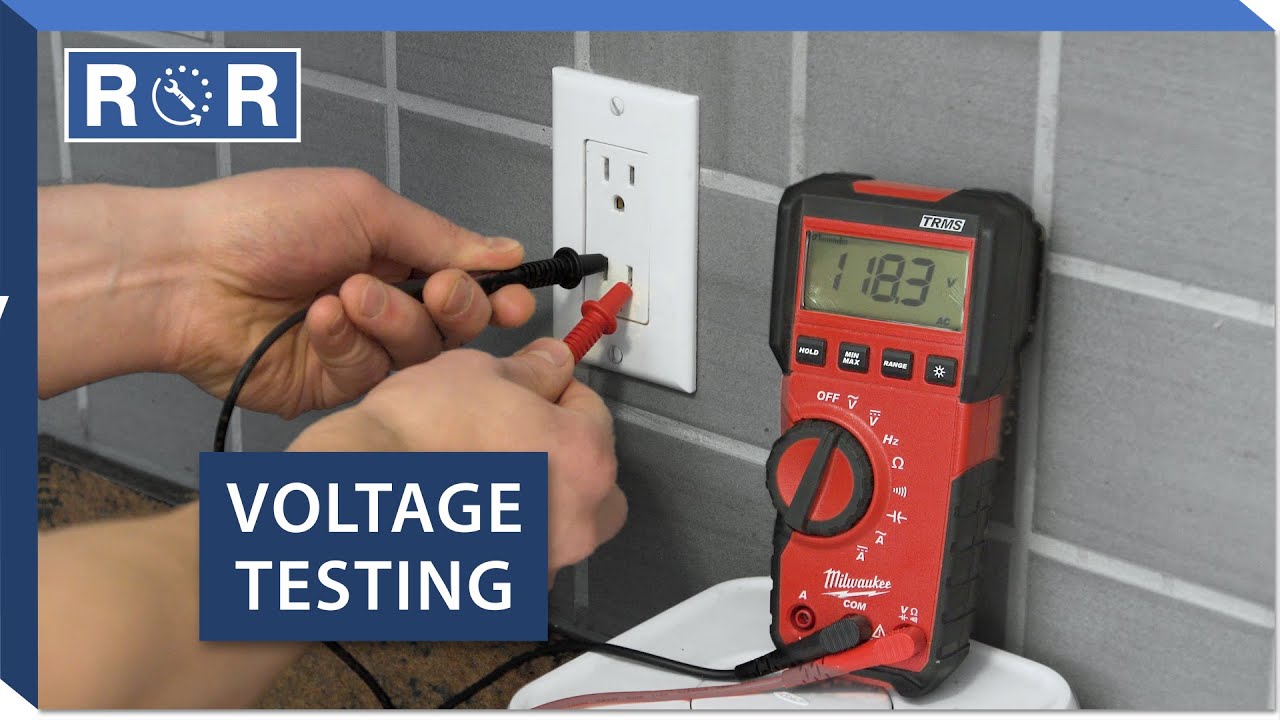
Step 1: Check For Power
- Set your multimeter to AC voltage (V~).
- Insert the multimeter probes into the hot (short slot) and neutral (long slot) openings of the GFCI outlet.
- A properly powered outlet should read between 110-125 volts (standard US voltage).
- If there’s no voltage, check the circuit breaker or wiring.
Step 2: Test The Gfci’s Test And Reset Buttons
- Press the test button on the GFCI outlet.
- The reset button should pop out, cutting power to the outlet.
- Use the multimeter to confirm voltage is now 0 volts between hot and neutral.
- Press the reset button to restore power and retest voltage.
Step 3: Verify Proper Grounding
- With the outlet powered, place one probe in the hot slot and the other on the ground slot (rounded hole).
- A correct reading should be 110-125 volts.
- If the reading is significantly lower or zero, the outlet may have an open ground.
Step 4: Check For Reversed Polarity
- Place one probe in the neutral slot and the other in the ground.
- The reading should be 0 volts or very close to zero.
- If you measure a significant voltage, the outlet may be wired backwards.
Step 5: Advanced Load Testing (optional)
For those comfortable with electrical testing:
- Plug in a small device or lamp to create a load.
- Test voltage at the outlet with the device on and off.
- Voltage should remain steady; significant drops may indicate wiring issues.
Pro Tip: Document each reading in your notebook to track changes over time or compare with other outlets.
Troubleshooting Common Results
| Test | Expected Result | Potential Issue if Failed |
|---|---|---|
| Hot-Neutral Voltage | 110-125V | No power or wiring fault |
| Test Button (after press) | 0V | Faulty GFCI, failed mechanism |
| Hot-Ground Voltage | 110-125V | Open or missing ground |
| Neutral-Ground Voltage | 0V | Reversed polarity or ground fault |
Example: Real-world Testing Scenario
When I tested a GFCI outlet in an older home, the multimeter showed 120V hot-neutral but only 40V hot-ground. Further investigation revealed a disconnected ground wire in the junction box, a common problem in houses built before grounding became standard.

Credit: www.youtube.com
Advanced Testing Techniques And Troubleshooting
While basic voltage tests suffice for most homeowners, advanced users can leverage a multimeter’s additional features for deeper diagnostics.
Testing Continuity Of Gfci Outlet
- With power off, remove the outlet cover.
- Set the multimeter to continuity mode (often shown as a soundwave or diode symbol).
- Touch one probe to the ground terminal and the other to a known ground source (like the metal outlet box).
- A beep or near-zero resistance means a good ground connection.
Measuring Resistance Across Terminals
- With the power off, disconnect the wires from the outlet.
- Set the multimeter to ohms (Ω).
- Measure resistance between hot and neutral, should be very high (open circuit) with no load.
- Low resistance may indicate a short circuit.
Simulating Ground Faults
Advanced users (or electricians) may use a ground fault simulator or create a controlled ground fault by temporarily bridging hot and ground with a resistor (for testing only, as per safety standards). This tests whether the GFCI trips as intended.
Warning: Only attempt ground fault simulation if you are experienced and understand the risks. Improper handling can cause electric shock or damage.
Diagnosing Nuisance Tripping
If a GFCI trips frequently:
- Inspect for moisture in the outlet or box.
- Check for damaged appliances or cords.
- Measure leakage current using a clamp meter.
- Replace the GFCI if it continues to trip without obvious cause.
Example: Troubleshooting A Persistent Trip
A property manager found a kitchen GFCI tripping every few days. Using a multimeter, they measured neutral-ground voltage and found intermittent spikes, traced back to a faulty coffee maker. Replacing the appliance solved the issue.
Comparing Gfci Testing Methods: Multimeter Vs. Other Tools
Different tools offer varying levels of insight when testing GFCI outlets. While the multimeter is versatile, other devices may be more convenient for quick checks or large-scale inspections.
| Tool | Functionality | Pros | Cons | Best For |
|---|---|---|---|---|
| Multimeter | Measures voltage, resistance, continuity | Versatile, precise, advanced diagnostics | Requires knowledge, slower for multiple outlets | DIYers, professionals |
| GFCI Outlet Tester | Lights indicate wiring status | Fast, easy, beginner-friendly | Limited info, can’t measure voltage | Quick checks, beginners |
| Non-contact Voltage Tester | Detects live wires | Safe, quick, no contact needed | No wiring info, can’t test GFCI trip | Safety checks, identifying live circuits |
Choosing The Right Tool
- Use a multimeter for comprehensive testing and troubleshooting.
- Use a GFCI tester for rapid checks during routine inspections.
- Use a non-contact voltage tester for initial safety verification before opening an outlet.
Example: Apartment Building Maintenance
In a 50-unit apartment complex, maintenance staff use GFCI testers for quarterly checks but rely on multimeters for diagnosing failed outlets or verifying repairs after tenant move-outs.
Common Problems And Solutions When Testing Gfci Outlets
Even with careful testing, issues can arise. Here’s how to identify and address the most frequent GFCI problems.
Problem 1: Outlet Shows Power, But Gfci Won’t Reset
- Possible Causes: Tripped breaker, moisture, damaged wiring, internal GFCI failure.
- Solution: Check for external damage, dry out the area, reset the breaker, and replace the outlet if needed.
Problem 2: Gfci Trips Instantly Or Won’t Trip At All
- Possible Causes: Ground faults, reversed wiring, defective outlet.
- Solution: Use your multimeter to check for correct voltage and grounding. Replace the outlet if it fails to trip during testing.
Problem 3: No Voltage Between Hot And Neutral
- Possible Causes: Open circuit, tripped breaker, disconnected wire.
- Solution: Inspect breaker panel and wiring connections. Repair loose or disconnected wires.
Problem 4: Voltage Detected Between Neutral And Ground
- Possible Causes: Reversed polarity, shared neutral on multi-wire branch circuits.
- Solution: Rewire the outlet correctly, consult an electrician for complex circuit setups.
Problem 5: Frequent Or Nuisance Tripping
- Possible Causes: Water intrusion, faulty appliances, wiring faults.
- Solution: Identify and replace problematic appliances, seal outlets from moisture, repair wiring as needed.
Pro Tip: If problems persist, always consult a licensed electrician. Incorrect repairs can increase risk of shock or fire.
Maintenance Best Practices For Gfci Outlets
Regular testing and proactive maintenance help ensure GFCI outlets continue to provide protection. Both beginners and advanced users should develop a routine for checking GFCI functionality.
Routine Testing Schedule
- Monthly: Press the test button and verify power loss.
- Quarterly: Use a multimeter to confirm voltage and ground.
- Annually: Inspect outlet for physical wear, moisture, and loose connections.
Keeping Records
Maintain a logbook with:
- Location of each GFCI outlet
- Date and outcome of each test
- Any maintenance or repairs performed
When To Replace Gfci Outlets
- If the test or reset button fails
- If outlet does not trip under simulated fault
- After 10 years of use, as recommended by many manufacturers
Environmental Precautions
- Install weather-resistant GFCI outlets outdoors.
- Use in-use covers to protect from rain and debris.
- Ensure indoor outlets are not exposed to excessive moisture.
Example: Commercial Kitchen Upkeep
In a busy restaurant, GFCI outlets near sinks are tested every two weeks due to high humidity and frequent appliance use. Keeping a testing log has helped staff quickly identify and replace outlets before a failure occurs.
Frequently Asked Questions
What Should I Do If My Gfci Outlet Won’t Reset After Testing?
If your GFCI outlet won’t reset, first check for moisture or debris inside the outlet and ensure the circuit breaker is on. Remove any connected appliances and attempt a reset again. Persistent problems may indicate internal failure or wiring issues, replacement is often the safest solution.
Can I Use A Multimeter To Test A Gfci Circuit Breaker In My Panel?
Yes, you can use a multimeter to test a GFCI circuit breaker, following similar steps as you would with an outlet. Measure voltage between the breaker’s output terminals and ground, and verify that the breaker trips when you press its test button.
Always exercise caution, as working inside an electrical panel involves higher risk.
Is It Necessary To Turn Off Power Before Removing A Gfci Outlet For Testing?
Yes, always turn off the power at the circuit breaker before removing a GFCI outlet or exposing wiring. Even with the outlet switched off, parts of the circuit may remain live, posing shock hazards. Use a non-contact voltage tester to confirm no power is present before proceeding.
Why Does My Gfci Outlet Keep Tripping When I Plug In Certain Devices?
Frequent tripping when plugging in specific appliances may indicate that the device has a ground fault or leakage current exceeding the GFCI’s threshold. Common culprits include old or damaged kitchen appliances, outdoor equipment, or devices with internal moisture. Test appliances on a different outlet and replace any that cause repeated trips.
Can I Install And Test A Gfci Outlet On A Two-wire (no Ground) System?
GFCI outlets can be installed on two-wire systems without a ground, and they will still provide shock protection by monitoring current imbalance. However, the outlet should be labeled “No Equipment Ground. ” Testing with a multimeter will not show voltage between hot and ground, but the GFCI will still function correctly.
Ensuring your GFCI outlets are correctly installed and functioning is one of the most important steps you can take for home electrical safety. Whether you’re a novice learning with your first multimeter or a professional looking to refine your process, thorough, regular testing is essential. Remember to prioritize safety, document your findings, and never hesitate to contact a licensed electrician for complex or persistent issues. For further guidance, consult resources such as the National Fire Protection Association and always stay up to date with local codes and best practices.